If you are looking for a guide to format external hard drive to NTFS on Mac, you are in the right place. This article will present you with 2 practical methods for you to format an external disk to NTFS in macOS.
Table of Contents
Generally, external hard drives, USB flash drives, and SD cards are pre-formatted with file systems like exFAT, FAT32, or NTFS. As you may know, exFAT and FAT32 enable cross-platform compatibility between Windows and macOS, while NTFS cannot since the Mac has restricted write capability on NTFS.
However, if you prefer the higher disk utilization and faster read and write speeds of NTFS, then check this article from EaseUS to learn how to format external hard drive to NTFS on Mac. this post will walk you through two efficient techniques to format a hard drive to NTFS on a Mac or convert an NTFS disk to another file system.
Although NTFS compatibility is not as good as FAT32, it provides better performance in disk utilization and speed. If you're someone who frequently uses or shifts between Macs and Windows PCs and has a strong bias towards NTFS formatted drives, check below. We will show you the details on how to convert the drive to the NTFS file format and allow you to use it across devices to transfer data easily without issues.
Here are some basic information regarding the methods covered in this article to Format External Hard Drive to NTFS on Mac:
| Comparison | Mac Terminal | |
|---|---|---|
| Effectiveness | Effectively streamlines the formatting process on Mac. | Effectiveness relies on familiarity with command-line operations. |
| Difficulty | Easy👍 | Hard |
| Pros | Multiple functions, simple interface, secure, quick, and reliable. | No need to download any tool. |
| Cons | Need to download the tool. | Includes using terminal commands. |
Do not worry if you are new to formatting external hard drives on your Mac and feeling hesitant and scared! This method aims to make it easier for beginners to manage the process.
EaseUS NTFS for Mac is an easy way to access data on your external hard drives. It supports multiple file systems like NTFS, exFAT, FAT32, HFS+, and APFS, guaranteeing that it works seamlessly with your Mac. The app also lets you enable write access on NTFS drives through its Enable Writable feature and is M1-compatible.
Follow the steps below and transfer data between your Mac and NTFS formatted devices with this easy-to-use app.
Step 1. Launch EaseUS NTFS for Mac on Mac computer, click "I already have a license" to activate this software.
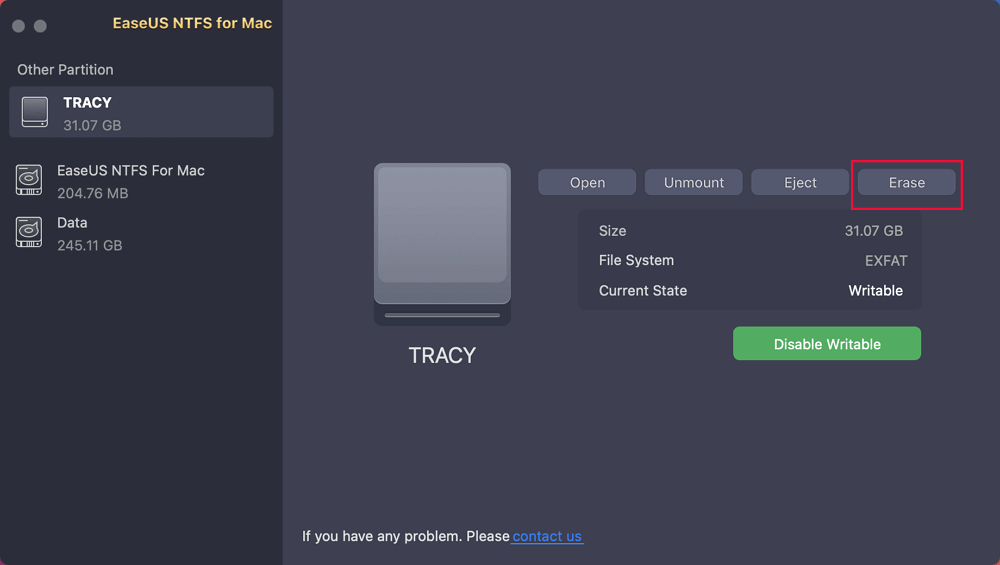
Step 2. Select target disk drive or removable device you tend to erase, and click "Erase" to continue.
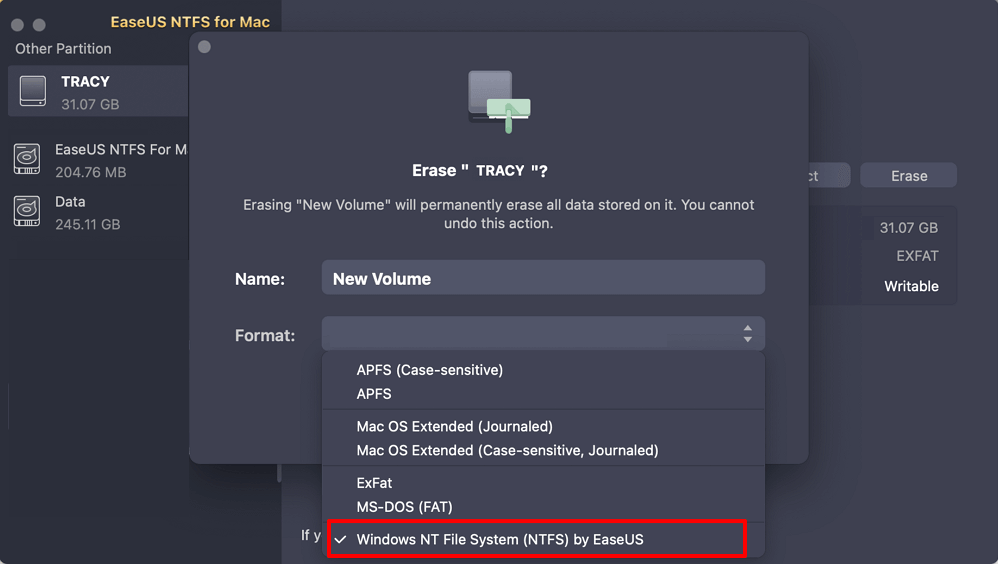
Step 3. Select "Windows NT File System (NTFS) by EaseUS" - NTFS file system as the target file system.
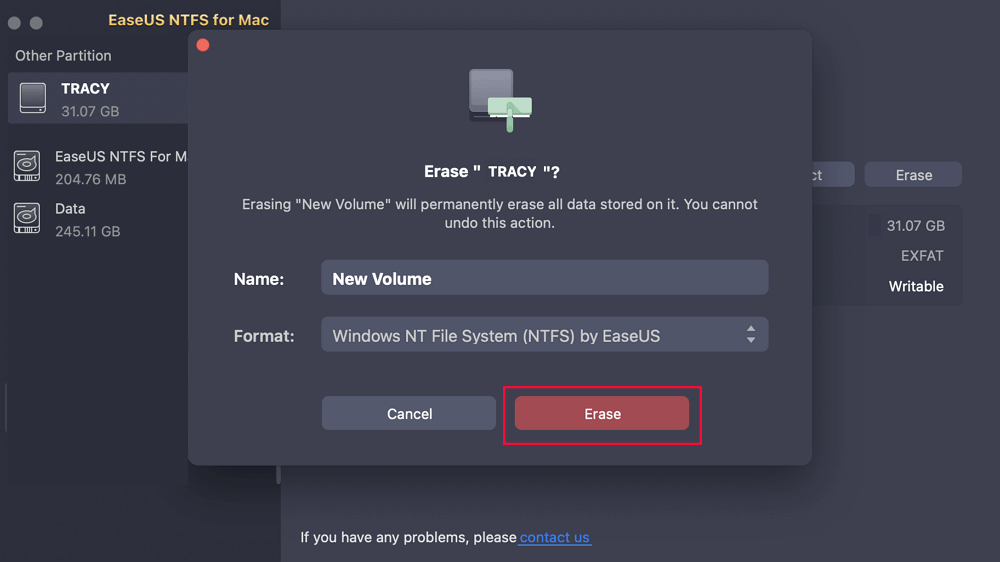
Step 4. Click "Erase" to confirm the formatting and start erasing your target device to NTFS file system.
This method simplifies drive management on your macOS as you can format your drive to the NTFS format with a simple click using the EaseUS NTFS for Mac app.
After formatting the external drive to NTFS, you need to enable it on your Mac to make it writable. Check this tutorial to learn how.
How to Enable NTFS on Mac - 3 Detailed Ways
Do you know how to write to an NTFS drive on a Mac computer? Due to the restriction, the Apple Mac computer only allows users to read the NTFS drives but cannot write to them. We will guide you in enabling NTFS on Mac so that you can read and write files to it.
The best part about using the Terminal is that you don't need to download any third-party application to format an external hard drive to NTFS on Macs. Unlike Disk Utility, which does not support the NTFS formatting option, the Terminal offers a powerful function for expert users.
This method is an effective technique for experienced users who are familiar with the Terminal commands. Thus, if you are new to Terminal commands, stick to EaseUS NTFS, as it's geared for novices.
Now, follow these steps to format your disk to NTFS on Mac if you're comfortable with terminal commands.
Step 1. On your Mac, navigate to Finder and then Applications.
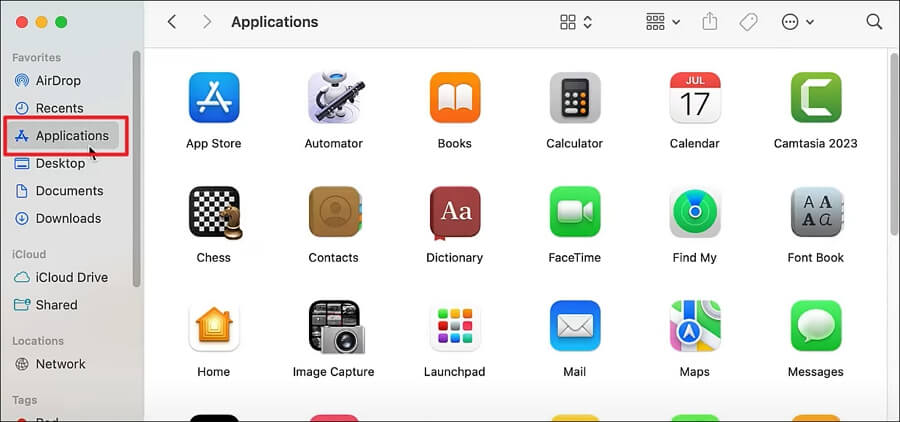
Step 2. Go to Utilities and then Terminal.
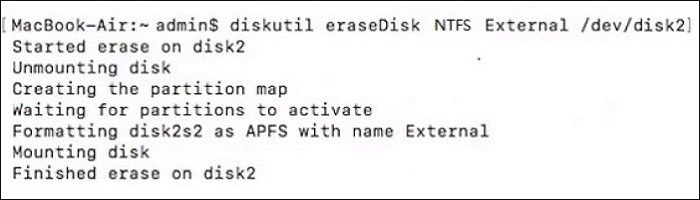
Step 3. In the Terminal, run diskutil list and press "Enter" to display the disks connected to your computer. Determine which one you want to format to NTFS.

Step 4. To begin the formatting process, type diskutil eraseDisk NTFS LABEL and hit "Enter." (Replace "LABEL" with the desired drive name.)
Hopefully, you could format the external hard drive to NTFS on Mac via these two methods and successfully copy files from Mac to NTFS external hard drive. If you find the article helpful, feel free to share it on your social media.
NTFS formatted disk can help you transfer files across macOS and Windows computers with better performance. If you want to transfer files between Windows and Mac via an NTFS drive, this article can help, especially if you're a beginner to disk formatting.
Terminal is a reliable tool for formatting drives. However, it involves complex commands. If you input incorrect command lines, it might lead to data loss. So, you are recommended to use a professional NTFS for Mac tool - EaseUS NTFS for Mac. It's simple, super effective, and safe, which is suitable for daily use.
Hopefully, you have got your formatting problem solved. But if you still have further questions, refer to the frequently asked questions given below.
To fix the read-only file system and write on NTFS using Mac, follow the steps given below:
Now, you can modify, rename, edit, or copy files from/to your NTFS drive. It's also available to safely umount it or revert to read-only mode.
The reason why you can't see NTFS files on your Mac is because Apple already has its own file system formats. As a result, macOS and Mac OS X do not officially support NTFS.
Issues with the drive's connectivity, power, or format compatibility, as well as potential difficulties with the Mac's USB port or the drive itself, are all possible causes for an external SSD not showing up on Mac.
Related Articles - ALSO ON EaseUS SOFTWARE
Fix 'This Disk Is Not Formatted as MacOS Extended' Error 2024
![]() Tracy King/2024-08-07
Tracy King/2024-08-07
Can A Mac Read NTFS | Can Mac Read and Write NTFS (2024 Fixed)
![]() Tracy King/2024-09-30
Tracy King/2024-09-30
How to Fix WD My Passport Not Showing up Mac
![]() Tracy King/2024-09-30
Tracy King/2024-09-30
![]() Daisy/2024-04-19
Daisy/2024-04-19
Copyright © 2004 - 2023 EaseUS. All rights reserved.