- Store
-
Support CenterGuides, License, ContactDownloadDownload installerChat SupportChat with a TechnicianPre-Sales InquiryChat with a Sales Rep
The possible reasons why WD My Passport not showing up on Mac: Here's an easy guide to fix this issue.
Table of Contents
You cannot access your external hard drive, or your WD passport ultra hard drive is not showing up on your Mac device. Either of these can be very annoying, especially when you need to transfer something right then.
The thought that your data has gone forever or you can never transfer your data to another device can concern you a lot. Follow this guide, and you'll learn the causes and fixes to WD my passport not showing on Mac.
There can be many reasons that can affect the performance of your external hard drive. Some of these can be:
Though it's impossible to instantly figure out the cause or how to fix that cause, you can still try to fix the problem by some of these methods:
One of the leading causes that your Mac might not be showing your WD passport can be that your Mac is not formatted to display external devices on the desktop. Your Mac can be recognizing your WD passport, but it is not set to show to the icon on the screen.
In such a case, you can follow these steps to show your WD passport:
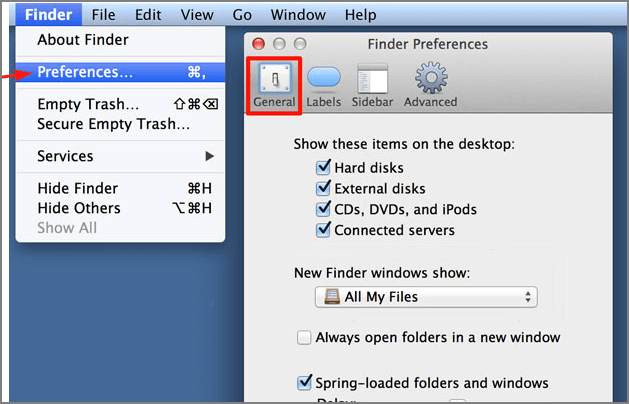
Step 1. Click on the Finder menu.
Step 2. After accessing your desired drive, click on "Preferences" and then "General Tab."
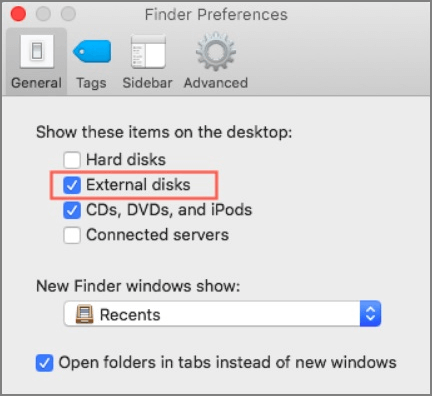
Step 3. Now select "External Disk" to show your external drives on your desktop.
You can find your WD passport external drive directly on your desktop screen by following these simple steps.
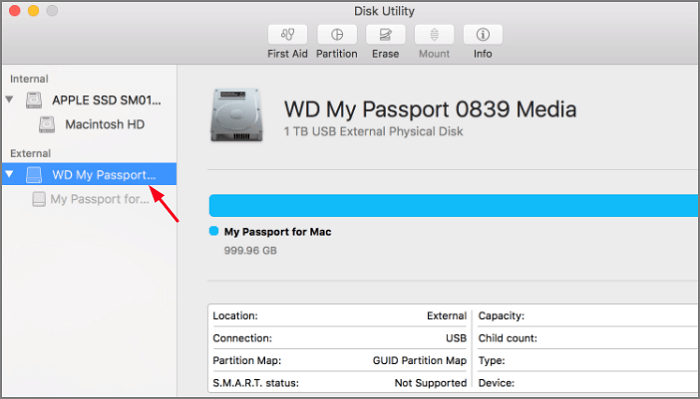
If you cannot find your WD file in the finder by trying the method mentioned above, you can try searching for it in the "disk utility".
Sometimes the disk utility doesn't recognize your file, which is why it doesn't show in the disk utility at all, but usually, the WD passports are present in the disk utility, but they're greyed out and not mounting. In this case, you can follow these steps to mount your external hard drive manually.
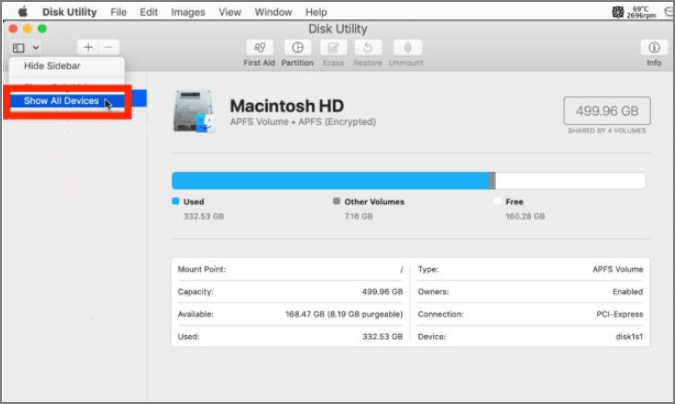
Step 1. From the "Finder" menu, select "Application" and then click on "Utilities" to select "Disk Utility."

Step 2. From the left corner of your disk utility, select "Show all devices".
Step 3. Select your WD passport from the left sidebar and click on "Mount" in the disk utility window.
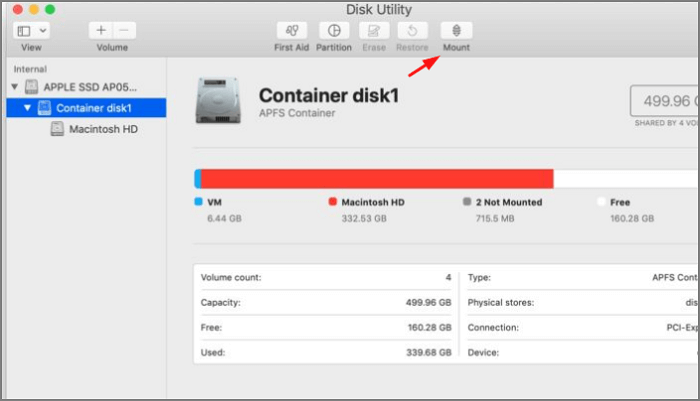
Following these basic steps on your Mac device will make your WD password mount.
If you cannot manually mount your WD passport from the disk utility, that means your file has some issues, but don't worry; this issue can also be resolved by using a repair tool called "first aid."
This tool in the disk utility can quickly analyze and repair all the fundamental errors in the catalog extend, file system, and volume bit maps.
Step 1. Click on the "Disk Utility" and select WD hard drive.
Step 2. Now select "First Aid" from the top of the disk utility window and click on "Run."
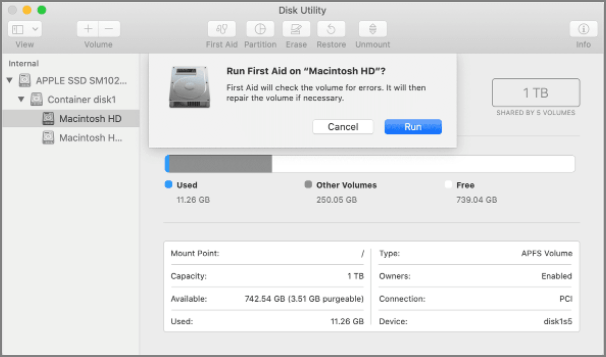
Step 3. Now try mounting your WD external drive to see if your file can be accessed or mounted directly.
Even if you have tried all the steps mentioned above and you still cannot access your WD passport, this means your file has been damaged and now can only be repaired by a reformat.
Formatting a file means losing all your data, and you do not want that. To save and transfer your data, you need to recover it by using some reliable tool like EaseUS Todo Backup. After your data is backed up safely, you can follow these steps:
Step 1. Select "disk utility," and from the left sidebar, select WD my passport for Mac.
Step 2. Form the top of the disk utility window, select erase.

Step 3. Enter all the information, such as partition scheme and new format, and then you can erase your drive.
EaseUS NTFS for Mac will help you mount, unmount your WD from the menu bar, and also it allows you have full access to your NTFS file. This easy-to-use software offers its users some exceptional features that let them do everything with their WD on their Mac device.
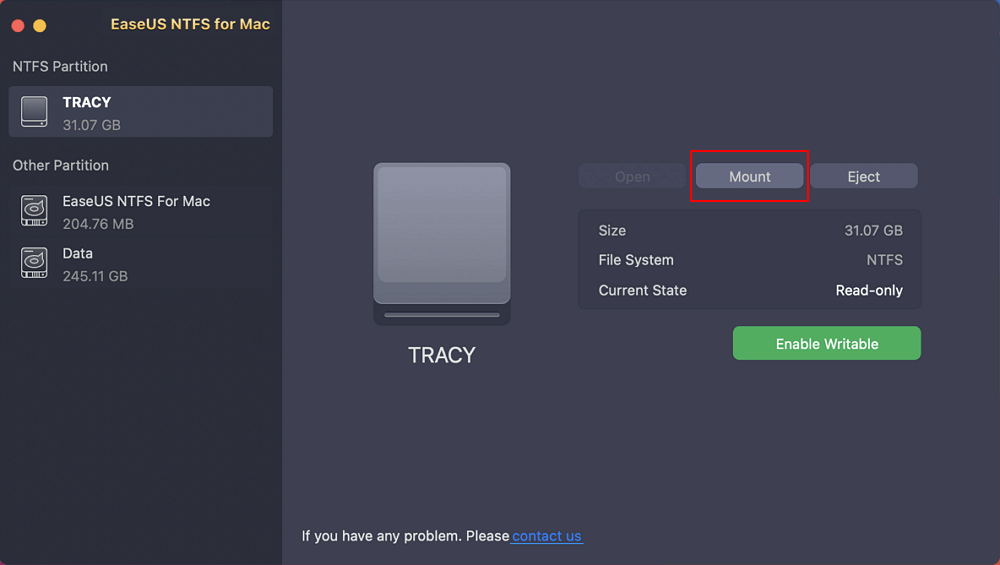
Step 1. Launch EaseUS NTFS for Mac on Mac computer, and click "I already have a license" to enter your code for unlocking the software.
Step 2. Connect your NTFS external storage device to Mac, and let EaseUS NTFS for Mac to detect it. Once it detects your drive, select the drive and click "Mount".
After this, EaseUS NTFS for Mac will mount this drive on Mac and you shall be able to open and view its content.
Along with these amazing features, this software also lets you:
Don't worry if your Mac doesn't recognize your WD passport, try identifying the issue first and then the solutions accordingly. The good thing is that you can always recover your WD passport unless it is physically damaged.
These are some of the common methods that you can manually follow in case of your WD passport is not showing on your Mac.
Related Articles - ALSO ON EaseUS SOFTWARE
How to Fix Can't Delete Files from Seagate Exteranl Hard Drive Error on Mac
![]() Daisy/2025-06-26
Daisy/2025-06-26
How to Read and Format NTFS Drives on Mac
![]() Banu/2025-06-26
Banu/2025-06-26
Don't Have Permission to Write to External Hard Drive on Mac? Get Your Complete Guide
![]() Banu/2025-11-10
Banu/2025-11-10
How to Mount and Read EXT4 Partition in Mac
![]() Cici/2025-11-11
Cici/2025-11-11
Copyright © 2004 - 2023 EaseUS. All rights reserved.