- Store
-
Support CenterGuides, License, ContactDownloadDownload installerChat SupportChat with a TechnicianPre-Sales InquiryChat with a Sales Rep
This passage will help you figure out the reasons and find corresponding solutions about the read-only file system on Mac. You will get detailed step-by-step guides and a powerful tool to help you solve the error on macOS.
Table of Contents
Are you encountering a read-only file system error on your Mac? There are multiple reasons for this error. This article will explain the causes of a read-only file system and provide solutions based on different situations. Read on to learn more about read-only file systems.
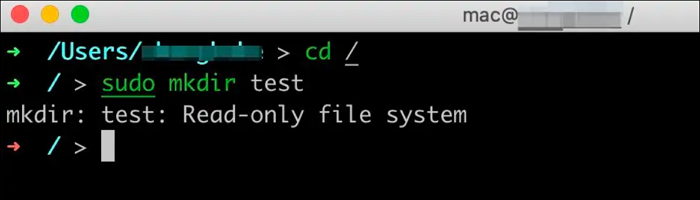
A Read-only file system means that users can only read the system volumes under the file system on Mac but cannot make changes to them or store data on them. This problem can be encountered in two situations:
According to the official instructions, after upgrading macOS to Catalina, the hard drive will be divided into read-only and writable parts. In the Catalina version, users cannot operate on the read-only system volume. Changes to the /root directory cannot be made from the command line using root.
You may also encounter read-only file system errors when using an external hard drive. You will not be able to write to the external drive. This is due to the fact that your drive is in Windows format (NTFS), and it cannot be freely written to and edited on a Mac. You need to change the drive to a suitable file system format to solve the NTFS for Mac read-only.
There are various situations when you encounter read-only file systems on Mac. The specific solution depends mainly on your situation. Once the specific situation is sorted out, you can solve the read-only on Mac problem using the following methods.
macOS has protection restrictions on the applications that come with it. We need to remove the protection restrictions from the computer first. Here are the steps to turn off SIP.
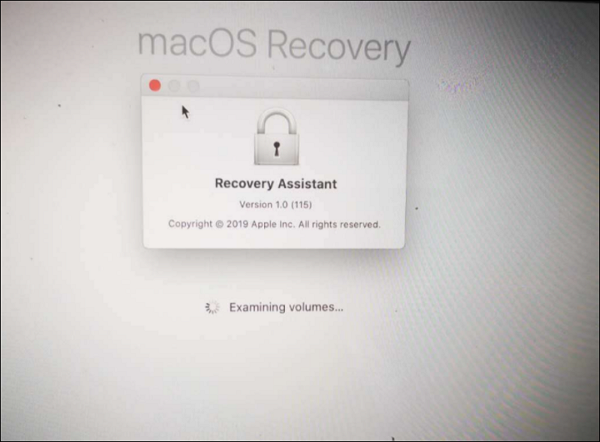
Step 1. Restart your computer and hold down Command+R to access the Recovery screen.
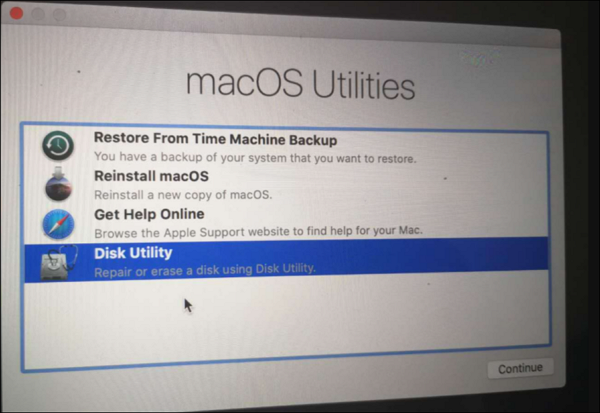
Step 2. Enter your username and password and select Disk Utility.
Step 3. Select and open Terminal in the top menu bar and enter the command: csrutil disable.
Step 4. Reboot to make the command take effect.
Note: You do not need to enter Recovery OS mode to reboot. Normal mode is sufficient. After the reboot, confirm the current SIP status using the csrutil command with the following details:
liumiaocn:~root# csrutil status
System Integrity Protection Status: disabled
lumiaocn:~ root#
This sets the SIP via csrutil.
To confirm if the problem is with the external drive format, you first need to confirm the drive's file system. You can check the external hard drive file system in Disk Utility. If it is an NTFS system, you can use Disk Utility to convert it to APFS. But your data will be deleted by using this way. If you want to change the read-only file system mode while keeping your data, try the professional NTFS reader - EaseUS NTFS for Mac.
EaseUS NTFS for Mac is a powerful NTFS mounter that prevents you from doing frequent erasing and formatting when using NTFS on Mac. It enables you to easily change the read-only mode of your drive to read-write mode without worrying about Mac compatibility. The tool comes in handy for resolving read-only file systems as follows:
Follow these steps to resolve read-only file system errors.
Step 1. Launch and activate EaseUS NTFS for Mac. Click "I already have a license" to unlock this software.
Step 2. Connect an NTFS drive to Mac, EaseUS NTFS for Mac will automatically detect the device. Select your drive and you'll see it's now marked as 'Read-only". Click "Enable Writable" to add read and write rights to the drive.
Step 3. When the state of NTFS drives turns into "Writable".
Step 4. EaseUS NTFS for Mac will pops up a window to help Mac get access to the NTFS drive:
Step 5. When EaseUS NTFS for Mac restarts, you can then open to check, read, write, and even modify saved data on the NTFS device.
If it is not a problem with the NTFS file system, it may be caused by a lack of access rights or hard disk corruption. You can either ignore permissions on your Mac or run First Aid to repair your hard drive.
When you encounter problems with a read-only file system, don't worry. You need to first figure out why the problem occurs: does it occur when using Terminal or an external drive? Then you can try to fix the error by turning off SIP on your Mac or running NTFS Reader. EaseUS NTFS for Mac can be of great help in this process.
If your hard drive won't mount on Mac or you have no permissions to write on the hard drive, you can find solutions on the great tool!
Don't worry if you encounter a read-only file system error. This article analyzes two cases and gives solutions to them. This section will give some related questions and answers. Please read on, and hope it will be helpful to you.
1. How to change the read-only USB on Mac?
USB read-only means that your USB is write-protected. To change the USB write protection, you can run First Aid to fix USBs with internal errors, ignore read-only permissions, or add support for writing to NTFS USB drives through the Terminal:
Step 1. Open a terminal and enter the following command:
nano etc/fstab
LABEL=DRIVENAME none ntfs rw,auto,nobrowse
Step 2. Save and exit.
2. How to change the read-only file in Mac Terminal?
When you meet the read-only files, you cannot write or edit it. Please follow these steps to fix the read-only file in Mac Terminal.
Step 1. Press and hold Command + I to display the Get Info window.
Step 2. Select Sharing & Permissions.
Step 3. Click on the Permissions menu and select Read & Write.
3. How to delete a read-only file on Mac?
To delete a read-only file, you should cancel the read-on ly status and then delete it. Follow these steps to delete read-only files on Mac:
Step 1. Open Finder and locate the target file.
Step 2. Click on File at the top and select Get Info.
Step 3. In the "Sharing &Permissions" section, select the "Privileges" option and set the file to read/write status.
Step 4. Delete the file.
Related Articles - ALSO ON EaseUS SOFTWARE
Solved: Can't Delete Photos From SD Card on Mac - 2023 New
![]() Sherly/2025-11-11
Sherly/2025-11-11
Mount External Hard Drive Mac Terminal [All Details You Need]
![]() Cici/2025-11-11
Cici/2025-11-11
Disk Won't Format on Mac? Fixes Available Here
![]() Banu/2026-01-05
Banu/2026-01-05
Is NTFS Compatible with Mac? Check Your Answer Here
![]() Banu/2025-11-11
Banu/2025-11-11
Copyright © 2004 - 2023 EaseUS. All rights reserved.


