If junk files accumulate on your computer, they may have devastating effects. They not only clog your storage but also affect the overall system performance. Do you know how to clean junk files on Mac? This article from EaseUS seeks to discuss that issue in detail. We'll start by giving an overview and why you should remove the files. Next, you'll learn nine ways to remove junk files on your Mac.
How to Remove Junk Files on Mac via Duplicate File Cleaner
The best way to remove junk files on Mac is via a duplicate file cleaner software like EaseUS DupFiles Cleaner. This software scans for junk files within all the drives on your Mac and allows you to delete them easily. The junk files that EaseUS mostly works on are duplicate files. Such could include documents, images, videos, audio, archives, etc.
This duplicate file finder for Mac uses advanced search algorithms to identify duplicates among a list of files. It can also detect similar photos that are not necessarily duplicates but are taking up extra disk space. What more? EaseUS allows you to scan and remove duplicate files on macOS.
The main features of EaseUS DupFiles Cleaner include:
To start removing junk files on your Mac via EaseUS DupFiles Cleaner, ensure you download and install it today. This app is quite user-friendly; hence, it is easy to follow through the steps.
Step 1. Launch EaseUS DupFiles Cleaner and select Photos to find duplicate and similar images.
![]()
Step 2. You can customize the specific file or folder by clicking Here, or let the software Scan whole computer automatically.
![]()
Step 3. Click Scan Options button to customize your filter criteria, including image tye, minimum photo size, and similarity threshold. When set down, click Yes.
![]()
Step 4. Tap Scan button to start finding duplicate photos. It may take some time if you have multiple unnecessay duplicate images.
![]()
Step 5. When it finishes scanning, you can see how many photos are duplicated. Mark thess unnecessary phots and clcik Move Photos. Additionaly, you can choose to delete permanently, move to recycle bin, or move to folder.
![]()
Is this article helpful? If so, post it on your social media to help more people.
How to Remove Junk Files from Mac Without Software
Apart from using software, you can also delete junk files on your Mac manually. This section will discuss eight ways to remove junk files from your Mac, including the following:
- Way 1. Clear Cache Files
- Way 2. Remove User Log Files
- Way 3. Delete System Log Files
- Way 4. Remove Localization Files
- Way 5. Delete App Leftovers
- Way 6. Delete Unused .DMGs
- Way 7. Remove Large and Old Files
- Way 8. Remove Xcode Junk
Keep reading as we outline the steps for each method in detail.
Way 1. Clear Cache Files
When apps or processes are running on your Mac, they will create junk files in the form of caches. These files may accumulate with time and minimize your storage space. You can clean junk files using the following steps:
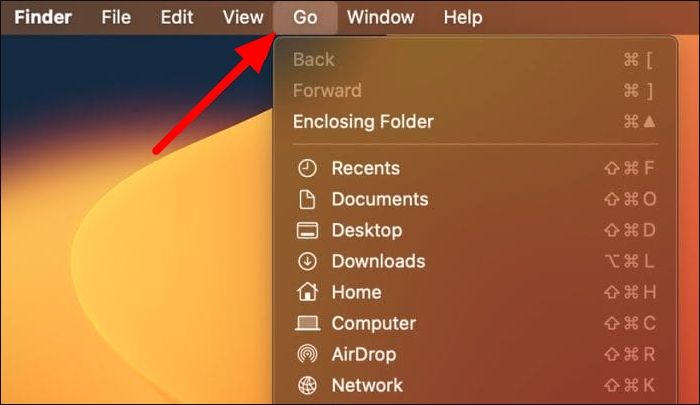
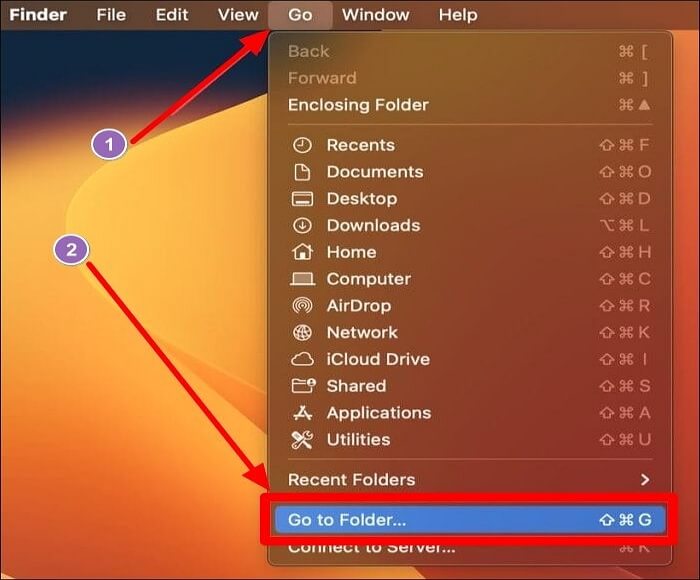
Step 1. Launch the Finder app on your Mac. Next, click "Go," then select "Go to Folder."
![click Go, then select Go to Folder]()
Step 2. Write this file path and hit Enter to list all cache files:
~/Library/Caches
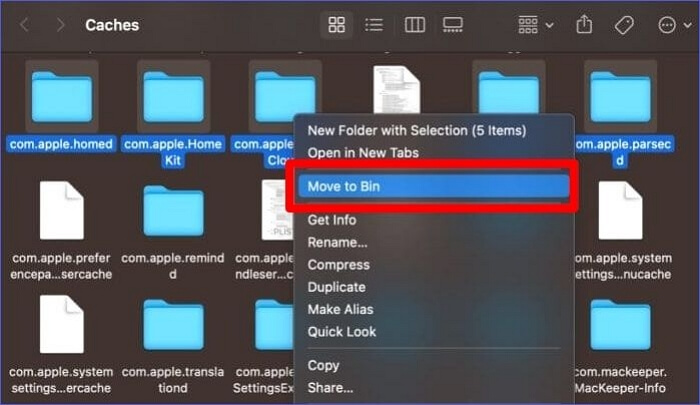
Step 3. Once the list of cache files displays, select the ones you wish to delete. Next, right-click on your selection, then choose "Move to Bin."
![choose Move to Bin]()
Step 4. Navigate to the bin icon and right-click it. Select "Empty Bin" to remove the selected junk files. This will remove the files permanently from your computer and create more storage.
Way 2. Remove User Log Files
Since log files keep track of all activities you undertake on your computer, they may increase in size with time. This could take up unnecessary space on your Mac. You can remove user log files using the steps below:
Step 1. Launch Finder and hit Command + Shift + G.
Step 2. Copy the following file path and hit Enter:
~/Library/Logs
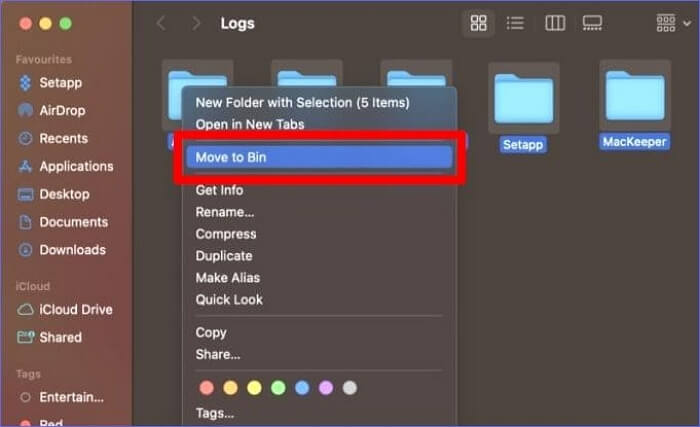
Step 3. The system will then display all the log files on your Mac. Select all the log files, right-click on them, and then choose "Move to Bin.'"
![select Move to Bin]()
Step 4. To permanently delete the log files, navigate to the Dock and right-click the Bin icon. Next, select "Empty Bin."
Way 3. Delete System Log Files
System log files keep track of events and operations on your computer. If you regularly use your computer, these files may accumulate with time. Below are the steps to delete them:
Step 1. Open the Finder app, then click "Go" on the menu bar. Next, select "Go to Folder."
Step 2. Type the following file path and press Enter:
/var/log
Step 3. Once the system log file list displays, select the ones to delete. Next, right-click on them and choose "Move to Bin."
![choose Move to Bin]()
Step 4. Lastly, right-click the bin icon and click "Empty Bin" to remove them permanently from your device.
Way 4. Remove Localization Files
Localization files are language files that come with the various apps installed on your computer. You can delete the other language files to free up space on your Mac once you've selected your primary language. Follow these steps:
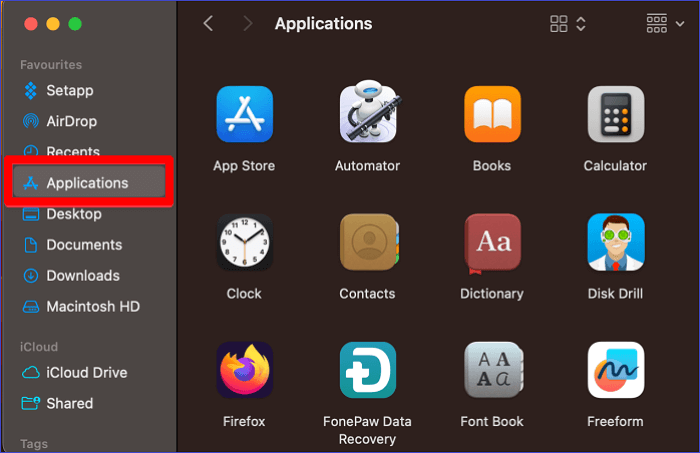
Step 1. Go to Finder, then open the Applications folder.
![open Applications folder]()
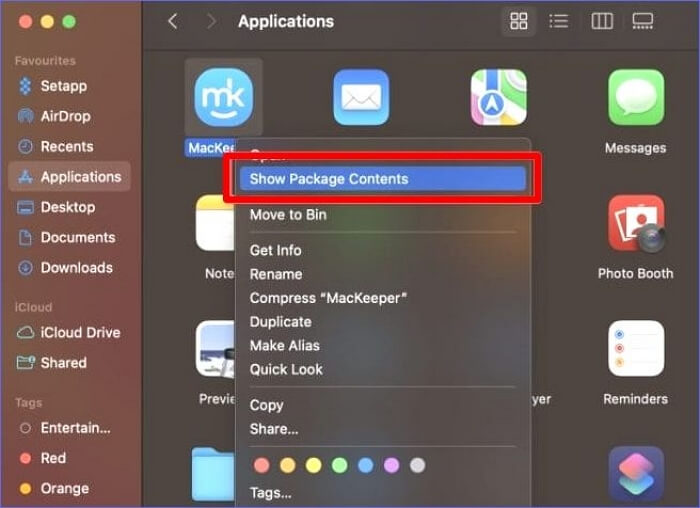
Step 2. Browse through the apps displayed and select the one to delete its language files by right-clicking on it and then selecting "Show Package Contents."
![select Show Package Contents]()
Step 3. Click on the "Contents" folder to open it, then select "Resources."
Step 4. Find subfolders with the .lproj extension and delete them. Only leave the .lproj extension for your default language, i.e., "en.lproj" for English. To delete the other subfolders, select them and click "Move to Bin."
Way 5. Delete App Leftovers
After uninstalling some apps on your Mac, they may leave behind junk files. These files may take up unnecessary space. You can delete these leftover files using the following steps:
Step 1. Launch the Finder app on your Mac, then click "Go."
Step 2. Next, hold down the Option key until the library folder appears. Click on the folder to open it.
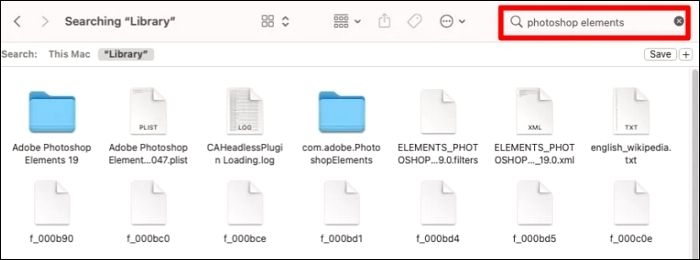
Step 3. Upon opening the library folder, navigate to the magnifying glass at the upper right and input the name of the app you recently deleted.
![input the name of the app you recently deleted]()
Step 4. Once the search results are displayed, delete all the files related to that app. Repeat Steps 3 & 4 for all the apps you've deleted. This will remove all the leftover junk files related to uninstalled apps.
Way 6. Delete Unused .DMGs
The .DMGs files are left behind once you've installed an app or extracted some zip files from a downloaded disk image. These files don't have any use after that; if left, they may accumulate in your computer. Follow these steps:
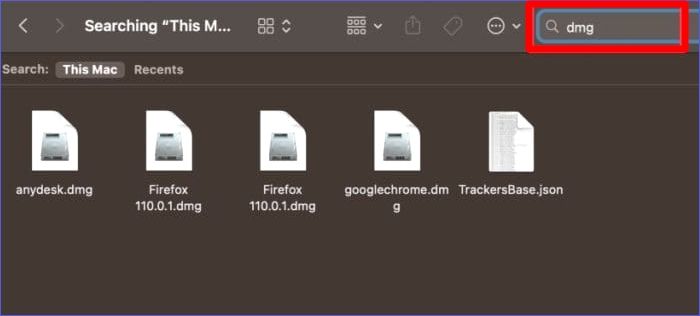
Step 1. Launch Finder from the Dock and select the magnifying glass icon in the top right.
Step 2. Type "dmg" in the search bar that displays. Hit enter to search for files with similar extension names.
![type dmg]()
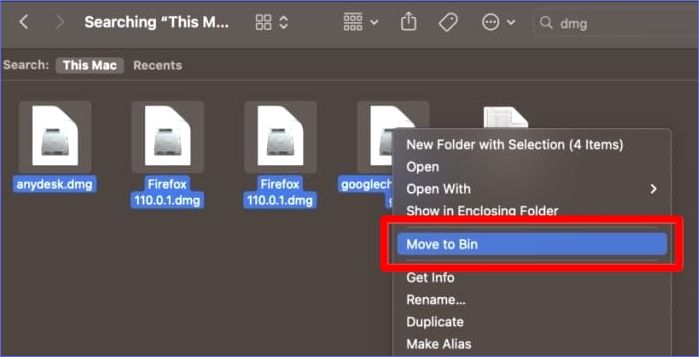
Step 3. Once the results display, select all the .dmg files, right-click on them, and click "Move to Bin." You can then delete all the files from your computer.
![]()
Way 7. Remove Large and Old Files
Large files such as videos and HD images may accumulate as you keep using your Mac. With time, these files could consume a large chunk of memory. Since such old files are no longer useful, finding and removing them is the best option. Check the steps below.
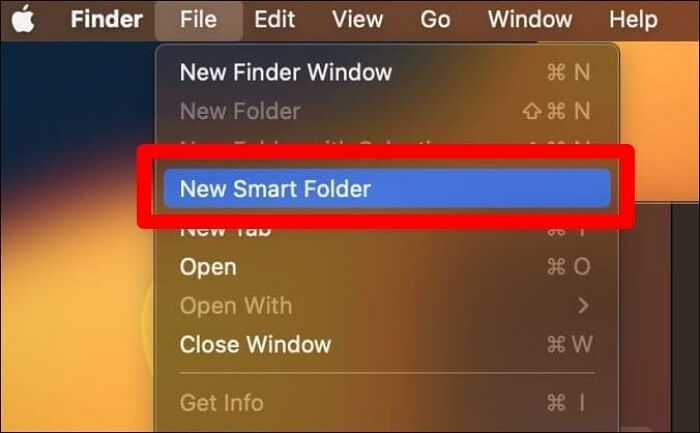
Step 1. Open the Finder app, then go to "File">"New Smart Folder."
![go to File > New Smart Folder]()
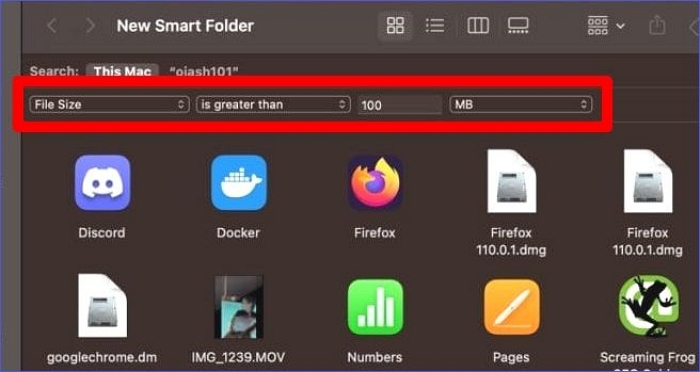
Step 2. Once the next window displays, click the plus (+) icon. Next, type the features (i.e., size) of the files you want to delete. The system will then scan and display the list of files greater than the size limit you've set.
![remove large and old files]()
Step 3. Select the large files you want to delete, right-click on them, then select "Move to Bin." Lastly, empty the Bin to erase the files from your computer permanently.
Way 8. Remove Xcode Junk
Xcode is a programming tool used for software development on Mac. Caches like Xcode junk files may accumulate when you keep using this tool on your Mac. You should consider deleting such files from your computer frequently as a remedy. Follow the steps below:
Step 1. Launch the Finder app on your Mac. Next, click "Go" and select "Go to Folder."
![select Go to Folder]()
Step 2. Paste the following file paths one after the other.
~/Library/Application Support/MobileSync/Backup
~/Library/Caches/com.apple.dt.Xcode
~/Library/Developer/CoreSimulator
~/Library/Developer/Xcode/Archives
~/Library/Developer/Xcode/DerivedData
~/Library/Developer/Xcode/iOS DeviceSupport
Step 3. The system will then display a list of Xcode junk files on your Mac. Select these files and permanently delete them from your computer.
Is this article helpful? If so, post it on your social media to help more people.
What Are Junk Files on Mac & Why to Remove Them
The term "junk files" refers to those temporary files generated by apps or processes running on your computer. Users consider these files unnecessary since they occupy extra disk space. Cache files, outdated backups, duplicate files, log files, and temporary files are examples of junk files. The table below shows common types of junk files and their descriptions.
| Junk File Type |
Description |
| Duplicate Files |
Copies of other files that already exist on your device. |
| Cache Files |
Used for temporary app operations. |
| Temporary Files |
Used for specific tasks, after which they become unnecessary. |
| Log Files |
They keep a tab of system events and errors. |
| Localization Files |
Used for changing the language on your computer. |
| Unused Disk Images (.DMGs) |
App installers left behind after installing an application. |
| App Leftovers |
Are left after uninstalling an app. |
In addition to being unnecessary, you may want to remove junk files on your Mac for the following reasons:
- Free up storage space on your Mac for more useful files and data.
- Improve the overall performance of your Mac.
- Avoid the possibility of system crashes due to cluttered storage.
- Protect your device against malware or virus attacks due to accumulated junk files.
- Boost file organization and allow you to find files on your Mac easily.
To Wrap Things Up
This article has taught you how to clean junk files on Mac. If you delete junk files on your Mac, you'll get extra storage, improve system performance, and minimize the chances of malware attacks. The most recommended way to remove junk files is via a duplicate file finder cleaner.
One such tool is EaseUS DupFiles Cleaner. It allows you to detect all junk files (duplicate files) on your computer and delete them seamlessly. This software can scan all the drives on your computer and give a result of the available duplicates. Ensure you download EaseUS DupFiles Cleaner on your Mac today.
FAQS on How to Delete Junk Files on Mac
Below are frequently asked questions about how to delete junk files on Mac.
1. How Do We Remove Unwanted Files from Our Mac?
You can remove unwanted files on Mac using the following steps:
- Step 1. Open the location of the unwanted files.
- Step 2. Select all the files, right-click on them, then choose Move to Trash. The files will then move to the trash folder.
- Step 3. To permanently delete the files, open the Bin and delete them from there.
2. Is It Safe to Delete Junk Files?
Yes, it's safe to remove such files on your computer. This is because such files have already served their purpose. Deleting them will have no negative consequences.
3. What Are the Benefits of Deleting Junk Files?
The benefits of removing junk files include:
- Increased disk space.
- A boost in overall system performance.
- Minimal chances of malware or virus attacks.
- Improved file organization on your device.