- Store
-
Support CenterGuides, License, ContactDownloadDownload installerChat SupportChat with a TechnicianPre-Sales InquiryChat with a Sales Rep
Can Mac write to NTFS? Discover how to enable Macs to write to NTFS drives in 2023! Our tutorial covers easy steps, software solutions, and tips to get you started.
Table of Contents
Struggling with issues on your Mac when writing to NTFS drives? Can Mac write to NTFS? Fret not! All your questions will be answered in my comprehensive guide.
This article will take you through some steps and reliable software solutions that enable your Mac to seamlessly read and write to NTFS-formatted drives. Moreover, you can use 3 different methods to get your Mac to support NTFS.
Say goodbye to file transfer headaches and embrace cross-platform accessibility. So, get ready to enhance your Mac experience and write to NTFS drives like never before!
No. By default, macOS can read NTFS drives but cannot write to them in most common cases. However, there are a few ways to enable NTFS to write support. Here's how you can do so:
1. Use third-party software. Several applications enable your Mac to write to NTFS formatted drives. These solutions are easy to use and provide a seamless user experience.
2. Format the drive using a compatible file system. Another option is to reformat the drive using a file system that both macOS and Windows can read and write, such as exFAT. This solution works well for drives that will frequently be used on both operating systems. However, it requires you to reformat and back up your sensitive data before proceeding.
There are multiple other methods that can enable your Mac to write on NTFS drives. However, you need to follow the right process to use them effectively.
You may want to know as follows:
Here are some easy-to-follow guides that will help your Mac write to NTFS formatted drives. Use the guide that meets all your requirements, and make sure to back up your data beforehand.
Now, you can read the three kinds of guides in detail for you as follows:
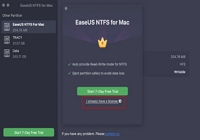
The easiest and safest way to make Macs write to NTFS without losing data is by using a third-party service. Software such as EaseUS NTFS for Mac offers a user-friendly interface and quick solutions to the problem of NTFS not writing.
EaseUS NTFS for Mac is beginner-friendly and can help you write to NTFS drives using your Mac with just a few simple clicks. You can download EaseUS NTFS for Mac and use it to configure NTFS write support on your Mac.
Just follow the steps below to get started:
Step 1. Launch and activate EaseUS NTFS for Mac. Click "I already have a license" to unlock this software.
Step 2. Connect an NTFS drive to Mac, EaseUS NTFS for Mac will automatically detect the device. Select your drive and you'll see it's now marked as 'Read-only". Click "Enable Writable" to add read and write rights to the drive.
Step 3. When the state of NTFS drives turns into "Writable".
Step 4. EaseUS NTFS for Mac will pops up a window to help Mac get access to the NTFS drive:
Step 5. When EaseUS NTFS for Mac restarts, you can then open to check, read, write, and even modify saved data on the NTFS device.
Besides the functions mentioned above, there are some other features the EaseUS NTFS for Mac can provide for users:
In a word, the EaseUS NTFS for Mac tool helps you enable NTFS drives writable in one click. Moreover, it helps you safely eject NTFS volumes without any data loss. Support for the latest M1/M2 devices and macOS Ventura 13.0 version is also supported.
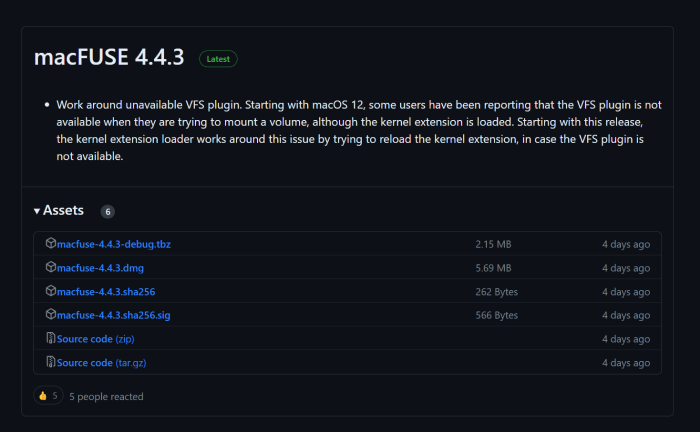
macFUSE (previously known as FUSE for macOS) is an open-source software that lets you extend the native file-handling capabilities of Macs. It adds support for various file systems, including NTFS, and lets you enable write support for NTFS drives. Here's how to set it up for your Mac:
Step 1. Install macFUSE by visiting the macFUSE GitHub releases page and downloading the latest version of the installer (.dmg file).
Step 2. Run the downloaded .dmg file and follow the instructions to install NTFS-3G.
Step 3. Visit the NTFS-3G website and download the latest version of the NTFS-3G installer (.pkg file).

Step 4. Now, open the downloaded .pkg file and follow the instructions to install Homebrew on your Mac.
Step 5. Open the Terminal and paste the following command.
Step 6. Now, install osxfuse-ntfs script. This helps you mount NTFS drives with write support using macFUSE and NTFS-3G.
Step 7. In the Terminal, type the following command.
Step 8. Mount the NTFS drive with write support by typing the following command.
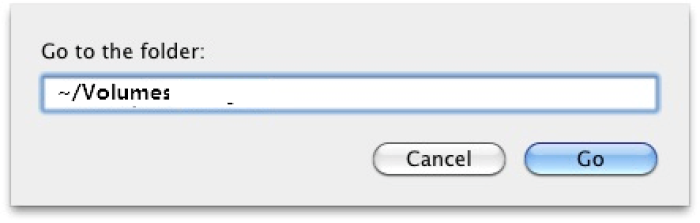
The NTFS drive should now have write support, but it won't show up in Finder by default. So, open Finder and press the Cmd + Shift + G keys, and type the following in the Go to the folder:
You may be interested in the following:
macOS has a hidden feature that allows you to enable NTFS to write support, but Apple does not officially support it. To enable it, follow the steps below:
Step 1. Open Terminal and type the following command.

Step 2. Enter the command and fill in your administrator password when prompted.
Step 3. Add the following line in the text editor.
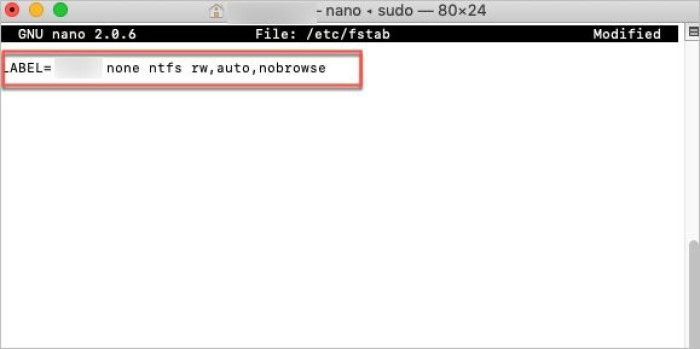
Step 4. Press the Ctrl + O keys to save the file.
Step 5. Restart your Mac, and the NTFS drive should now be writable.
However, keep in mind that this method is experimental, and you should back up your data before using it.
Finally, if you are interested in a related passage, which can help you get write access on M1 Mac, you can read the linked passage:
NTFS for Mac M1 Free: How to Get Write Access on M1 Mac
This passage mainly talks about how to get write access on M1 Mac by providing readers with three helpful solutions.
Using an NTFS drive on Mac can get challenging. macOS doesn't offer to write support natively and won't let you store new files or make changes. So, this article offers 3 methods to enable NTFS to write support on your Mac.
However, the process for some methods can get a bit complicated. So, using a third-party tool like EaseUS NTFS for Mac is a much easier and beginner-friendly option. You can download and start using your NTFS drive on your Mac today.
If you think this passage can help you enable Macs to write to NTFS drives, we are glad that you can share it on social media.
You should now be able to read and write to the NTFS drive on your Mac. However, if you still have any questions that you'd like to be answered, then follow the FAQs below.
1. Can Mac write to exFAT?
Yes, exFAT is compatible with macOS. Macs and Windows PCs can read and write to the exFAT file system. This makes it a popular choice for external drives that can be used across different platforms.
2. How do I allow my Mac to write to NTFS?
You can allow your Mac to write to an NTFS drive using the experimental hidden feature that can be enabled using the Terminal. Just run the Terminal as an administrator and enter the following commands:
3. How to mount NTFS hard drive on macOS?
You can mount NTFS hard drive on macOS using the macFUSE method. However, the process can get a bit complicated, and I suggest using a third-party app like EaseUS NTFS for Mac to help you mount your NTFS drive.
If you still want to mount the drive manually, then enter the following command after installing macFUSE, NTFS-3G, and Homebrew:
Related Articles - ALSO ON EaseUS SOFTWARE
How to Format NTFS on Mac [2026 New Guide]
![]() Banu/2026-01-05
Banu/2026-01-05
How to Fix Toshiba External Hard Drive Not Working on Mac
![]() Banu/2025-06-26
Banu/2025-06-26
WD Exteranl Hard Drive Shows Read Only on Mac? Why and How to Fix It
![]() Banu/2026-01-05
Banu/2026-01-05
How to Copy Files From Mac to External Hard Drive Without Formatting
![]() Sherly/2025-06-26
Sherly/2025-06-26
Copyright © 2004 - 2023 EaseUS. All rights reserved.