- Store
-
Support CenterGuides, License, ContactDownloadDownload installerChat SupportChat with a TechnicianPre-Sales InquiryChat with a Sales Rep
Formatting flash drives to NTFS can be easily done on the Mac operating system. The most popular utility software used to format flash drives to NTFS on Mac is EaseUS.
Table of Contents
It is possible to format a flash drive to NTFS on any Mac operating system. You can also read and write NTFS drives on any Mac. The latest Mac processor and operating system can also format different flash drives to NTFS. One can use the Mac operating system to format any USB flash drive with the NTFS file system. NTFS is a file format that is mostly used in Windows operating systems.
If you switch from a Windows to a Mac operating system, you will surely face some issues. However, it can be resolved easily. EaseUS will discuss it in detail. It is essential to remember that to change the format flash drive to NTFS on Mac to use it on a Windows operating system, an NTFS driver on the Mac will be required.
All Mac operating systems support a wide variety of file systems. If you use both Windows and Mac operating systems simultaneously, format all flash drives to exFAT format. If one already has drives running on NTFS, then he/she can easily format it on a Mac. We collected two solid methods to help you format USB drive on Mac, and here is the comparative table:
| 🆚Comparison | 💡EaseUS NTFS For Mac | 💡Disk Utility |
|---|---|---|
| 🚩Complex Level |
|
|
| 🔎Suitable Users |
|
|
| 💻Pros |
|
|
| ⚙️Cons |
|
|
In order to format a USB flash drive on the Mac operating system smoothly and effectively, we highly recommend you try NTFS For Mac of EaseUS. With the help of its "Erase" function, you can format your USB flash drive to an NTFS drive within three steps. In addition to NTFS, this practical utility can help you format the hard drive to exFAT, FAT32, HFS+, and APFS.
Here are easy steps:
Step 1. Launch EaseUS NTFS for Mac on Mac computer, click "I already have a license" to activate this software.
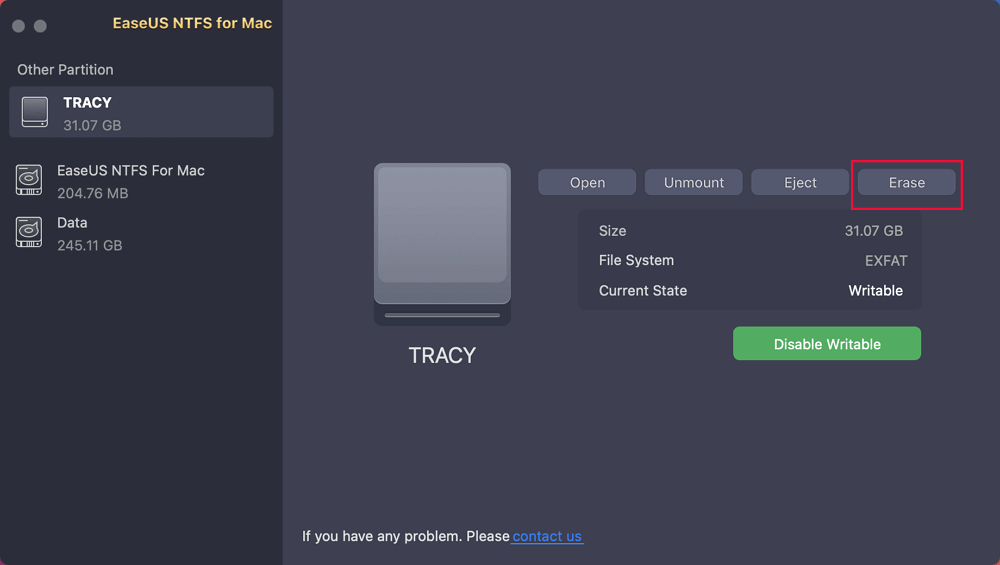
Step 2. Select target disk drive or removable device you tend to erase, and click "Erase" to continue.
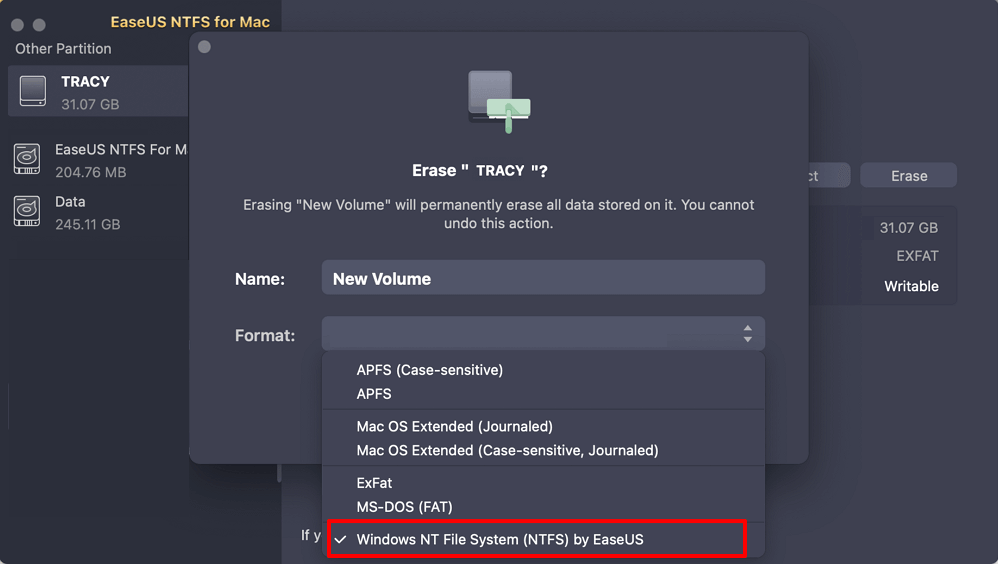
Step 3. Select "Windows NT File System (NTFS) by EaseUS" - NTFS file system as the target file system.
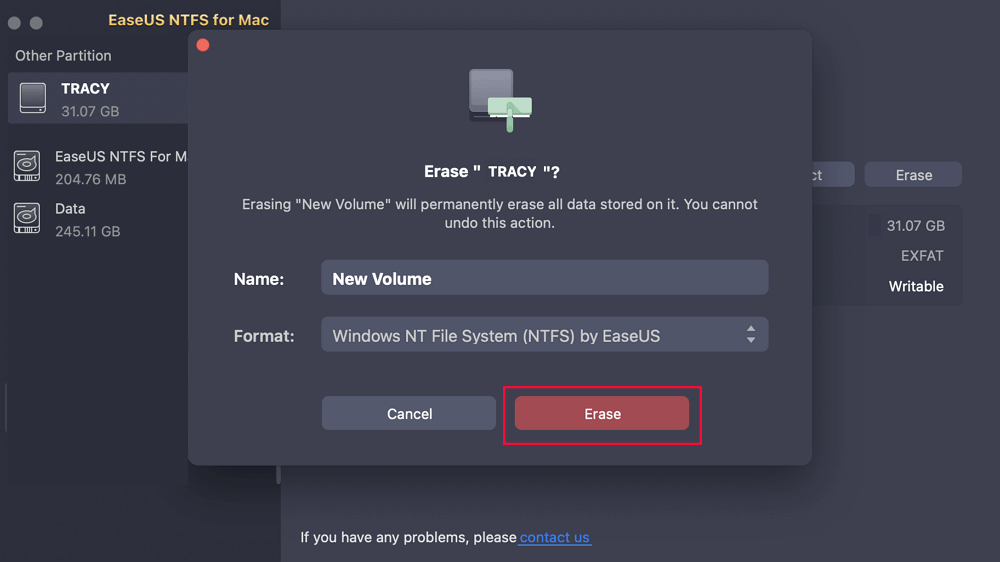
Step 4. Click "Erase" to confirm the formatting and start erasing your target device to NTFS file system.
Other Advantages of NTFS For Mac
If you are interested in any of the above powerful features, install and try it on your own.
Now, follow some simple steps mentioned here. Here, we will discuss formatting the USB drive to NTFS with the help of the Disk Utility application.
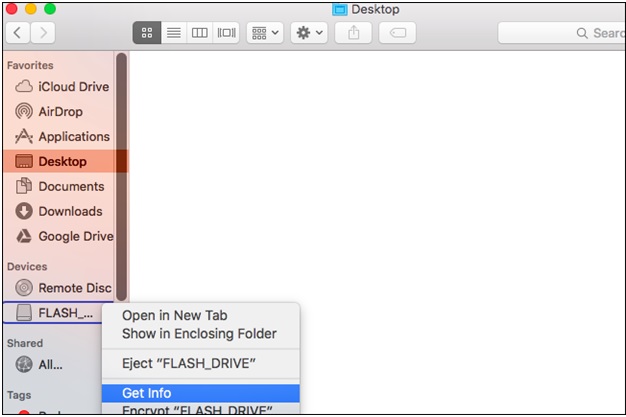
Step 1. The first thing to do before formatting the flash drive is to check what format it is in. For that, you need to open the Finder application and look for the external flash drive on the left-hand side of the window. Right-click on the flash drive and select Get info.
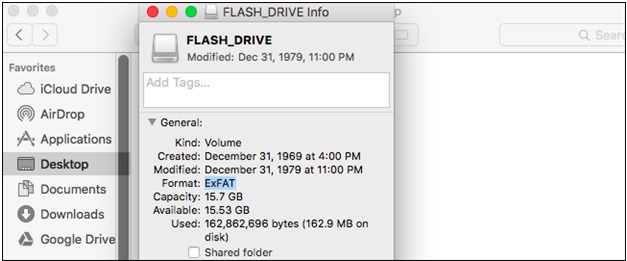
Step 2. This will open up all the information about the flash drive, and you will see the information needed under Format.
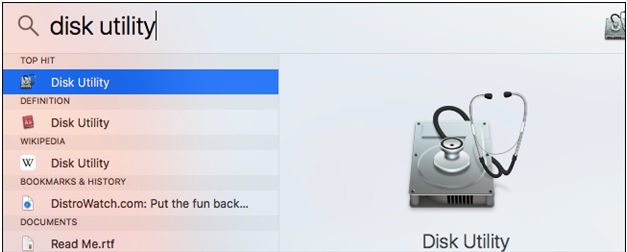
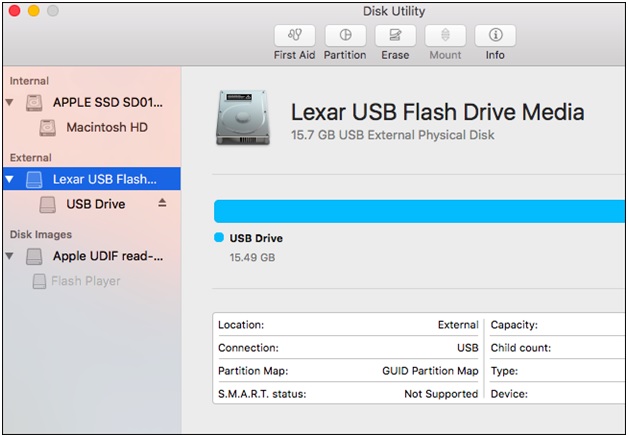
Step 3. Once you know the format of the drive, simply go ahead and close the application. Go to Finder and select Application in the sidebar, and open Utilities by searching disk utility.
Step 4. All the drives which are connected to the Mac operating system will appear in the application under the external option.
Step 5. Click on the erase button, which is on the top of the application. Make sure to select the drive before clicking on the button. You will have to give the name of the drive before going through the erase option. Make sure to change the format of the drive to NTFS before Erasing the drive.
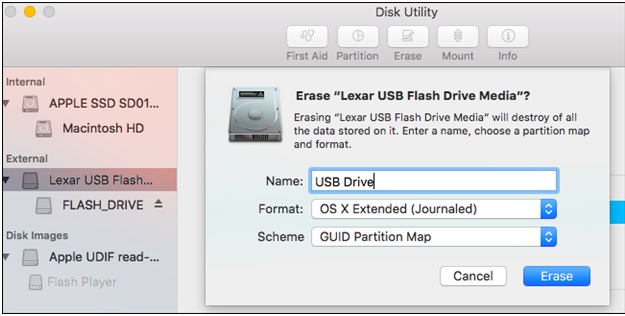
Step 6. As you click on the erase button, all the data will be deleted, and a completed message will be shown.

Yes, Mac operating systems can write to NTFS Formatted Drive with the help of applications like Disk Utility. Disk Utility comes preinstalled in the Mac operating system and is quite effective for disk formatting. If you are looking to access flash drives with different formats, then you can always try EaseUS. It is quite a reliable and helpful application for users who switch between Windows and Mac operating systems. Below are the one-click social media buttons that can help you to give more users who are stuck in this problem a fresh start:
EaseUS NTFS for Mac is a third-party application that helps mount and unmount your Windows NTFS flash drives from the Mac status bar. EaseUS NTFS for Mac is fully compatible with the M1-based mac devices, and it gives users read-write access to NTFS drives in the mac operating system.
The EaseUS application will help users access all the documents available on different Macs without having to format them every time. It is available in Mac's status bar, which is why you will be able to use it with more convenience. You will get full read and write access to NTFS drives with the help of EaseUS NTFS for Mac. All the latest laptops which run on Apple Silicon M1 support the EaseUS NTFS for Mac. It is available for free for the first 7 days as a trial, and users will have to pay for the app to keep using EaseUS. Make sure to always safely eject external hard drives when using a Mac operating system to prevent any kind of data loss.
Step 1. Launch EaseUS NTFS for Mac and click "I already have a license" to activate it.
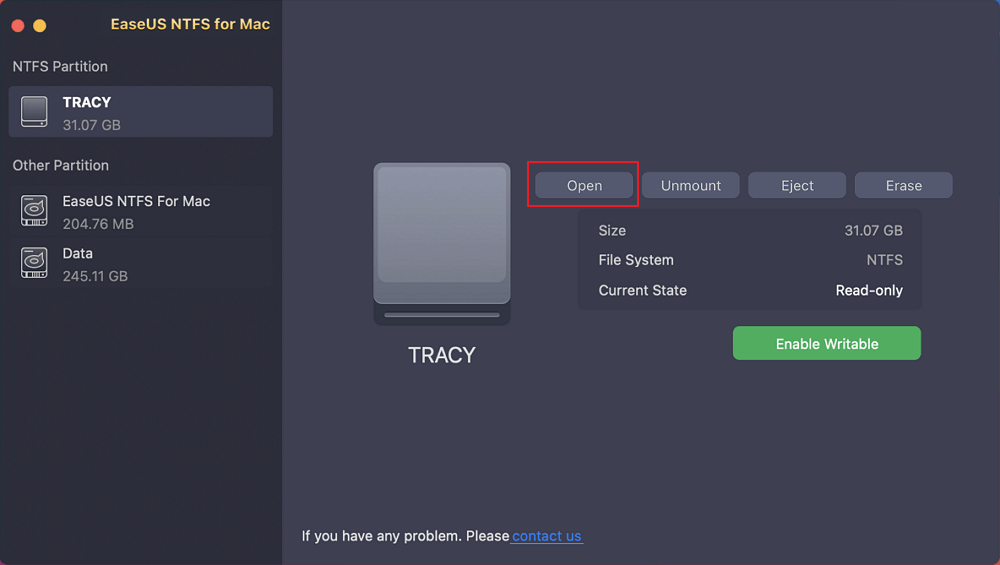
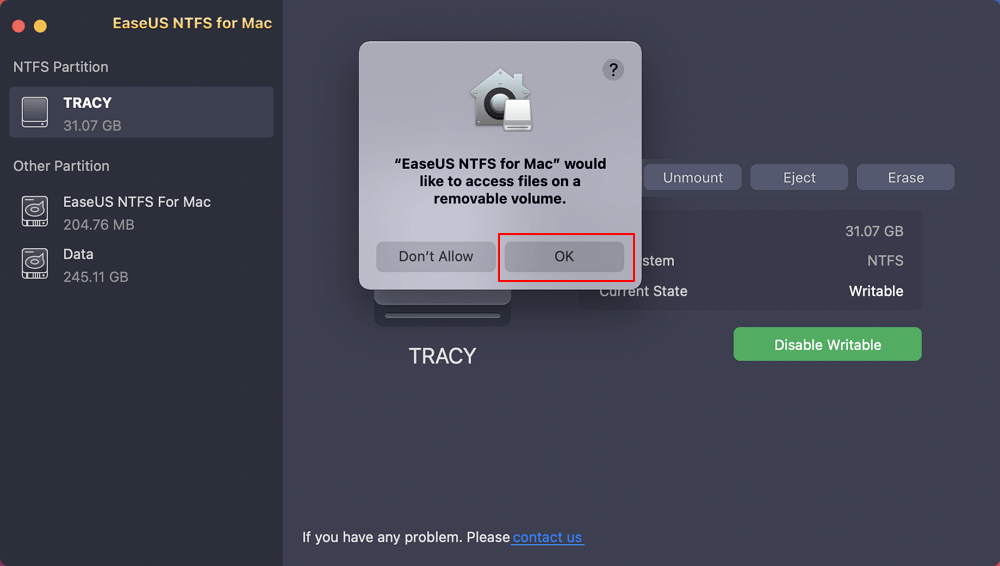
Step 2. Connect your NTFS drive to Mac, EaseUS NTFS for Mac will automatically detect and display the device. Click "Open" to open it on Mac.
Step 3. Click "OK" to allow NTFS for Mac to access and open NTFS drive on Mac computer.
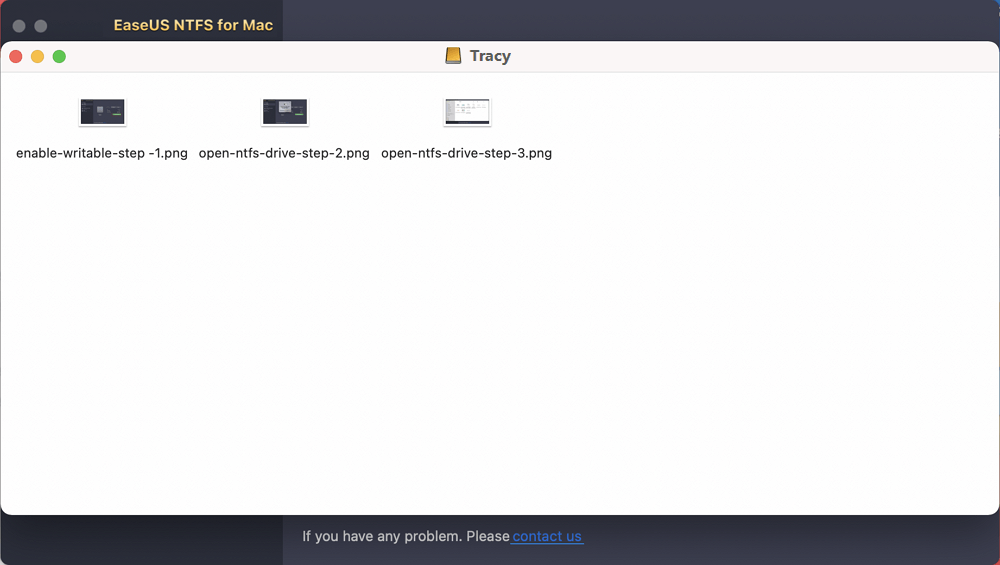
Step 4. Now, you can view and check saved files in the NTFS drive on Mac.
The formatting problem of NTFS drives has been going around for a long time, and it is faced by all users who use Windows operating system and macOS simultaneously. If you are using both operating systems at home and work, have EaseUS NTFS for Mac on the laptop. The application supports all Mac operating systems and helps users access NTFS, HFS+, APFS, FAT, and exFAT files. It also supports all kinds of devices, from hard drives, external hard drives, USB drives, SD cards, and thunderbolt drives. Make sure to free 100 MB of space before getting your system's EaseUS NTFS for Mac.
Related Articles - ALSO ON EaseUS SOFTWARE
What Is Paragon NTFS for Mac, Pros & Cons, Everything You Should Know
![]() Banu/2025-11-11
Banu/2025-11-11
EaseUS NTFS for Mac Cataline/Big Sur and M1 Full Version Free Download with Serial Key
![]() Banu/2025-06-26
Banu/2025-06-26
Can't I Format My USB to FAT32 Mac
![]() Banu/2025-06-26
Banu/2025-06-26
How Do I Read and Write NTFS Drives on Mac? 3 Best Solutions Available to Help
![]() Banu/2025-06-26
Banu/2025-06-26
Copyright © 2004 - 2023 EaseUS. All rights reserved.