- Store
-
Support CenterGuides, License, ContactDownloadDownload installerChat SupportChat with a TechnicianPre-Sales InquiryChat with a Sales Rep
This guide will provide detailed information about FAT32. If you are curious about the question: can Mac can read FAT32? You are in the right place to solve the FAT32-related problem.
Table of Contents
Can Mac read FAT32? EaseUS will help you solve the problem related to FAT32. And if your Mac can't write FAT32 hard drive, we offered three ways to fix the read-only FAT32 problem.
FAT32 refers to File Allocation Table32, a 32-bit version of the FAT file system designed by Microsoft in 1977. As a disk format or file system, it stores, organizes, and retrieves files stored on a disk drive. It supports USB flash drives, flashcards, and external hard drives for compatibility between all platforms.
Key information about FAT32 includes:
After understanding the general information about FAT32, let's come together to address most people's question: can Mac read FAT32? Continue reading.
Of course, Macs can read FAT32 file systems. And Mac provides full read-and-write support for FAT32. You can read and write FAT32 file systems without installing plug-ins or programs. All versions of Mac OS X (Mavericks, Yosemite, El Capitan) and newer versions of macOS (Catalina, Big Sur, and Monterey) support FAT32.
Any FAT32-formatted file system can be inserted on a Mac, and you can view its information in Finder, Desktop, Disk Utility, and System. Mac supports FAT32 just like it does for macOS-friendly file systems.
FAT32 can be read and written on Mac. Mac provides "Disk Utility" to format external drives quickly and safely. And since FAT format is a built-in option in the list of disk formats, you don't need to resort to extra operations to complete this task.
Step 1. Connect the external drive to your computer.
Step 2. Open Disk Utility in Launchpad.
Step 3. Select the target drive on the left side and click the Erase button.
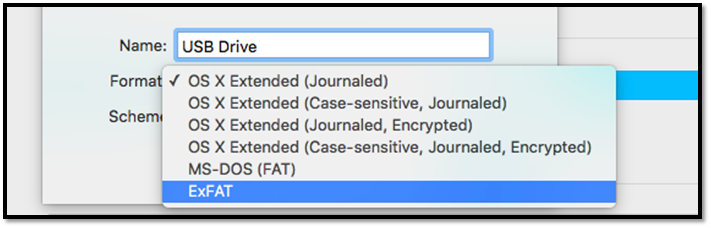
Step 4. Name the drive and select the MS-DOS (FAT) file system.
Step 5. Click on "Erase" and wait for the formatting process to complete.
You have obtained the FAT32 file format, and you can now use the same drive between macOS, Windows, or other operating systems. Next, we will provide more information about the read-only file system on Mac. If you think it's helpful, click the social button to share it with other people.
FAT32 is compatible with Mac, you can read and write to FAT32 external hard drives or USB, but you need to pay attention if your Mac appears to be a read-only FAT32 drive. Usually, three situations cause you to be unable to write to a FAT32 drive:
1️⃣You lack permissions: You can change the drive's read-only setting by changing read and write permissions on Mac. - Check the Solution
2️⃣The drive was accidentally formatted to NTFS: NTFS is the default format for Windows. You may have used the drive on Windows before and accidentally formatted it to NTFS. - Check the Solution
3️⃣Drive corruption: If your device is not performing well, Mac will render it as read-only. - Check the Solution
Different solutions are provided for these three scenarios. Read on to fix Mac read-only FAT32 drive situation.
The first thing to do to fix the FAT32 read-only issue is to change the read and write permissions of the external device.
Step 1. Connect the external device to the Mac.
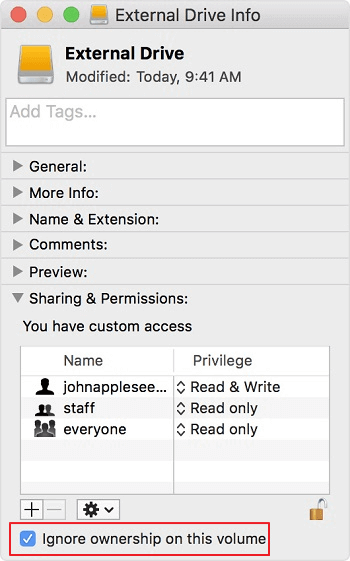
Step 2. Follow these steps to open the unlock settings: Open Finder>Get Info>Share & Permissions>lock icon.
Step 3. Select Ignore ownership on this volume at the bottom.
This method will bypass permission errors and help you access the device successfully. If the permissions are fine, there may be another reason for the read-only error.
If your drive has been accidentally formatted as NTFS, you don't need to perform any other operations. With the help of the NTFS tool - EaseUS MTFS for Mac, you can easily get read and write permissions to your drive. The tool has no extra commands and tedious steps, so you can quickly start NTFS support even if you are new to computers.
Step 1. Launch and activate EaseUS NTFS for Mac. Click "I already have a license" to unlock this software.
Step 2. Connect an NTFS drive to Mac, EaseUS NTFS for Mac will automatically detect the device. Select your drive and you'll see it's now marked as 'Read-only". Click "Enable Writable" to add read and write rights to the drive.
Step 3. When the state of NTFS drives turns into "Writable".
Step 4. EaseUS NTFS for Mac will pops up a window to help Mac get access to the NTFS drive:
Step 5. When EaseUS NTFS for Mac restarts, you can then open to check, read, write, and even modify saved data on the NTFS device.
EaseUS NTFS for Mac avoids the hassle of reformatting. With the help of this tool, you can solve all your NTFS drive problems on Mac, like ejecting, mounting, opening, and writing to NTFS drives. Download this tool and use it for free!
If the drive has some directory corruption, Mac cannot read or write it. Mac can only read and write FAT32 format, which has no special problems. Please follow the following methods to check the hard disk on your Mac computer:
Step 1. Open Finder>Applications>Disk Utility.
Step 2. Select the USB or external drive you want to check.
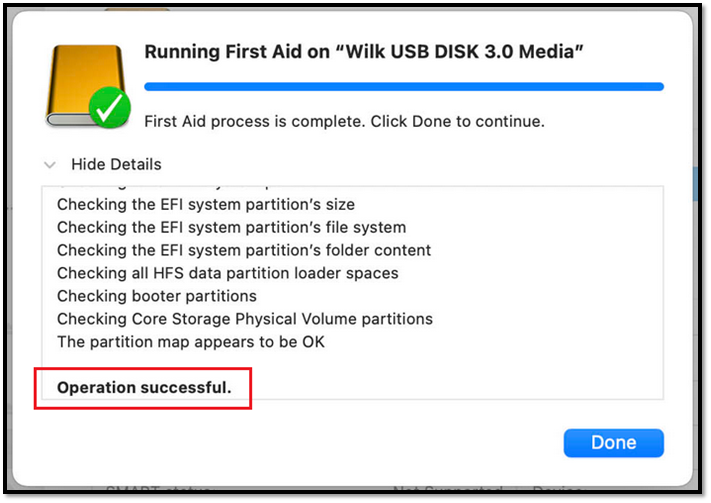
Step 3. Select and run First Aid from the top.

If it works well, you will see the option "Operation successfully":
You can also bring the drive back to your Windows computer and use chkdsk to check and repair it:
Step 1. Hold down Windows+R to open a command line window.
Step 2. Type chkdsk H:/f to check the status of the drive.
You can make it work on your computer again by repairing the bad sectors, updating the driver, and replacing it.
You May Also Like:
Mac not only reads FAT32, but it also supports writing to FAT32. FAT32 is compatible with macOS, Windows, Linux, and Android systems. If your FAT32 does not work on Mac, this article provides additional tips to help you fix FAT32 read-only issues. If the drive's file system format is wrong, EaseUS NTFS for Mac can help you stay out of this trouble.
This part will provide some frequently asked questions related to Mac and FAT32. Keep reading.
1. Why is Mac not reading FAT32 drive?
Usually, Mac can read and write FAT32 drive. If it's not working, something may be damaged in the directory. Or the drive lacks permission to write or read on the external hard drive.
2. Can FAT32 be used on Mac and Windows?
Yes, FAT32 is compatible with both Mac and Windows. It can work well with all versions of both systems. But it's not recommended for its file size limits.
3. How to open FAT32 on Mac?
You can find FAT32 drive via Disk Utility and format it to FAT:
Step 1. Connect the drive to Mac and open Utilities.
Step 2. Choose Disk Utility and view all the devices on the right side.
Step 3. Select the drive you want to format and click Erase from the toolbar.
Step 4. Name the drive and choose the target format.
Related Articles - ALSO ON EaseUS SOFTWARE
Solved: the Disk Couldn't Be Ejected Because the Finder Is Using It
![]() Cici/2025-07-07
Cici/2025-07-07
Solved: Can't Save to External Hard Drive Mac
![]() Oliver/2025-11-11
Oliver/2025-11-11
How to Fix USB Drive Read Only Mac FAT32 [Full Guide]
![]() Banu/2025-06-26
Banu/2025-06-26
Don't Have Permission to Write to External Hard Drive on Mac? Get Your Complete Guide
![]() Banu/2025-11-10
Banu/2025-11-10
Copyright © 2004 - 2023 EaseUS. All rights reserved.


