- Store
-
Support CenterGuides, License, ContactDownloadDownload installerChat SupportChat with a TechnicianPre-Sales InquiryChat with a Sales Rep
Even today, many users work with the obsolete file system FAT32. However, you can format FAT32 to NTFS on Mac which offers better data protection and file compression.
Table of Contents
FAT32 and NTFS are file systems used in different categories of equipment like hard disk, DVD player, game console, and much more. However, the file system comes with several limitations like 4GB maximum file size and partition capacity of 2TB.
On the other hand, NTFS offers users unlimited single files with a top capacity of 256TB for the partition size. Suppose you want to save a movie worth 16GB in the FAT32 file system. What would you do? Simply format FAT32 to NTFS on Mac and reap the benefits.
| Workable Solutions | Step-by-step Troubleshooting |
|---|---|
| Format FAT32 Drives To NTFS On Mac | 1. Format FAT32 To NTFS On Mac Using Disk Utility; 2. Format FAT32 To NTFS Using Terminal...Full steps |
| Fix 1. Change a USB port | Step 1. Launch and activate EaseUS NTFS for Mac. Click "I already have a license"...Full steps |

There are several reasons to convert from FAT32 to the NTFS filing system. Whether you are a developer or simply looking to convert heavy file batches, it can be an excruciating exercise. Besides, when trying to copy a file larger than 4GB, you will encounter a message saying that the file is too large for the destination receiver. Let us now go through the reasons why you need to format FAT32 to NTFS on Mac:
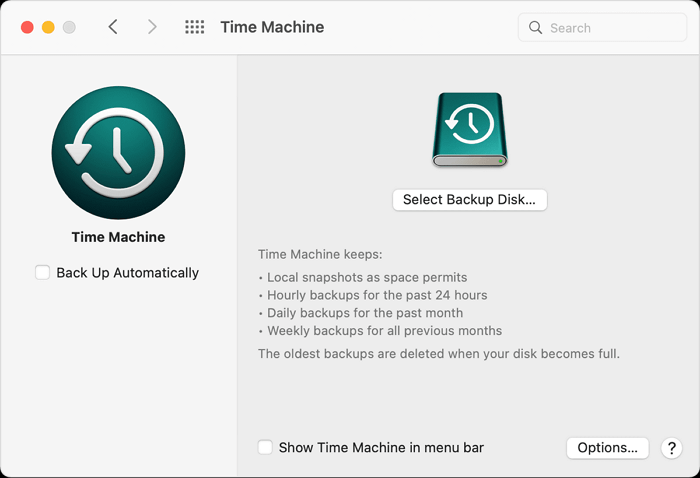
It will be impossible to format FAT32 to NTFS on Mac without third-party software. But first, save all the crucial backups before making the conversion. If you are a light user, a 240GB software works fine, but you need close to 1TB storage space for heavy users. Follow these guidelines for backing up the files:
EaseUS NTFS for Mac is a reliable third-party software that can help you convert external devices from FAT32 to NTFS with one click. It is very simple, especially suitable for novice users. That's why we put it first. Its simple interface makes everything very clear. Don't miss this tool and download it to format your FAT32 device to NTFS now.
Step 1. Launch EaseUS NTFS for Mac on Mac computer, click "I already have a license" to activate this software.
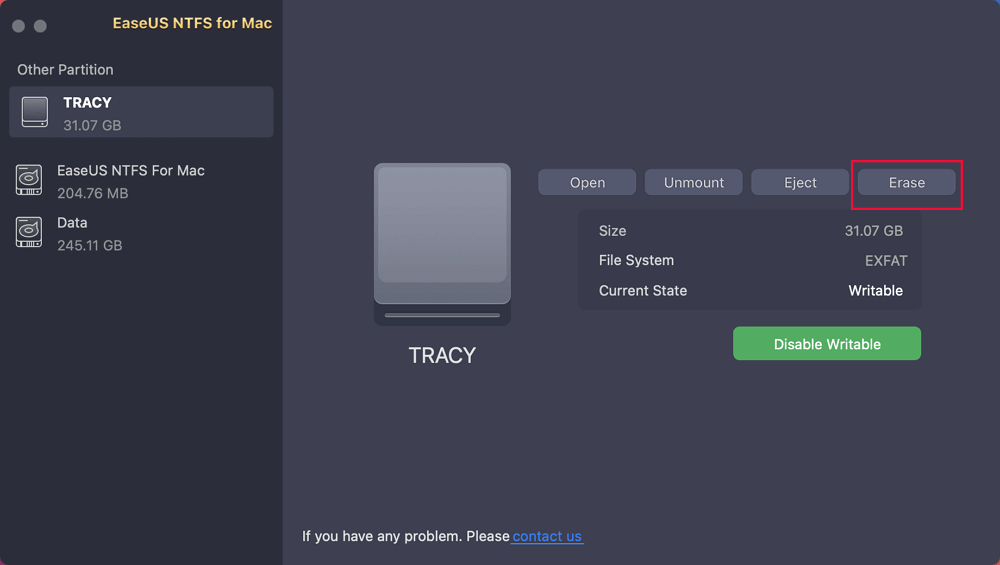
Step 2. Select target disk drive or removable device you tend to erase, and click "Erase" to continue.
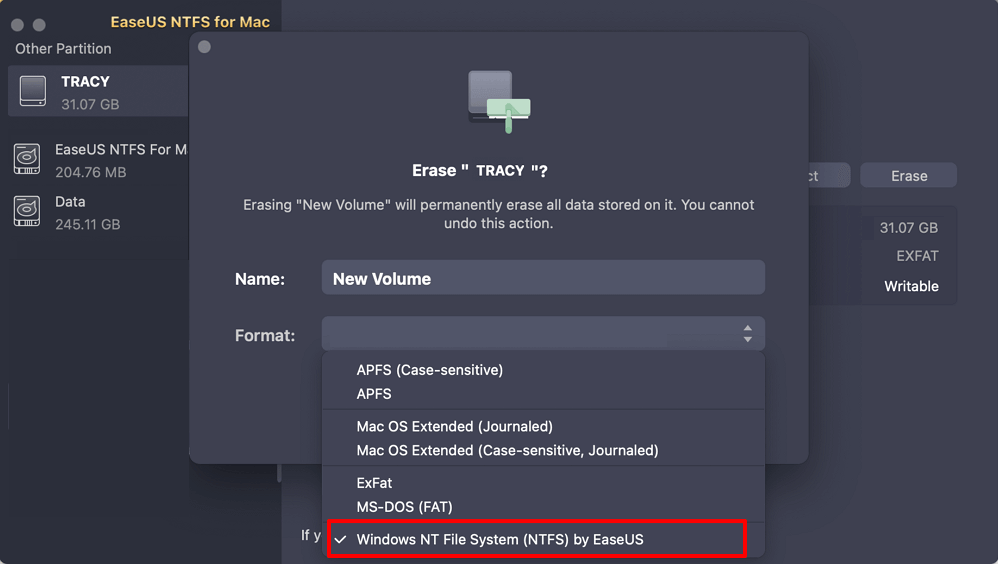
Step 3. Select "Windows NT File System (NTFS) by EaseUS" - NTFS file system as the target file system.
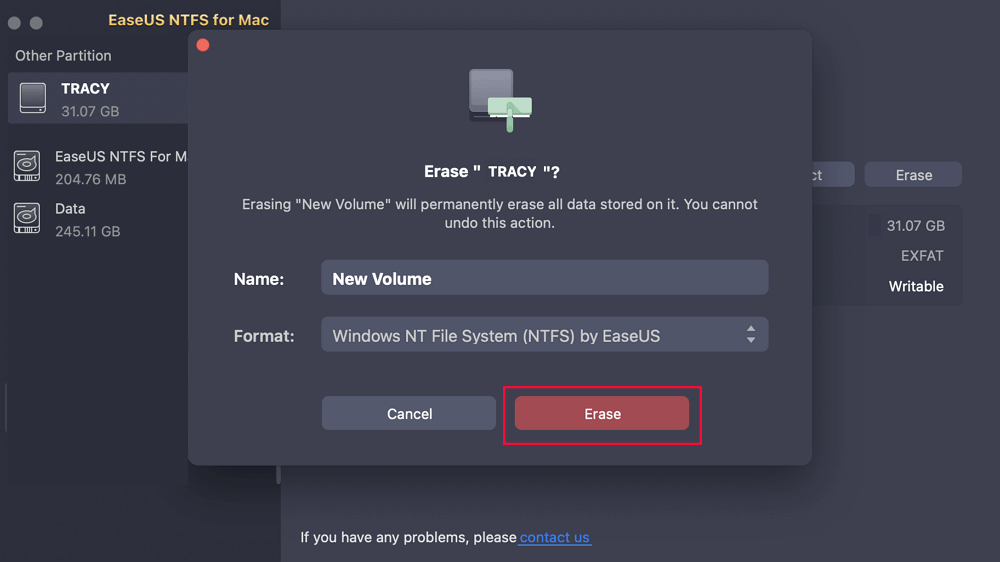
Step 4. Click "Erase" to confirm the formatting and start erasing your target device to NTFS file system.
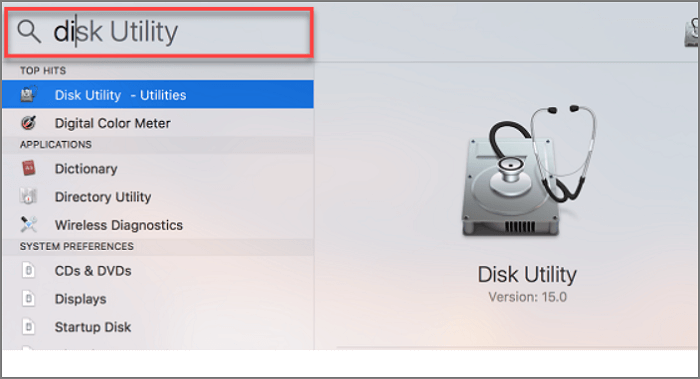
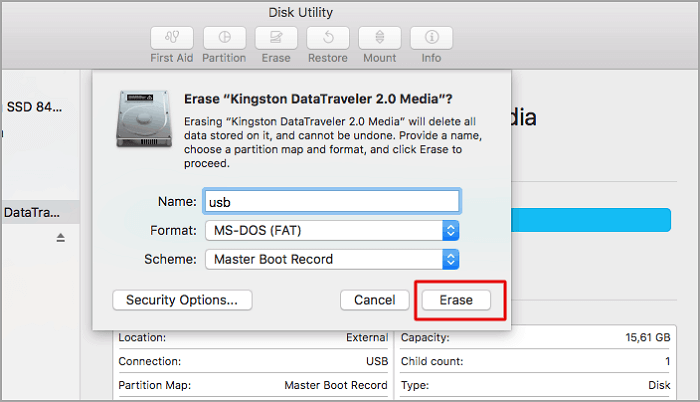
You can use Apple's built-in Disk Utility, but it may be a little complicated. Check the below steps for proper formatting of FAT32 drive:
Today, you can insert any USB drive directly on Mac. However, if it has been intended for Windows, you need to format it using the MAC data system. That’s because most USB drives are configured for Windows, using a data system called FAT32.
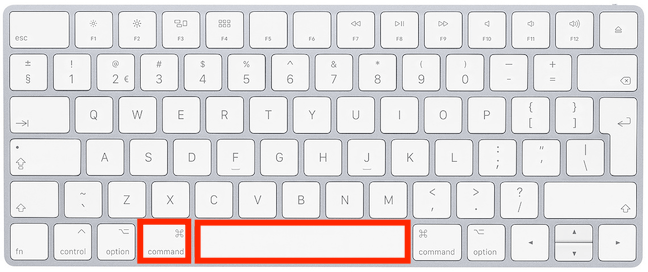
You can format FAT32 to NTFS on Mac using the Terminal Command-Line or simply Terminal. Most developers use this option when they can’t convert using Disk Utility. Let us then go through the formatting procedure using Terminal.
How can you edit, rename, copy, paste, move, create or delete an NTFS file? Simply by making it readable and writeable.
You can make the selection from either of these following options:
There are many paid third-party software that can be installed to make the NTFS file readable and writable.
Mac's new System Integrity Protection feature enables you to achieve the results without a paid version. But it is very slow, and sometimes the read/write mode can pose a security risk.
You can also make the task simpler by downloading EaseUS NTFS Mac for free.
1. Download NTFS For MAC Software For Free
NTFS is a great option for people who need to spend considerable time on their PCs. Plus, with EaseUS NTFS Mac, you will have a complete tool for the laptop. Also, this powerful tool comes with a lot of utility and helps users do everything with Windows Drive on their Mac. Some of the powerful features include:
2. Enable NTFS Drive Readable and Writeable On Mac
Now you can take ownership of all NTFS drives from the Mac itself. It is also very easy to format FAT32 to NTFS on Mac. Plus, EaseUS NTFS enables users to work even with external drives allowing them access to all fields that they can read, write, copy, and delete at their convenience.
Step 1. Launch and activate EaseUS NTFS for Mac. Click "I already have a license" to unlock this software.
Step 2. Connect an NTFS drive to Mac, EaseUS NTFS for Mac will automatically detect the device. Select your drive and you'll see it's now marked as 'Read-only". Click "Enable Writable" to add read and write rights to the drive.
Step 3. When the state of NTFS drives turns into "Writable".
Step 4. EaseUS NTFS for Mac will pops up a window to help Mac get access to the NTFS drive:
Step 5. When EaseUS NTFS for Mac restarts, you can then open to check, read, write, and even modify saved data on the NTFS device.
So, you can see that it is very simple to format FAT32 to NTFS on Mac. All you have to do is to follow the steps mentioned above to achieve the desired result. But before formatting does not forget to backup all your files.
However, the simplest way to access the Windows file system is to get EaseUS NTFS for the best read and write support. Download it for free right here.
Related Articles - ALSO ON EaseUS SOFTWARE
How to Delete Files from Seagate Exteranl Hard Drive Mac & Windows [2026 Guide]
![]() Banu/2026-01-05
Banu/2026-01-05
Can High Sierra Write to NTFS? Yes or No - EaseUS
![]() Banu/2025-06-26
Banu/2025-06-26
Can't I Format My USB to FAT32 Mac
![]() Banu/2025-06-26
Banu/2025-06-26
(Solved!) Can't Copy Files to USB on Mac
![]() Oliver/2025-06-26
Oliver/2025-06-26
Copyright © 2004 - 2023 EaseUS. All rights reserved.