External storage devices such as SD cards are used to backup data or transfer between devices. It is not only important to keep it secure but also essential to remove SD card from Macbook safely. This guide shows multiple methods to ensure your SD card is not damaged.
Table of Contents
When you want to remove an SD card from the Mac, you would directly eliminate it from the device. But this often corrupts your SD card and even affects your MacBook. Hence, unmounting an SD card before removing it from a Mac is essential. After all, the Mac is a pricey investment.
Here's where you would be looking for how to safely remove an SD card from a Mac, and EaseUS has covered it for you! There are five most effective ways to keep your devices safe, so you should proceed accordingly.
As mentioned earlier, five methods exist to safely remove an SD card from a Mac. Our experts have tested all of these and accordingly suggested them in the order of effectiveness.
Below-mentioned is a list of the same:
So, without any further ado, let's dig into the details!
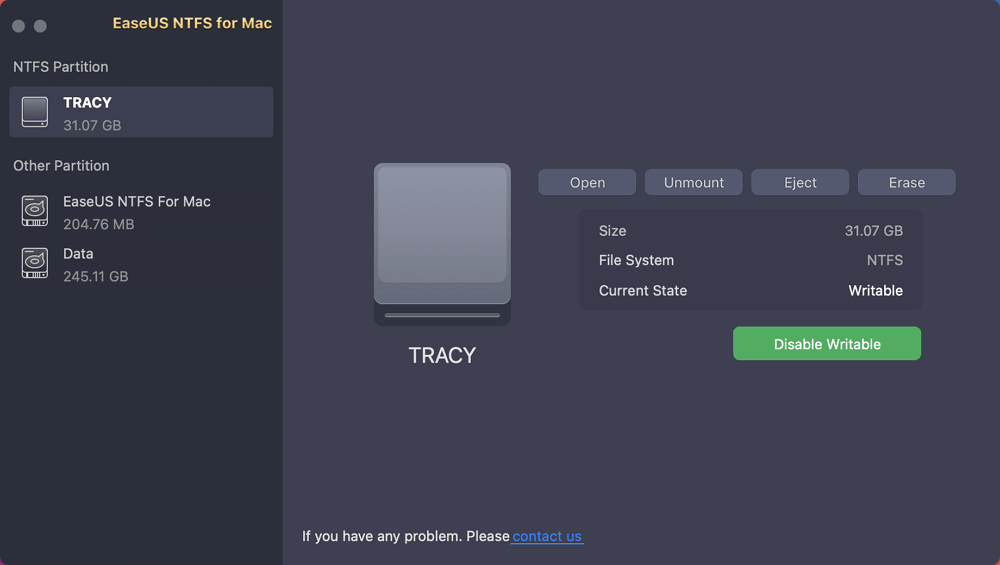
EaseUS NTFS for Mac makes it possible to safely write, mount, unmount, and much more with your SD Card! It is safe as well as time-saving. With one click, you can eject your SD card from your Mac. This tool allows you to eject SD cards from Macs without harming SD cards and Macs. Its clear interface and prompts help beginners finish the ejection efficiently and effortlessly.
Here is how to use EaseUS NTFS:
Step 1. Launch EaseUS NTFS for Mac on Mac computer, click "I already have a license" to activate this software.
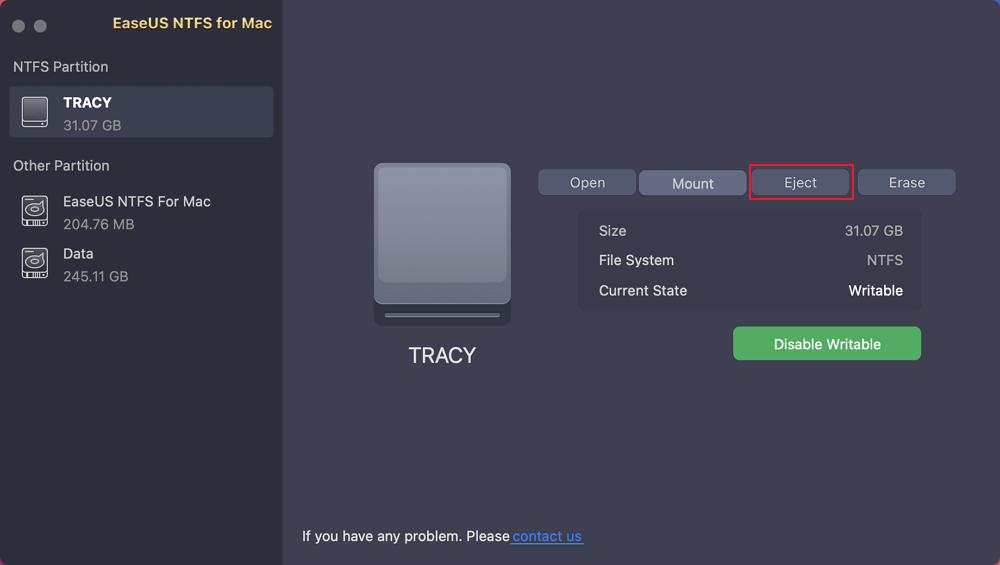
Step 2. Let EaseUS NTFS for Mac detect the connected drive that you want to eject.
Step 3. Once detected, select the target drive and click "Eject". This will safely remove your drive without affecting the saved files and data.
Key Features:
You can download EaseUS NTFS for Mac from the official website, or you can download it directly from the button below. Don't miss this tool if you are facing SD card eject errors.
You can also eject the SD directly if you don't want to use third-party applications. This doesn't use the NTFS mechanism now, yet sometimes you have no other option!
To eject your SD from the MacBook:
Step 1. Locate and identify the SD card icon on your Macbook.
Step 2. Hold Ctrl and click on the Icon.
Step 3. Click on Eject.
This ejects your SD card, and you can safely remove it from the MacBook.
If you cannot locate the Eject SD card option, use the Finder to ease things up!
Step 1. Open Finder on your Mac.
Step 2. On the left-hand sidebar, locate your SD card under the Locations tab.
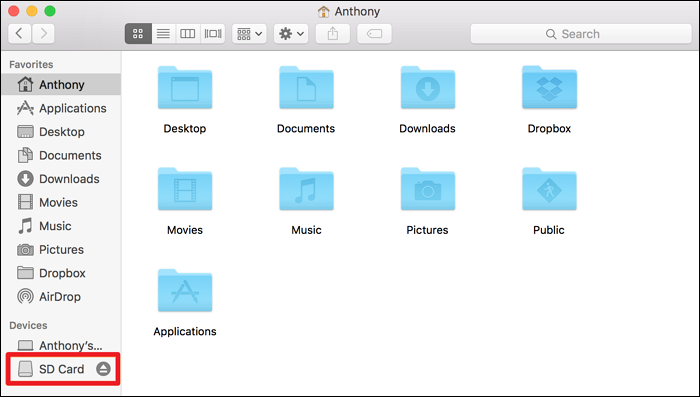
Step 3. Click on the Eject icon present.
After this, your SD card will no longer appear under the Locations tab. It means you have ejected it safely and can proceed further. You can now remove it from your device.
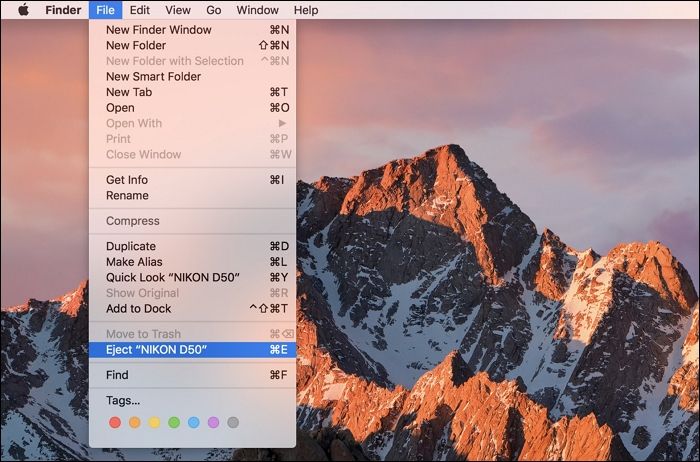
In the macOS Status bar, you will find the Eject Menu you can use to remove SD from the device. Yet, it's better to know your SD's name in this method!
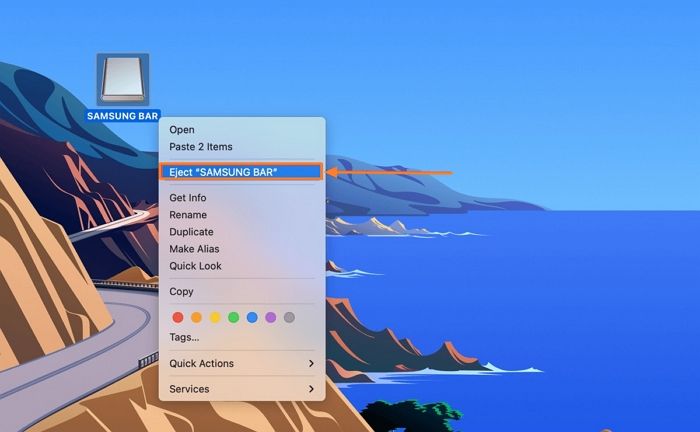
Step 1. Click on the SD card icon present on your desktop.
Step 2. On the Status bar, click the File option.
Step 3. Select the Eject "Name_of_your_SD_Card" option from the drop-down menu to proceed.
After confirming you successfully eject the SD card, you can remove it later!
Did you know Trash also lets you unmount an SD card before dragging it to the bin? This way, it also doesn't have any associated risks!
Step 1. Click on the SD Card icon present on the desktop
Step 2. Drag the SD card icon over the trash icon present on the MacOS dock
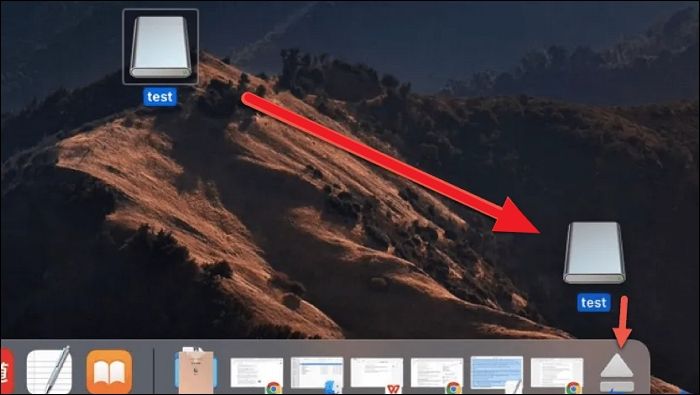
After you drag and drop your SD card into the Trash bin, your SD card will be safely ejected, and hence, you can remove it from your device.
A misconception about this way is that dropping your SD card over the trash can also delete the data in it. It's not true; your data stays as it is, and it only safely ejects your SD card.
You May Also Like:
Many people underestimate the importance of safely ejecting their SD Cards or external devices before removing them. Removing them without ejecting them doesn't immediately cause damage, so people aren't concerned about it.
But you must always eject your SD card before removing it, as you don't want your data to go out of nowhere.
Problem Improper ejections can cause:
While you just read a dozen scary side effects of not ejecting your SD card correctly, scroll down a bit, and you'll see solutions to prevent it! Follow the proper etiquette; your SD card will thank you, and you will thank us! The safest approach is to use the EaseUS NTFS tool, which allows you to mount, unmount, and modify read-only drives.
If you found this article helpful, share it with all your Mac buddies and give us feedback.
Based on this new information, We are sure you're well-trained in SD Card etiquette. If you still have questions, refer to the FAQs below.
1. Why can't I eject my SD card from my Mac?
Not being able to eject an SD card occurs if your SD card is under an active file transfer. Make sure there are no pending file transfers before ejecting your SD Card. Also, close all the files from your SD card, like an application or a video.
2. What happens if you remove an SD card without ejecting it?
As mentioned, not ejecting your SD card before removing it can cause many problems. You can brick your SD card permanently or corrupt the files in it. Not ejecting your SD card will keep your data under a constant threat like Russian roulette.
3. How do I safely eject my SD card?
You can safely and efficiently eject your SD card using the eject option available in macOS for any external device connected to the MacBook.
Step 1. Close all applications or file processes that involve the SD Card.
Step 2. Right-click on the SD card icon that appears on the Desktop.
Step 3. Choose Eject from the menu.
Step 4. The card icon should disappear automatically. You can now remove the card physically from the MacBook.
4. How to use Finder to eject an SD card from MAC?
If you don't see any SD card on the desktop, you can use the Finder to eject the SD card from macOS.
Step 1. In the sidebar of a Finder window, select the card.
Step 2. Choose File > Eject.
Step 3. After the card's icon disappears from the sidebar, remove the card from the slot.
Related Articles - ALSO ON EaseUS SOFTWARE
![]() Daisy/2024-04-19
Daisy/2024-04-19
How to Use NTFS Drive on macOS Sonoma [Picture Guide]
![]() Sherly/2024-02-23
Sherly/2024-02-23
How to Safely Force Eject External Hard Drive on Mac
![]() Tracy King/2023-12-19
Tracy King/2023-12-19
How to Format WD Passport on Mac [Effective Ways]
![]() Roxanne/2024-01-16
Roxanne/2024-01-16
Copyright © 2004 - 2023 EaseUS. All rights reserved.