Discover the step-by-step guide on how to format WD Passport on Mac and learn the best ways to format WD Passport for seamless file transfer and optimal performance.
Table of Contents
As external hard drives become indispensable for data management, ensuring compatibility with Mac systems is crucial. If you're switching from Windows OS to Mac initially, you can face challenges regarding a flash drive, but these issues can be easily fixed and resolved.
In this article, EaseUS will show you how to format a WD passport on a Mac and explore effective methods to tailor your WD Passport for optimal performance on a Mac. Users can navigate the formatting journey seamlessly, from step-by-step guides to insightful techniques.
In this section, we'll provide step-by-step guidance on how to format a WD passport for Mac. It's crucial to understand that formatting will delete all data stored on your WD Passport drive. Therefore, taking a moment to safeguard your vital files through a complete backup is an essential precaution. With this protection in place, let's explore the effective methods to format your WD Passport for optimal use on your Mac.
Formatting a WD passport on Mac requires the right tool to fill this gap and enable everyone to perform this job independently. To ease the formatting process of WD Passport on Mac, consider using EaseUS NTFS For Mac. This tool provides a user-friendly solution, enabling you to effortlessly format your external drive for optimal performance on your Mac. This software offers a streamlined solution, ensuring a hassle-free formatting experience.
Follow the steps:
Step 1. Launch EaseUS NTFS for Mac on an Mac, click "I already have a license" to activate this software.
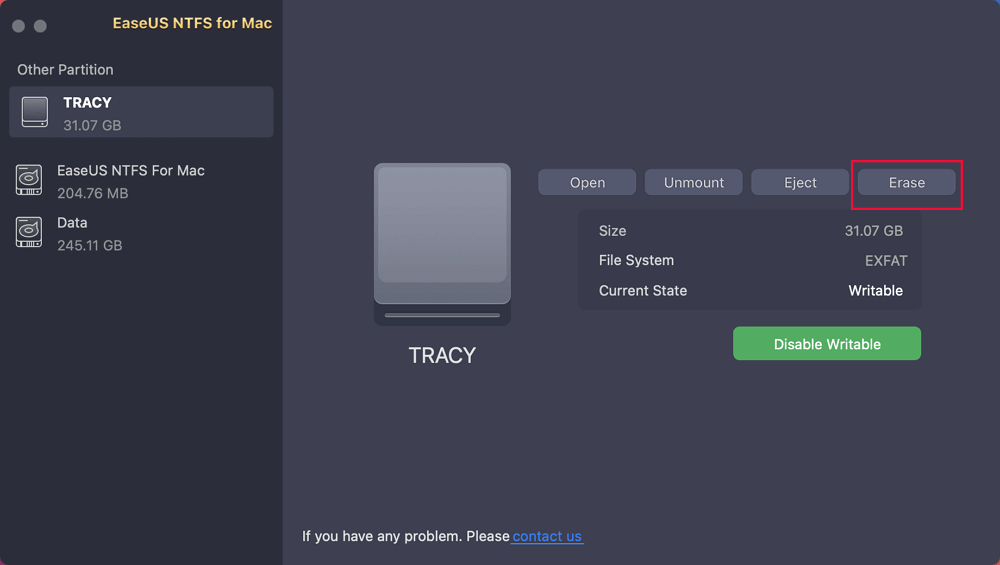
Step 2. Select target disk drive or removable device you tend to erase on the left side, and click "Erase" to continue.
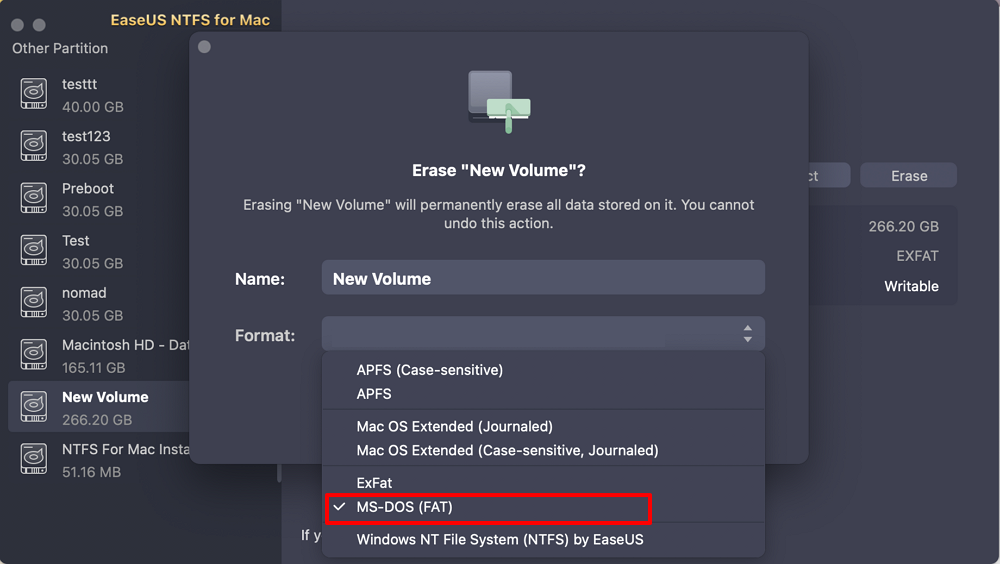
Step 3. From the drop-down box, select "MS-DOS(FAT)" as the target file system.
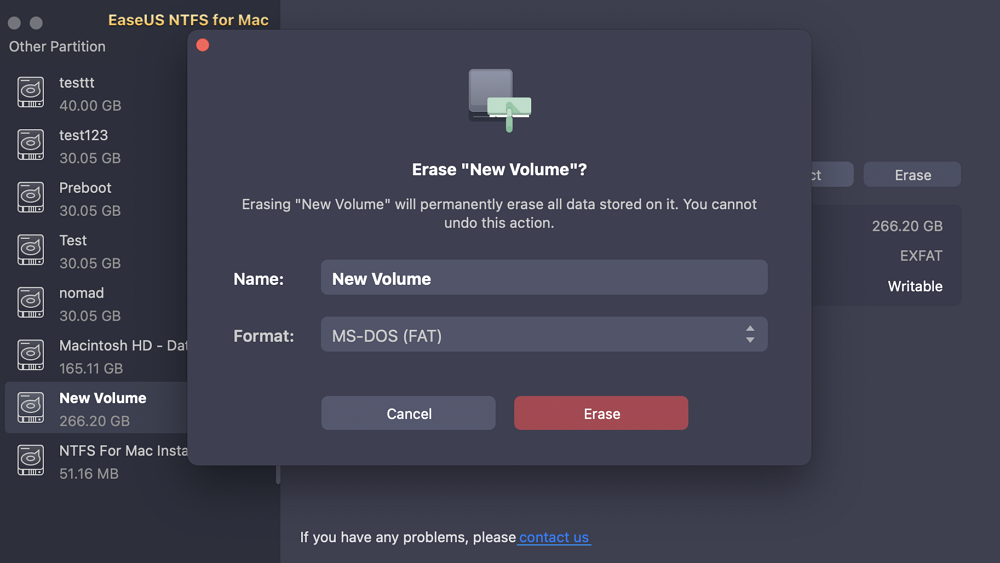
Step 4. Click "Erase" to confirm the formatting action and start erasing your target device to FAT file system.
Features of EaseUS NTFS For Mac:
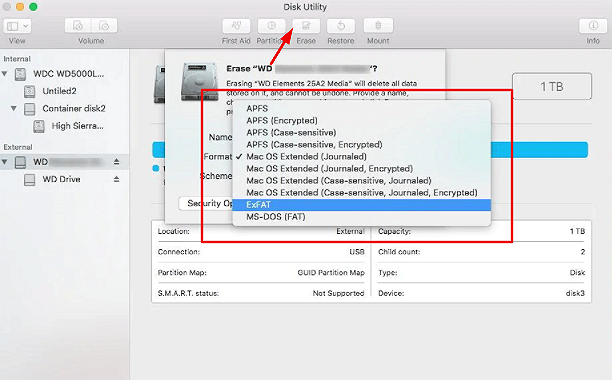
Using this method, we will use Mac's built-in Disk Utility to format the WD Passport. This provides a native and straightforward approach. Follow the steps below to format the WD Passport on Mac:
Step 1. Connect your WD passport to your Mac.
Step 2. Navigate to "Applications > Utilities > Disk Utility" to open the Disk Utility.
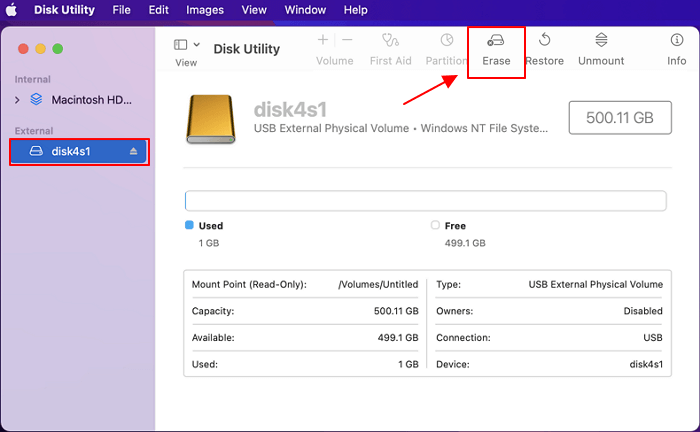
Step 3. Choose your WD My Passport on the sidebar, and select the "Erase" option.
Step 4. Rename your drive, go to the "Volume Format" drop-down menu, and opt for either "MS-DOS (FAT)" or "ex-FAT File System." Afterward, click the "Erase" button to proceed with the formatting.
Step 5. Wait until the formatting process is over.
This method is tricky and complicated, so only try it if you're tech-savvy and have enough knowledge and experience. Follow the steps:
Step 1. Go to "Applications > Utilities" and open the Terminal.
Step 2. Type diskutil list in the Terminal to show the connected drives. Under the "IDENTIFIER" section, navigate your drive based on the size and name.

Step 3. Type the following commands and hit on the "Enter" button.
sudo diskutil eraseDisk FAT32 diskname MBRFormat /dev/diskidentifier
Note: Write diskname with the new name of your drive and diskidentifier with the old name.
Step 4. Enter the administrator password and allow Terminal to complete the formatting process.
Now, you have learned three solid ways to format a WD passport on Mac. Let's share them on your social media for more users to get efficient solutions:
Mastering the art of formatting your WD Passport on Mac is crucial for a seamless data management experience. This article has guided you through effective methods to ensure compatibility and optimal performance. Always prioritize a complete backup before formatting, as it involves deleting all data stored on your WD Passport drive.
For a hassle-free and efficient formatting experience, we highly recommend trying EaseUS NTFS For Mac. Its streamlined interface, comprehensive compatibility, and rapid formatting features make it an ideal and excellent choice for users of all technical levels. As you start your WD Passport formatting journey, let the power of EaseUS NTFS For Mac transform your external drive into a seamless extension of your Mac ecosystem.
Have more questions about formatting your WD Passport on Mac? Here are answers to common queries.
1. Can I reformat a WD hard drive for Mac?
Absolutely! You can reformat your WD hard drive for Mac; even if previously formatted for Windows, it can be readily adapted for your Mac. For step-by-step guides, navigate to the "How to Format WD Passport on Mac?" section.
2. How do I format an external drive on the Mac?
Here's how to format an external drive on your Mac. Follow these steps:
3. Which format is the best for an external Mac drive?
For optimal compatibility and ease of use on your Mac, two formats shine:
Related Articles - ALSO ON EaseUS SOFTWARE
How to Fix LaCie Hard Drive Not Showing Up on Mac (5 Practical Methods)
![]() Tracy King/2023-12-19
Tracy King/2023-12-19
How To Delete Everything on NTFS Drive Mac Big Sur, Catalina
![]() Tracy King/2023-12-19
Tracy King/2023-12-19
Don't Have Permission to Write to External Hard Drive on Mac? Get Your Complete Guide
![]() Tracy King/2024-01-15
Tracy King/2024-01-15
How to Format 1TB/2TB NTFS Drive on Mac
![]() Tracy King/2023-12-19
Tracy King/2023-12-19
Copyright © 2004 - 2023 EaseUS. All rights reserved.