- Store
-
Support CenterGuides, License, ContactDownloadDownload installerChat SupportChat with a TechnicianPre-Sales InquiryChat with a Sales Rep
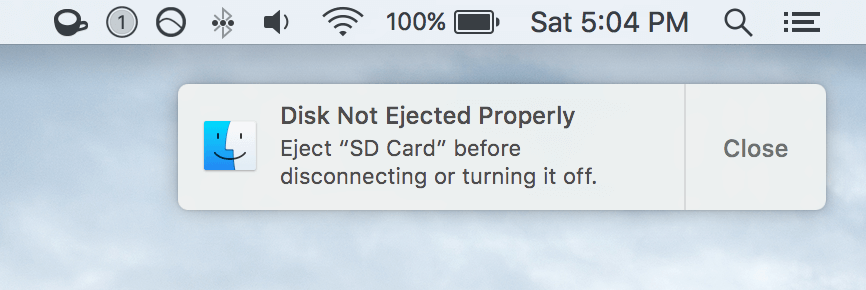
Are you facing the 'Disk Not Ejected Properly' message on your Mac? Then, make sure to never force eject external hard drives on the Mac. Check out the four ways to safely eject external disks on your Mac.
Table of Contents
| Workable Solutions | Step-by-step Troubleshooting |
|---|---|
| 1. Use EaseUS NTFS for Mac to Safely Eject Hard Drive | Step 1. Launch EaseUS NTFS for Mac on Mac computer, click "I already have a license" to activate...Full steps |
| 2. Drag External Hard Drive to Trash | Step 1. Locate your external storage device's icon on the desktop and drag it to the Trash bin...Full steps |
| 3. Eject Device from Finder | Step 1. Press Option + Cmd + Space on your keyboard to bring up the Finder window; Step 2. Find and...Full steps |
| 4. Click Eject from the File Tab | Step 1. Simply right-click on the external drive that you want to eject on your Mac; Step 2. Just click...Full steps |
Are you a Mac user? If yes, always remember to eject your external hard drive when you are finished using it.
Why?
That's because when you fail to eject the media drive safely, you can encounter the message "Disk Not Ejected Properly" that won't let you transfer data on Mac. Besides this, you can severely damage your disk data or even put your Mac at risk.
This post will help you learn all about force ejecting an external hard drive on Mac and how to eject it safely. So, let's get started!
In a word, the answer is NO. It is not at all safe to force eject external hard drives on your Mac. Why?
That's because force ejection can open a box of many bad scenarios for your Mac, including hard drive data corruption. This happens because your machine uses something called a write cache while copying data from an external disk.
Instead of simply transferring data from one device to another, the cache makes the process more efficient. The cache is local memory storage that your computer can write quickly.
So, when you write to the drive on your Mac, it will just write it into the memory and then come back to confirm it. Using write cache, your computer can finish the copying process very fast in the background. Everything happens so fast from a human perspective.
macOS always uses the write cache to transfer data, but on Windows, you can choose whether you want to use it or not.
Now, the eject feature comes while managing data in the write cache. The eject indicates that data is pulling out, flushing the write cache.
This process takes some time, which is extremely fast for humans. But if you force eject an external hard drive before the computer has finished the data transfer, this can lead to many problems like data loss.
Here force ejection can happen intentionally or unintentionally due to external hard disk malfunction. However, force ejecting an external disk on Mac isn’t safe for your system and data in both cases. Therefore, always follow the right way to eject external drives on Mac.
For safe external drive ejection, you have four easy options on Mac, such as:
EaseUS NTFS for Mac is a robust and simple utility tool. The software can help Mac to read and write NTFS partitions with ease. It can delete, copy, move, write or edit data on Microsoft NTFS volume.
In short, you can do everything with Windows drives on Mac with this tool. Thus, you can also make sure that your Mac never shows the "Disk Not Ejected Properly" message .
Here are many other features that EaseUS NTFS for Mac offers:
Besides offering so many great features, it is very easy to use EaseUS NTFS for Mac, such as to safely eject external hard drive from Mac:
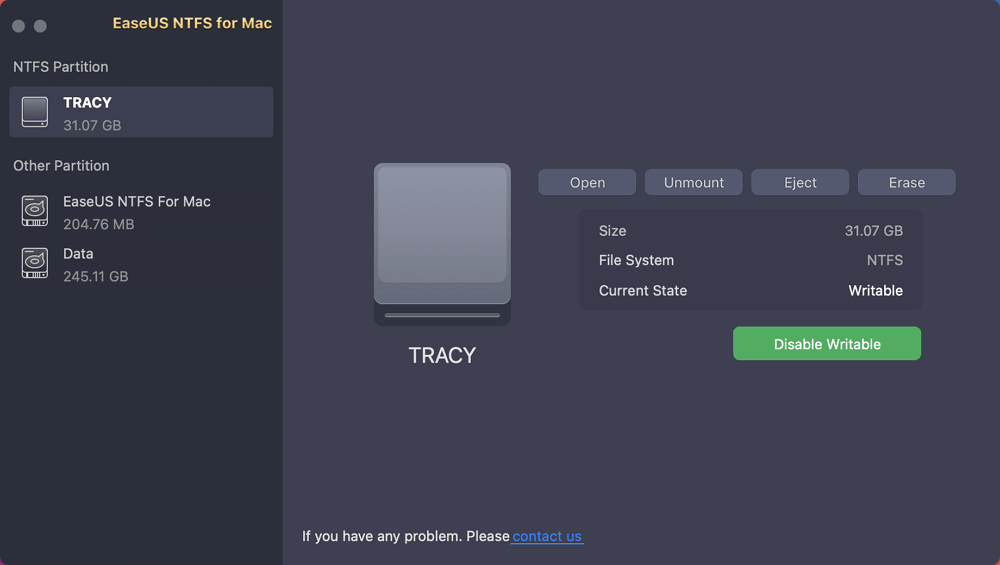
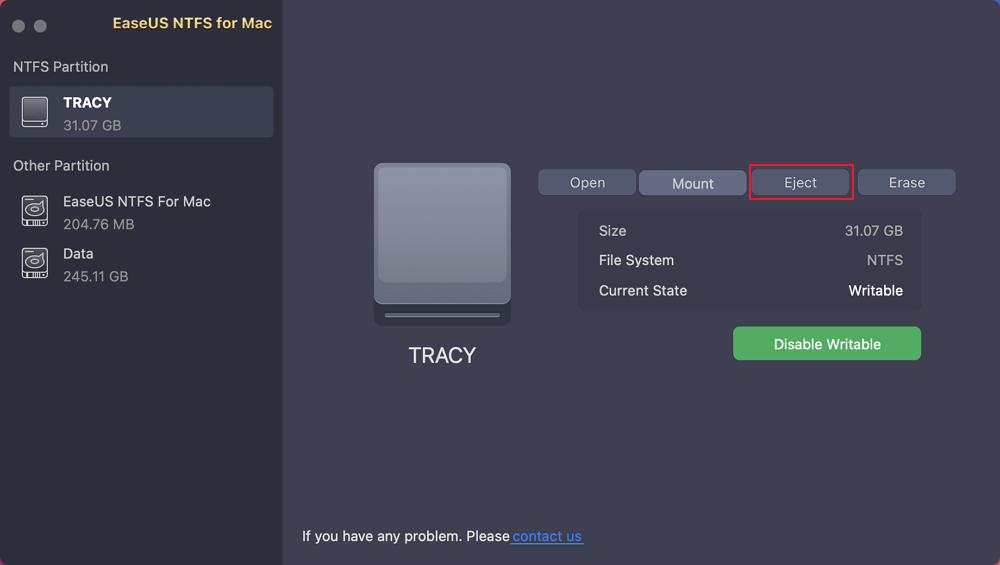
Step 1. Launch EaseUS NTFS for Mac on Mac computer, click "I already have a license" to activate this software.
Step 2. Let EaseUS NTFS for Mac detect the connected drive that you want to eject.
Step 3. Once detected, select the target drive and click "Eject". This will safely remove your drive without affecting the saved files and data.
Besides the easiest EaseUS NTFS tool method, you can use the Trash bin in your Mac to safely eject the external hard disk. To do so:
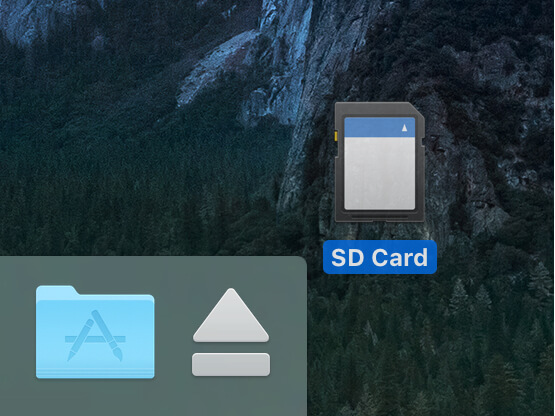
Step 1. Locate your external storage device's icon on the desktop and drag it to the Trash bin. The Trash bin will now change to an Eject icon.
Alternatively, you can hold the 'Ctrl' key and press the left-click button on your mouse on the external disk's icon to popup the menu and then click on the Eject button.
Step 2. If the icon is no longer visible, you have safely ejected your external disk. And now, you can disconnect the external device from your Mac.
If the Trash bin method doesn't work for you, use the Finder on Mac to safely eject the external drive as follows:
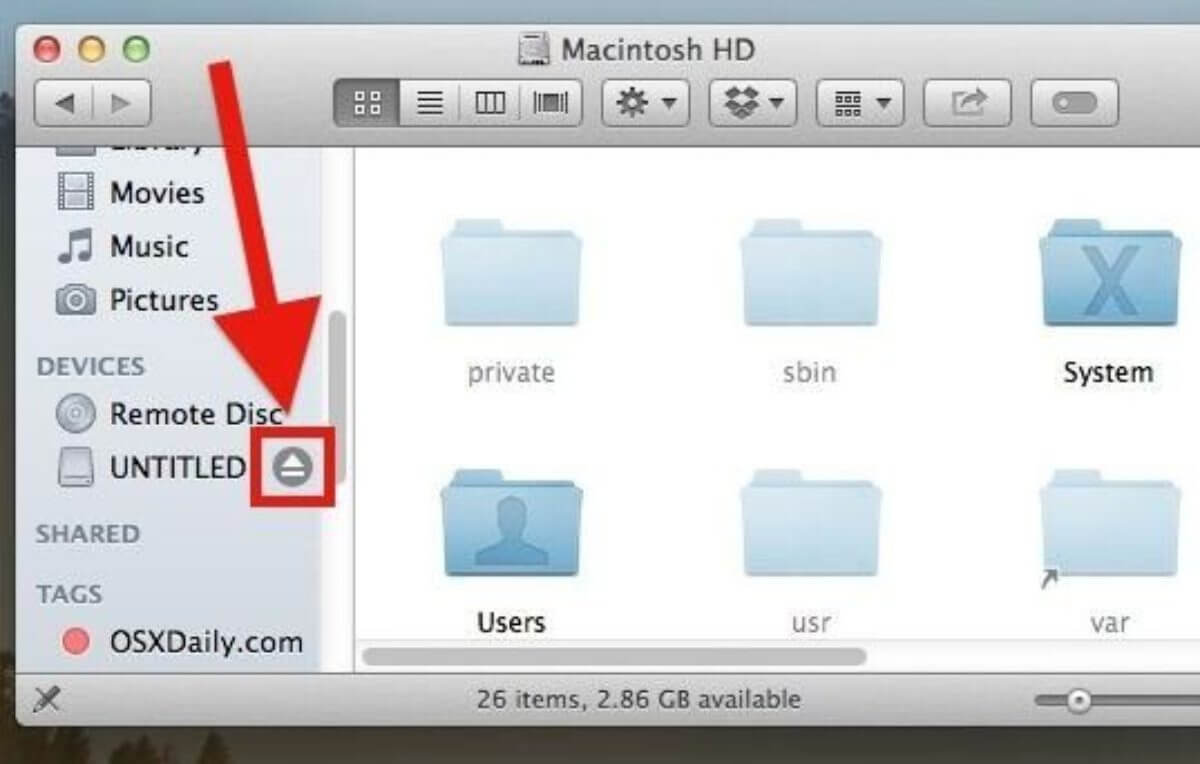
Step 1. Press Option + Cmd + Space on your keyboard to bring up the Finder window.
Step 2. Find and click on your external hard drive icon.
Step 3. Click on the triangle icon next to your device. This will safely eject the device from your computer, and then you can remove it from the USB cable.
Note: If you encounter any error while ejecting the device, ensure that all apps reading your external device files are closed on the computer.
Usually, when you connect a media drive to your Mac, it appears on the desktop unless you have configured the Mac not to do so. Here you can open the File tab to quickly eject external data from your Mac, such as:
Step 1. Simply right-click on the external drive that you want to eject on your Mac.
Step 2. Just click on the Eject button from the popup menu.
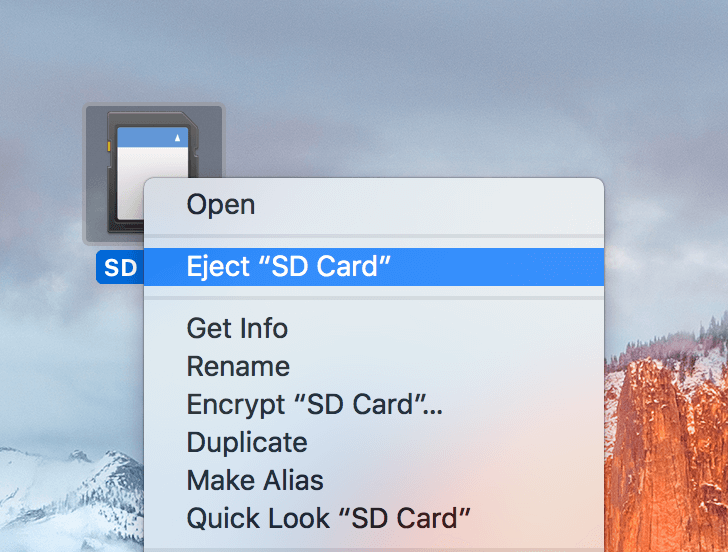
Step 3. Wait for a few minutes until the drive icon disappears from your desktop screen, and then pull out the device. And you are done.
The force ejecting external hard drives on Mac is the biggest blunder that you can ever make. It can corrupt your data and disturb your Mac's functioning.
Therefore, always use the safe way to eject external hard drives on Mac. Here, you can use the Finder menu, File tab, or Trash bin to safely eject external drives.
However, all these methods can only eject standard hard drives on Mac. But, when you want to do everything with Microsoft drives or read/write NTFS partitions on Mac, EaseUS NTFS for Mac is the best solution.
This tool can make it super easy for you to eject NTFS drivers on Mac to avoid data loss. Today, you can try EaseUS NTFS for Mac's seven days free trial to test the software on your own.
Related Articles - ALSO ON EaseUS SOFTWARE
How to Copy Files from Mac to NTFS External Hard Drive [2026]
![]() Banu/2026-01-05
Banu/2026-01-05
How to Fix Can't Delete Files from USB on Mac | 2026 New
![]() Cici/2026-01-05
Cici/2026-01-05
Get NTFS for Mac on Seagate and Fix Seagate External Hard Drive Read-only Mac
![]() Banu/2025-06-26
Banu/2025-06-26
EaseUS NTFS for Mac Cataline/Big Sur and M1 Full Version Free Download with Serial Key
![]() Banu/2025-06-26
Banu/2025-06-26
Copyright © 2004 - 2023 EaseUS. All rights reserved.