- Store
-
Support CenterGuides, License, ContactDownloadDownload installerChat SupportChat with a TechnicianPre-Sales InquiryChat with a Sales Rep
This passage will help you explore a common issue Mac users face: 'The disk couldn't be ejected because the finder is using it.' You'll learn five solutions to resolve it effectively.
Table of Contents
"I plugged in an external drive to transfer files on Mac. The transfer is complete, but it shows a notification that says, 'The disk couldn't be ejected because the Finder is using it.' I'm looking for guidance on safely disconnecting the drive. Anyone can assist me, please?"
If your Mac fails to eject an external drive and displays the message "the disk couldn't be ejected because the finder is using it," we will cover you. It happens because the computer system may be using files in the background. There might be several reasons for the issue. EaseUS will teach you five efficient solutions to fix this problem. Let's eject your drive without any data loss.
Share this valuable guideline with users on social media and check the details of these solutions:
This section will explore how to resolve this problem and safely eject your disk. Before diving into the journey to fix this issue, prepare the following essentials:
Once you have made all the preparations, let's try the following solutions to fix the disk that couldn't be ejected because the Finder is using it issue. Below is an overall list:
The macOS offers limited features on storage devices with an NTFS file system. To handle your NTFS drive in this situation, you'll require a powerful utility called EaseUS NTFS for Mac. On a Mac, this tool allows you to read and write drives formatted in NTFS. You can effortlessly and error-free eject them with a single click.
Managing NTFS drives on your Mac is no longer a complex process with EaseUS NTFS For Mac. Download now to enjoy its painless efficiency!
Here are the quick steps to eject your NTFS drive:
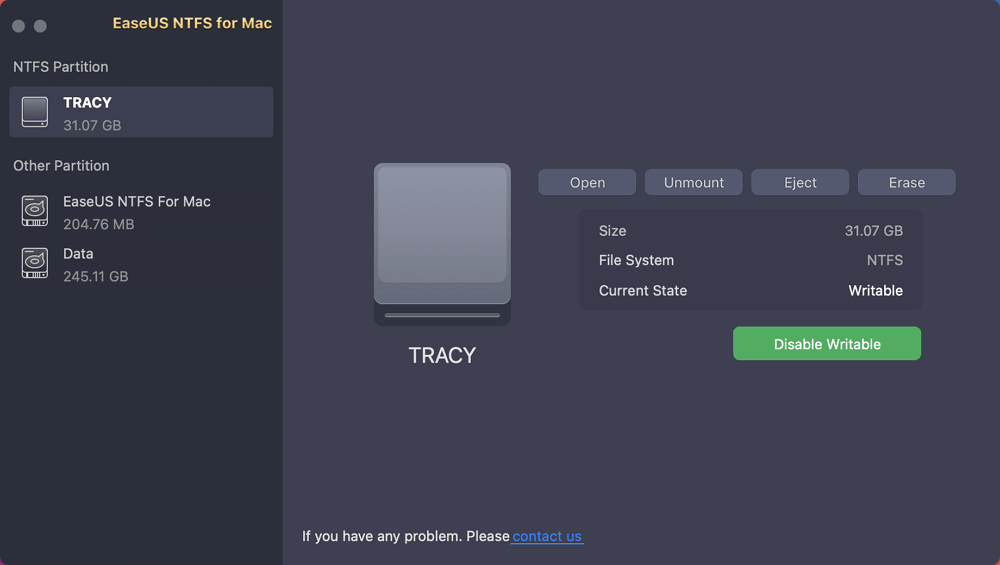
Step 1. Launch EaseUS NTFS for Mac on Mac computer, click "I already have a license" to activate this software.
Step 2. Let EaseUS NTFS for Mac detect the connected drive that you want to eject.
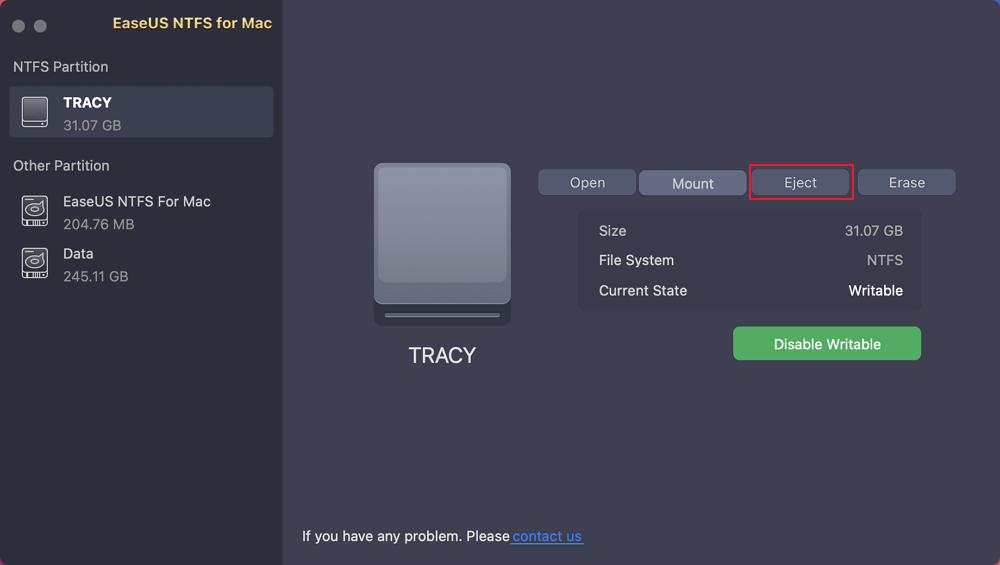
Step 3. Once detected, select the target drive and click "Eject". This will safely remove your drive without affecting the saved files and data.
Additional Features:
By turning to trusted third-party EaseUS NTFS For Mac, you can circumvent this Mac obstacle easily:
When you stop running apps on your Mac, it will help the system prevent the common issue of the disk couldn't being ejected because the Finder is using it. For instance, if you don't stop the running tasks actively using the disk, it may lead to data loss or disk corruption. Closing apps before ejecting minimizes this risk and contributes to system stability. It will allow you to unplug the external drive without any error message.
Apply the following steps to stop running programs, then eject the external disk from the Mac.
Step 1: Use the shortcut "Command + Space" to open Spotlight.
Step 2: Type "Activity Monitor" and select the first result.
Step 3: Go to the "Disk" tab in the Activity Monitor window, then select "QuickLookUIService" in Disk Usage by each process.
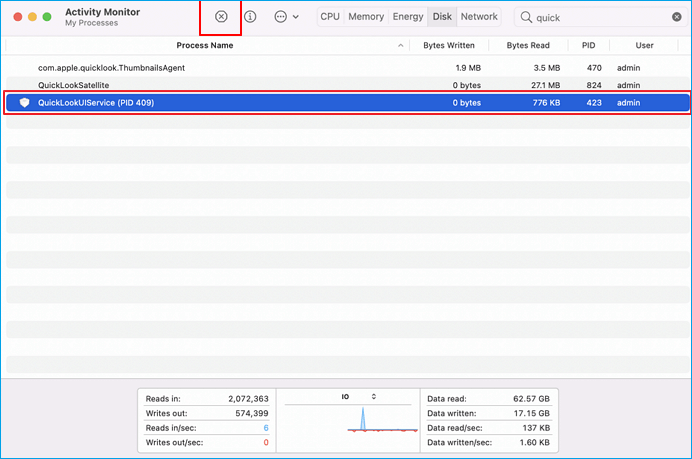
Step 4: Select this option and click the "Close" icon on the top menu.
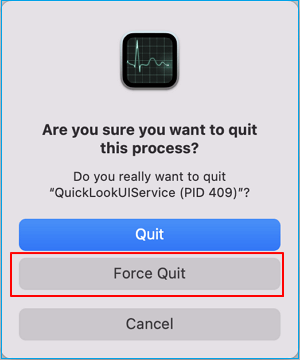
Step 5: Click "Force Quit" when it asks you to quit the process.
Now, you can eject the disk without any hassle. Here are more professional suggestions:
How to Eject and Unmount External Hard Drive on Mac
In addition to ejecting the external hard drive, this guide will also show you how to unmount it without data loss.
Logging out and logging back in can effectively clear any remaining Finder processes and allow the system to reset your user session. This can resolve the issue the disk couldn't be ejected because the Finder is using it.
Save all the running tasks to prevent unexpected data loss, and follow the given steps to log out and log in to your Apple account.
Step 1: Right-click the Apple icon and select "Log Out."
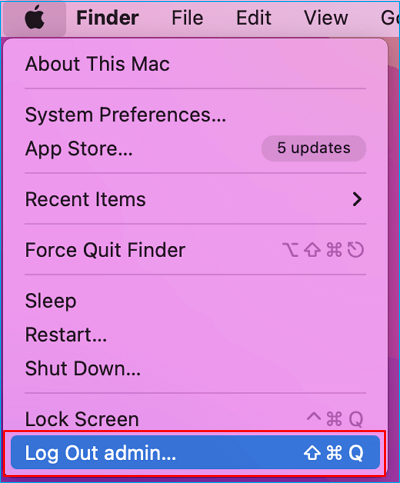
Step 2: Once the system is logged out correctly, click "Log In" and insert your Apple account credentials.
Step 3: Go to "Finder" and eject the external disk from Mac.
Shutting down the computer will help you deal with the disk not being ejected because the Finder is using it. You may also use the force quit Mac function to eject an external storage device successfully. In addition, we recommend you save files and end all the running programs. Here are the steps for easy "Shut Down" and "Force Quit" your computer.
Step 1: Click the Apple menu and hit "Shut Down" from the list. Instead of shutting down, you may click the "Force Quit" option for fast results.
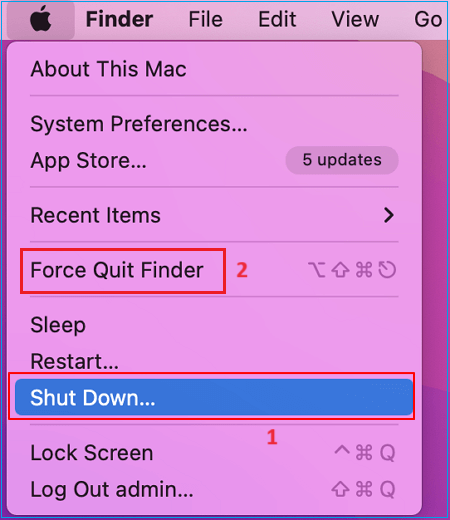
Note* Only unplug the external drive once the system is completely shut down.
Force eject the external drive using the Terminal utility should be your last option. This forceful ejection may cause potential data loss and disk corruption or may create bad sectors. Before starting the force ejection, please ensure you have made a secure backup and that no programs run in the background.
Note* Exicuting the terminal commands may be complicated for beginner Mac users. Please follow each step carefully. Go with these steps:
Step 1: Enter "Finder" and click "Applications."
Step 2: Select "Utilities" and open "Terminal" from the list.
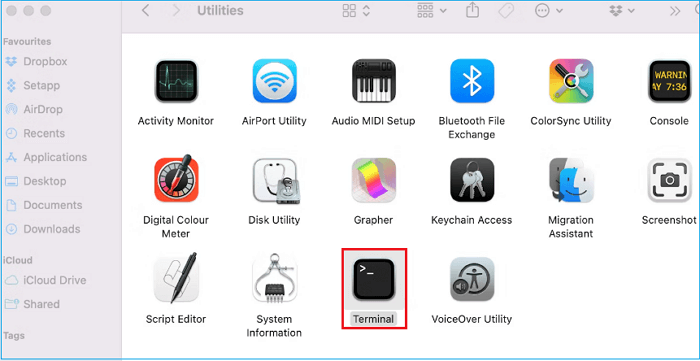
Step 3: Type/paste the following commands and hit "Enter" after each command.
Note* Replace the # with the correct number of your external disk. Check the disk number in the Finder.
Step 4: Wait till the process is over. Close the Terminal utility and eject the drive from your Mac.
This page thoroughly explained five solutions to fix the "the disk couldn't be ejected because the finder is using it" issue. Any Mac user can follow the instructions to deal with this annoying issue. Additionally, we recommend using EaseUS NTFS for Mac for an automated and quick solution. You will get performance, dependability, and convenience all in one package.
If you've additional questions about the topic discussed on the page, here are some quick FAQs to address your concerns:
1. Can I remove a hard drive without ejecting it?
Removing a hard drive without first properly ejecting it is not advised. The disk will need a proper ejection to ensure that any read/write operations are finished.
2. How can I stop the Finder action on a Mac?
Close any open Finder windows accessing the disk to stop Finder operations on a Mac. Restart your Mac and eject the disk if you're unsure which is using the drive in the background.
3. How do you eject a hard drive that won't eject on a Mac?
If a hard drive won't eject, try force quitting the running programs or tasks that might be using it, then attempt to eject it. If that doesn't work, log out and log in to your Mac again. It will allow you to unplug the disk safely.
Related Articles - ALSO ON EaseUS SOFTWARE
Solved: Can't Delete Photos From SD Card on Mac - 2023 New
![]() Sherly/2025-11-11
Sherly/2025-11-11
FAT32 Formatter Mac for USB | Top 3
![]() Cici/2025-07-07
Cici/2025-07-07
How to Mount BOOTCAMP NTFS Partition with Read-Write Access
![]() Sherly/2025-09-01
Sherly/2025-09-01
NTFS-3G for macOS Free Download and Install Tutorial
![]() Banu/2026-01-05
Banu/2026-01-05
Copyright © 2004 - 2023 EaseUS. All rights reserved.