Is your external hard drive showing the read-only restriction on Mac? To find out more about the reasons, causes, and solutions of the external drive, read-only Mac problem. Overviewing these solutions will help you make your external hard drive usable.
Table of Contents
Data storage has turned out to be a necessary provision that needs to be fulfilled at all costs. To ensure the operability of any process, having a proper storage space is necessary. Multiple hardware was introduced to cover the necessities of storage space. External hard drives were one of the many innovations made in the market.
While managing the data on your Mac, you might require an external hard drive. However, what if you face the issue of a "Read-only" drive on your Mac? The article has proper solutions for the external drive read-only Mac for such cases.
| Goal: | Fix external hard drive shows read only on Mac |
| Supported Devices: | External hard drives, external USB drives, SD cards, internal HDDs/SSDs, etc. |
| Compatible OS: | macOS 14.0 beta - 10.13 |
| Methods: |

On reporting such issues with your external hard drive, multiple possibilities arise against the problem. Although external hard drives are believed to be a source of data transmission and management, there are numerous things that you can't do when you are facing the external hard drive read-only Mac issue. For a better understanding, look into the things that you are restricted from doing under such a problem:
If you are experiencing similar issues on different brands of external disk drives on Mac, such as listed here, you can directly refer to the provided fixes below on this page for help now:
We will discuss resolving the external hard drive read-only Mac issue. Let's find out what can be done to resolve the problem with the external hard drive:
For the first remedy to this problem, it is best to change the USB port or reconnect the drive to the Mac. If it shows such an error, it can only be a glitch or a hardware fault in the Mac. Changing or reconnecting the drive can lead to a proper solution. You are not bound to incur any expensive costs to resolve the problem.
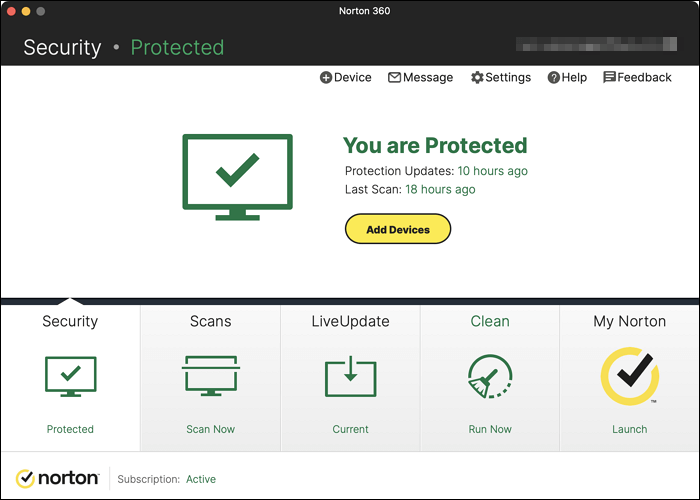
Since you seek to resolve the external drive read-only Mac issue on your device, you can try clearing out all the viruses and malware within the system. For that, downloading a suitable anti-virus is an important task to fulfill. This can help you resolve the critical errors caused by the virus and malware within your system or external hard drive. Bitdefender, Norton, or Avast can be some great options to consider.
Another appropriate solution to the read-only problem on your Mac is adding the option of NTFS read and write, which can be done with the help of a driver on your Mac. To cater to this requirement, you will need perfect software for its execution. As there is no direct option to this solution, tools like EaseUS NTFS for Mac provide the best platforms.
While you can find fully-compatible software in EaseUS NTFS for Mac, it supports the latest macOS and the Apple Silicon chip Macs. With its help, you can find complete read and write access to NTFS drives within your Mac. To know if it helps in exempting the external hard drive read-only Mac problem, find out its utility in the following steps:
Step 1. Launch and activate EaseUS NTFS for Mac. Click "I already have a license" to unlock this software.
Step 2. Connect an NTFS drive to Mac, EaseUS NTFS for Mac will automatically detect the device. Select your drive and you'll see it's now marked as 'Read-only". Click "Enable Writable" to add read and write rights to the drive.
Step 3. When the state of NTFS drives turns into "Writable".
Step 4. EaseUS NTFS for Mac will pops up a window to help Mac get access to the NTFS drive:
Step 5. When EaseUS NTFS for Mac restarts, you can then open to check, read, write, and even modify saved data on the NTFS device.
If this method successfully fixed your external hard drive from read only to readable and writable on Mac, feel free to share this article to help more of your friends online:
You can also provide permission to the external hard drive on your Mac, which is essentially a straightforward solution. If there are no prevalent problems with your hard drive, you can change them manually. To perform this process, look through the steps provided below:
Step 1: Open Finder by accessing it from the Dock of your Mac and continue to locate the external hard drive in the "Locations" section on the left panel of the new window.
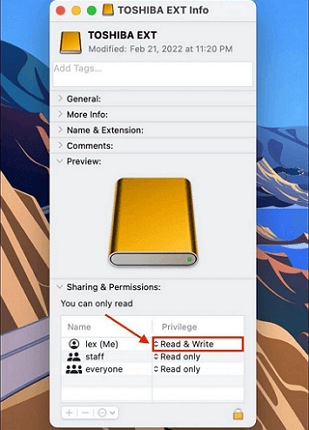
Step 2: Right-click on the external hard drive to select the "Get Info" option from the drop-down menu.

Step 3: Find the "Sharing & Permissions" option in the next window and expand its settings. Select your username in the "Privilege" section and tap "Read & Write" to change the permission settings.
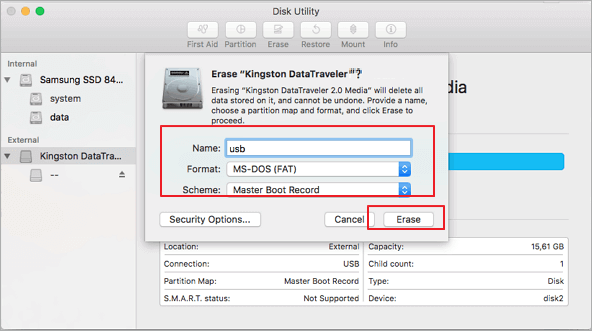
If your corrupted external hard drive has distinct permission, it can be resolved with proper formatting of the drive. You can efficiently use your Mac for this purpose and make your external hard drive usable. For that, follow the steps provided below to resolve the external drive read-only Mac issue:
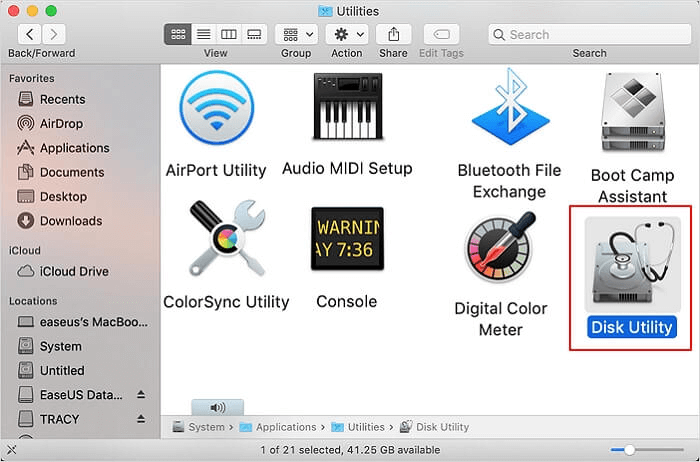
Step 1: Open Finder on your Mac and continue to the "Utilities" folder in the "Applications" section. Look for "Disk Utility" on the next screen and open it on a new window.
Step 2: Select the "View" button on the top and change the option to "Show All Devices." This will display your external hard drive in the left column as well.

Step 3: Select it and continue to the "Erase" button on the window's top menu. On selecting, set up a new name, select the "ExFAT" format, and define the "GUID Partition Map" as the Scheme. Click "Erase" to execute the process and format your external drive.
It is time to find out what causes the external hard drive read-only Mac issue. For that, this section lists down all the critical causes that direct to such a problem:
There is always a way to keep yourself safe from such issues in your external hard drive. To ensure that it works properly on your Mac whenever you attach it for your work, there are some tips that you can follow. Following these tips will help you protect your devices from external hard drive read-only Mac issues:
This article has provided a comprehensive overview of all the reasons, causes, and solutions related to the problem of external hard drives read-only Mac. To transfer data and files properly throughout the drive, it is essential to resolve such errors. However, in situations where the drive's file system is sustained within NTFS, you can consider using software like EaseUS NTFS for Mac for perfect results.
For more understanding, we have focused on some critical queries that need to be answered. Look through these frequently asked questions focusing on the external drive read-only Mac issue:
1. How do I unlock a USB drive that is read-only on Mac?
To unlock a USB drive not having permission on your Mac, you need to follow the steps provided below:
Step 1: Launch Finder and access your attached USB drive from the left panel of the new window. Right-click on it and select “Get Info.”
Step 2: Continue on the new window and expand the “Sharing & Permissions” option. You must select your name in the “Privilege” section and select “Read & Write” to change its settings.
2. What hard drive format types can I use on Mac?
You can consider using the APFS, FAT, and exFAT format types for your hard drive. These formats are supported on Mac devices.
3. What to do when I don't have permission to write to the external hard drive on Mac?
You can change the permission settings of your external hard on Mac by re-formatting the drive. Follow the steps to execute it in the following way:
Step 1: Open Finder and access the Utilities folder, and continue to look for "Disk Utility".
Step 2: As a new window opens, change the "View" option to "Show All Devices" from the top. Select your external hard drive from the left panel and tap the "Erase" button.
Step 3: Set up a name, select a format such as "exFAT", and set the scheme as "GUID Partition Map". On clicking "Erase", the drive formats.
Related Articles - ALSO ON EaseUS SOFTWARE
How to Format NTFS on Mac [2024 New Guide]
![]() Tracy King/2024-01-04
Tracy King/2024-01-04
Fix 'Can't Eject External Hard Drive' Error on Mac in 5 Practical Ways 2024
![]() Tracy King/2024-01-04
Tracy King/2024-01-04
Can Mac Use NTFS? 2024 Full Guide Here
![]() Cici/2024-02-26
Cici/2024-02-26
Explore External Hard Drive Read Only without Formatting
![]() Daisy/2023-12-19
Daisy/2023-12-19
Copyright © 2004 - 2023 EaseUS. All rights reserved.


