- Store
-
Support CenterGuides, License, ContactDownloadDownload installerChat SupportChat with a TechnicianPre-Sales InquiryChat with a Sales Rep
Formatting NTFS on Mac can sometimes be a difficult task for users. In this guide, we will easily and reliable ways in which you can format NTFS on Mac.
Table of Contents
As the NTFS file system isn't well known, you might be wondering, "What is the NTFS file system, and why would I use it?"
We'll explain what NTFS is, how to use it on your Mac, whether there is an NTFS Mac replacement, and the best ways to use the specialized filetype on your Mac in this article.
NTFS stands for NT File System. It was initially introduced in Windows NT version 3.1, serving as the operating system's default file system. The majority of the external drives are formatted to NTFS by default as Windows is more extensively used than macOS.
It is not possible to write Mac devices to NTFS natively because Apple has not licensed this proprietary file system. If you want to work with NTFS files, you'll need a third-party NTFS driver for Mac. You can read them on your Mac, but that is unlikely to meet your requirements.
Aside from reading, there are a few things you can do with NTFS files on your Mac. You can change the file type to something else, but this is a time-consuming process! Although this isn't always a good idea, you can also use Terminal to grant yourself NTFS writing permissions. Your best bet is to use third-party drivers and apps, which come in a variety of bundles.
Some drivers are rather expensive and can be compensated. Others provide free access to NTFS for Mac, but free isn't always the best option. There are a few native and third-party ways to work with NTFS on your Mac listed below.
Mac's built-in tools don't allow you to format an NTFS drive. Because you can choose third-party software. EaseUS NTFS for Mac can help you format NTFS drives to other target file formats with one click. It is easy to use and especially suitable for novice users. It makes the entire formatting process very easy and does not require too many steps to complete the formatting. Herein, I'll show you how to format an NTFS partition to APFS, and you can choose the target format you need:
Step 1. Download and install EaseUS NTFS for Mac on the Mac, click "I already have a license" and enter the code to unlock it.
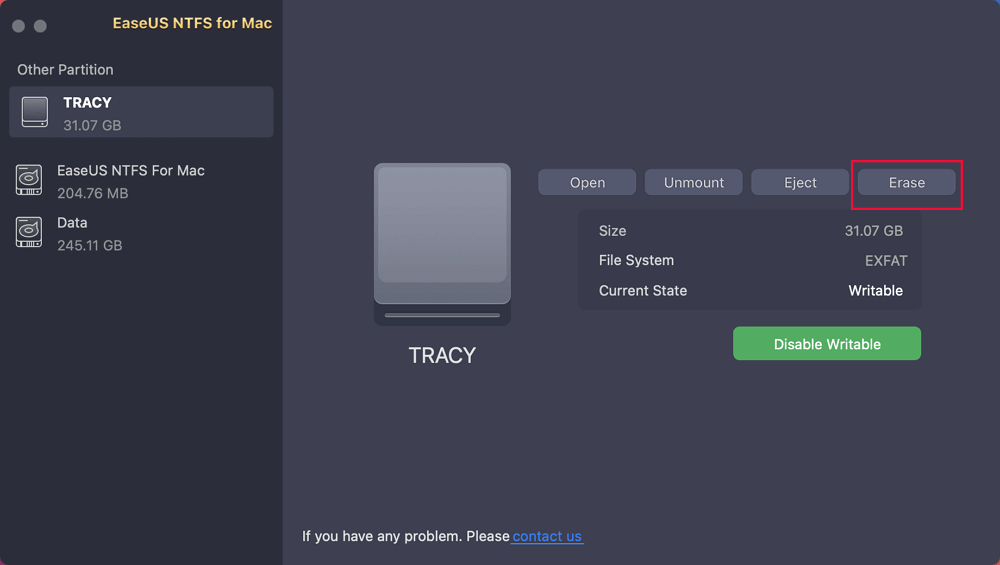
Step 2. Locate the external storage device you want to erase, and click "Erase" to continue.
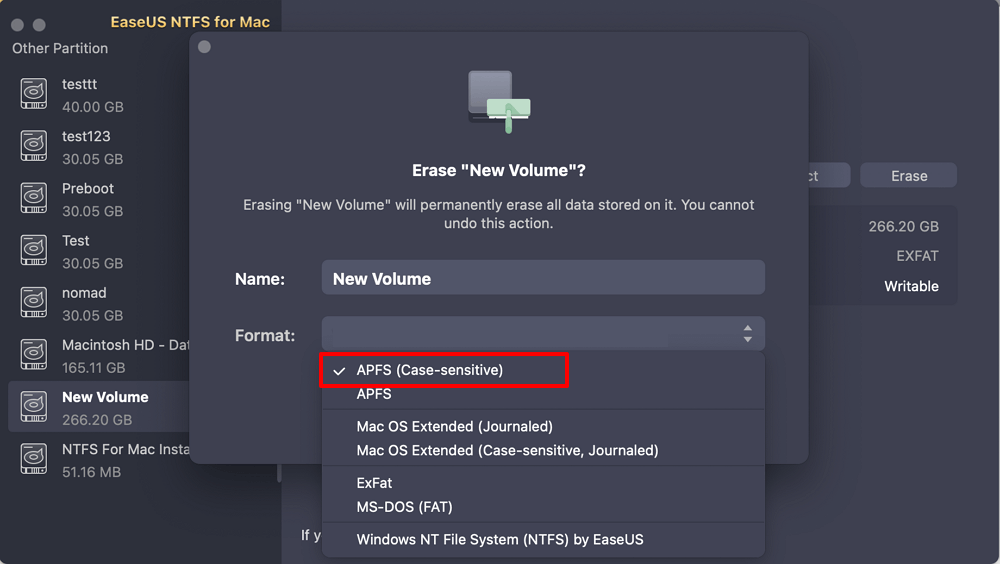
Step 3. Choose "APFS (Case-sensitive)" and set your disk as the target file system.
Step 4. Select "Erase" to format your disk and permanently erase the data on it.
Disk Utility doesn't support the NTFS file system. But it also comes with a formatting feature. If you want to know how to format a disc on a Mac, you can use the Disk Utility option. The approach outlined below will help you get your new equipment into working order. Continue reading to learn how to format Drive Mac.
The user will read and write to the disc by following these steps:
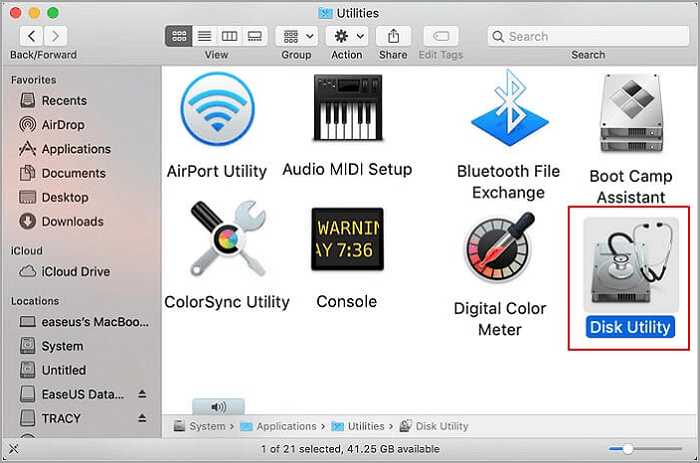
Step 1. Go to your Mac's Finder window and click on Applications on the left-hand side of the screen.
Step 2. Next, double-click the utility icon, which will appear on the screen alongside other programs you've installed.

Step 3. Select Disk Utility. Select the drive you want to format by selecting the NTFS 3G format from the list that appears. If you choose, you can also rename your drive.
Step 4. Select the drive you wish to format by clicking on it. You select the Erase icon in the center.
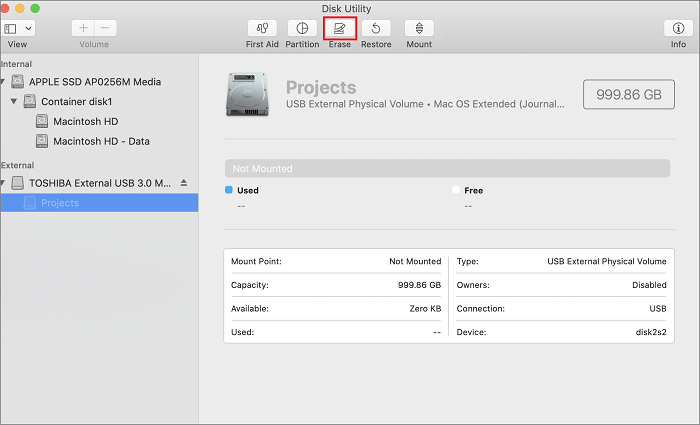
A dialogue box with around four commands will appear at the bottom. Choose which option you want to use to format your hard drive.
For someone who doesn't want to format NTFS drives and needs to directly access the drive data and files, you need another solution. It is to add read and write support to NTFS drives on Mac computers.
Here' we'll show you two solutions for help.
The second technique entails working more closely with your Mac computer and the software you already have, which is most likely macOS 11.0 Big Sur in this situation. You'll need to do some light coding for this strategy, detailed in the instructional part below.
The coding is incredibly simple, and even people who have never coded before can do it!
To allow Mac NTFS writing discs in Terminal, follow these steps:
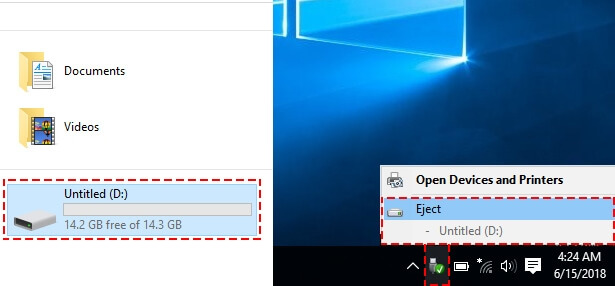
1. On Windows, you must first eject the USB drive.
2. Create a one-word name for the NTFS drive you want to utilize.
3. Press Command and the Space Bar at the same time to open a Terminal. Enter "Terminal" into the search box. You can also go to Terminal by navigating to Applications, Utilities, and then Terminal.
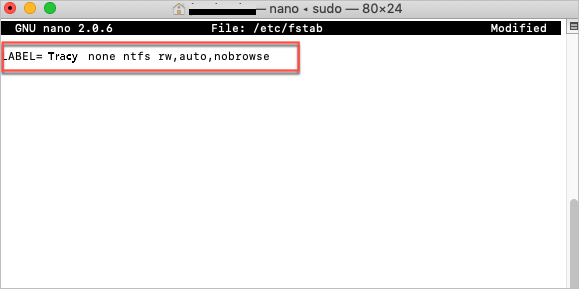
4. Enter the following command in Terminal: sudo nano /etc/fstab

Then, in Terminal, type "LABEL=NAME none NTFS rw,auto,nobrowse," replacing "NAME" with the name of your USB flash drive and "NTFS" with the NTFS drive you want to utilize. In this case, the file name will be "Data." The coding is shown below.
To save this new file, choose the Control key and the letter "O" key, press "Enter," and then shut the GNU using the Control key and the letter "X" key.
5. Reconnect the flash drive to the USB flash drive port after unplugging it.
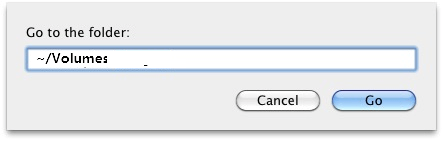
6. To view the files and the drive, navigate to the folder tab after clicking "Go." In the search box, type "/Volumes." You should now access the NTFS files on the drive and change or utilize them as you see fit.
To undo or delete whatever changes you've made, launch the nano editor using the same technique described above and delete the lines of code you've entered. This way of undoing the activities may or may not be effective. It depends on the possibility that the code had not been fully logged in or saved.
If you're lucky, it'll remove itself, undoing any code you've done previously.
EaseUS NTFS for Mac makes everything easy for Mac users for reading and writing to an NTFS drive on macOS Big Sur or Catalina. It allows you simply click the Enable Writable button to get everything done.
Step 1. Launch and activate EaseUS NTFS for Mac. Click "I already have a license" to unlock this software.
Step 2. Connect an NTFS drive to Mac, EaseUS NTFS for Mac will automatically detect the device. Select your drive and you'll see it's now marked as 'Read-only". Click "Enable Writable" to add read and write rights to the drive.
Step 3. When the state of NTFS drives turns into "Writable".
Step 4. EaseUS NTFS for Mac will pops up a window to help Mac get access to the NTFS drive:
Step 5. When EaseUS NTFS for Mac restarts, you can then open to check, read, write, and even modify saved data on the NTFS device.
Some of the primary features of EaseUS NTFS for Mac are as follows:
Related Articles - ALSO ON EaseUS SOFTWARE
WD NTFS Driver for Mac (Download the Free Software)
![]() Banu/2025-06-26
Banu/2025-06-26
Erase Button Greyed Out Mac Disk Utility | How to Fix
![]() Sherly/2025-06-26
Sherly/2025-06-26
How to Format FAT32 to NTFS on Mac
![]() Banu/2025-06-26
Banu/2025-06-26
What Is Paragon NTFS for Mac, Pros & Cons, Everything You Should Know
![]() Banu/2025-11-11
Banu/2025-11-11
Copyright © 2004 - 2023 EaseUS. All rights reserved.