- Store
-
Support CenterGuides, License, ContactDownloadDownload installerChat SupportChat with a TechnicianPre-Sales InquiryChat with a Sales Rep
Is your WD My Passport external hard drive showing Read-only on Mac? How do you change the WD My Passport from read-only to accessible on Mac? Follow this page, you'll get a full guide to fix this issue, making the drive readable and writable again.
Table of Contents
According to many Mac and hard drive users, the external hard drive or USB read-only is a common issue that may happen anytime. The causes of this issue are various and the solutions to fix this issue are also different.
On this page, we'll take WD My Passport read-only on Mac issue as an example to show you how to get rid of this error and change WD My Passport drive from read-only to accessible on Mac successfully. Let's get started.
| Workable Solutions | Step-by-step Troubleshooting |
|---|---|
| 1. Run First Aid or Format WD Passport | Connect the WD My Passport drive to Mac...Full steps |
| 2. Ignore Permissions on Mac |
Connect WD My Passport disk to Mac >Right-click the drive and select "Get Info"...Full steps |
| 3. Enable NTFS WD My Passport Readable and Writable | Launch EaseUS NTFS for Mac > Click "I already have a license" to unlock this software...Full steps |
"When I connected my WD Drive to my MacBook air, it goes mounted fine, I can open files and copy the data. But I'm unable to delete data or rename folders. The status is read-only on the WD drive. How do I change it?"
"I safely eject my WD My Passport external hard drive from Windows and connect it to Mac. It won't open. I check its state, showing as read-only. How do I change WD My Passport from Read-Only on Mac?"
According to most Mac users, they would commonly come across the above two example cases with read-only errors in their storage devices. How do I fix it? Follow the full guide below, you'll get a complete guide to getting rid of read-only issues from your WD My Passport, Seagate, Toshiba, etc., storage devices successfully.
To get rid of this error, you need to follow our self-reliance guide here to check the state, trying to figure out the real reason why is WD My Passport showing read-only on Mac:
Step 1. Connect your WD Passport disk to your Mac computer.
Step 2. Try to open the WD My Passport drive and see if Mac pops up warning notes.
In a word, WD My Passport read-only error could be caused by these reasons on Mac:
Follow the respective method with a full tutorial guide, you can address the drive read-only issue from your storage devices on Mac successfully.
When the WD My Passport contains an internal or formatting error, you can run First Aid first. Then, try to format the drive.
#1. Run First Aid in Disk Utility
Step 1. Keep the WD My Passport drive connected to Mac.
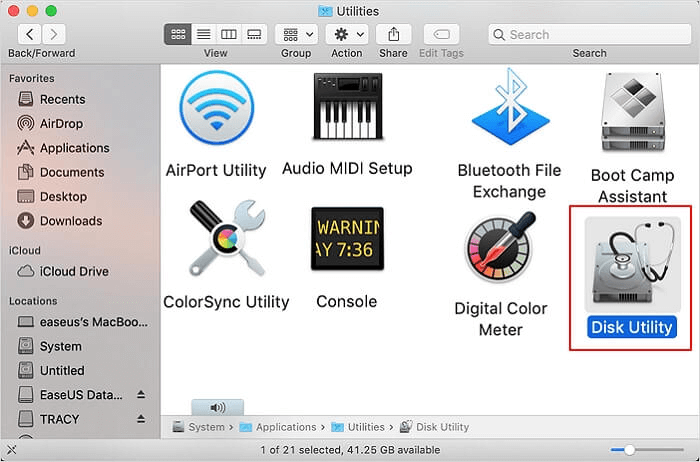
Step 2. Open Disk Utility by going to Applications > Utilities > Find and double-click "Disk Utility".
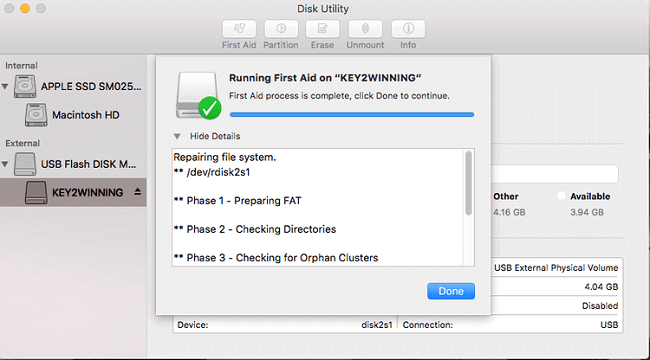
Step 3. Select the WD drive, and click "First Aid" at the top pane > Click "Run" > Click "Done".
Now, you can check if you can access and open the WD drive on Mac. If it is still inaccessible, continue the next guide here to format the drive.
#2. Format WD Drive with Disk Utility
As for formatting an external hard drive on Mac will erase the data, so make sure that you've scanned and restored essential files in advance.
Here are the steps that you can follow to format WD drive:
Step 1. Connect WD My Passport drive to Mac.
Step 2. Press the Command + Space key and type Disk Utility in Spotlight, hit Return.
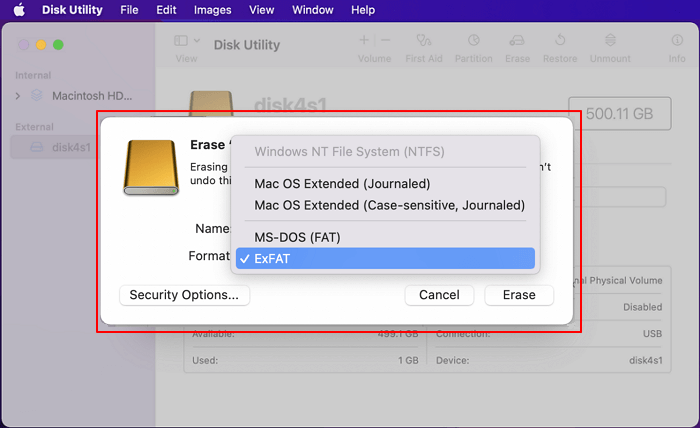
Step 3. Select the WD drive in Disk Utility, and click "Erase" at the top pane.
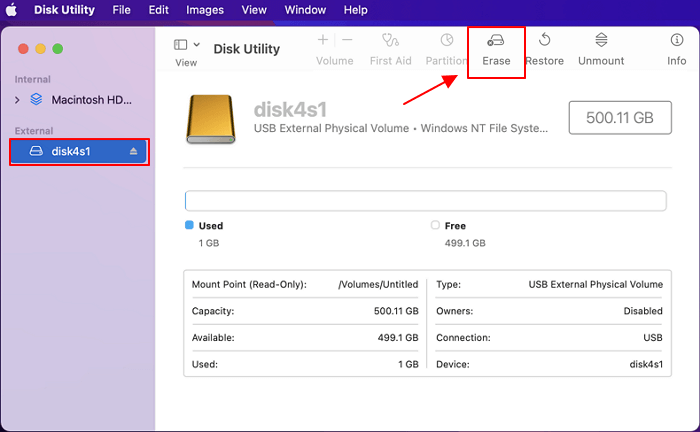
Step 4. Set a macOS-supported format to the drive, and click "Erase" to confirm the formatting.
Step 5. Click "Done" when the formatting process completes.
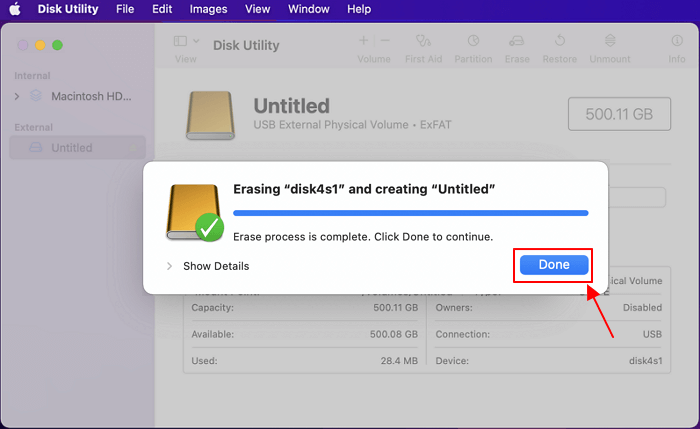
Now, you are good to visit the drive, using it for data storage flexibly on Mac.
When you set permission limits to an external disk or important drive, like a data backup disk, Mac will automatically block you from direct access to the drive. You'll need to change the permission settings to make the drive readable and writable again.
Here are the steps:
Step 1. Connect the WD My Passport external disk to Mac.
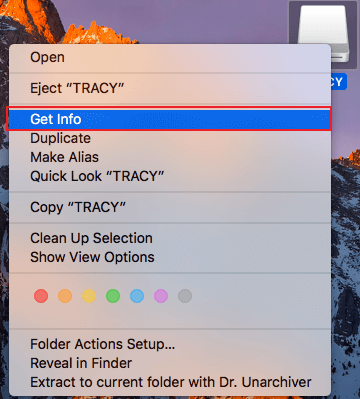
Step 2. Right-click on the WD drive and select "Get Info".
Step 3. Expand "Share & Permission" setting > Click the lock to authenticate > Tick "Ignore ownership on this volume".
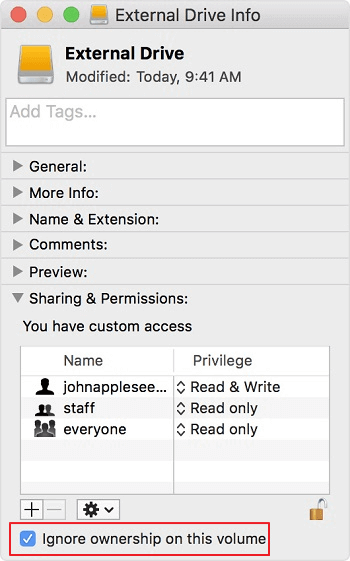
Now, you are good to go and visit the content in your WD My Passport drive on Mac computers.
When a WD My Passport drive is with an NTFS file system, Mac couldn't directly access the content. By default, the drive will show as read-only on Mac. To fix this issue, you'll need an NTFS for Mac software to help you get full control of this formatted drive.
EaseUS NTFS for Mac with its simple featured tip - Enable Writable can simply execute the operation for you in just 1 click. What's more, it's 100% free in 7 days.
Let's see the details:
Step 1. Launch and activate EaseUS NTFS for Mac. Click "I already have a license" to unlock this software.
Step 2. Connect an NTFS drive to Mac, EaseUS NTFS for Mac will automatically detect the device. Select your drive and you'll see it's now marked as 'Read-only". Click "Enable Writable" to add read and write rights to the drive.
Step 3. When the state of NTFS drives turns into "Writable".
Step 4. EaseUS NTFS for Mac will pops up a window to help Mac get access to the NTFS drive:
Step 5. When EaseUS NTFS for Mac restarts, you can then open to check, read, write, and even modify saved data on the NTFS device.
After this, you can get access to your WD drive with NTFS format on Mac. Reading, writing, renaming files, or even deleting files are all possible.
When your WD My Passport hard drive or other brands of drives is showing read-only on Mac, first, you need to stay calm.
To get rid of this issue, you should first try to figure out the symptom or possible reason that caused this issue.
Then, you can follow the respective solutions on this page to fix the error successfully.
Related Articles - ALSO ON EaseUS SOFTWARE
Full Guide to Permanently Delete Files from NTFS Drive on Mac 🎈
![]() Banu/2025-06-26
Banu/2025-06-26
Don't Have Permission to Write to External Hard Drive on Mac? Get Your Complete Guide
![]() Banu/2025-11-10
Banu/2025-11-10
How to Fix Lacie Read-Only Mac (Two Easy Ways)
![]() Banu/2025-06-26
Banu/2025-06-26
Can't Delete Folders/Files from External Hard Drive on Mac [Fixed]
![]() Banu/2025-11-11
Banu/2025-11-11
Copyright © 2004 - 2023 EaseUS. All rights reserved.


