- Store
-
Support CenterGuides, License, ContactDownloadDownload installerChat SupportChat with a TechnicianPre-Sales InquiryChat with a Sales Rep
Do you know that Mac computers can only partially read or support Microsoft NTFS drives? Follow this page to learn how to read NTFS on Mac on your own with 3 free solutions. Let's check.
Table of Contents
Are you looking for a method to access and read NTFS on Mac? This page will show you the complete process of how to read NTFS and work with Windows NTFS drives on Mac successfully. Let's start.
Yes, to make use of Windows NTFS drive files on a Mac computer, you'll first read files on an NTFS drive. Then gain write access to the drive.
The reason why you can't directly read and write an NTFS drive on a Mac computer is that Apple developed its unique file system formats for storage devices. As a result, NTFS is not officially supported by macOS and Mac OS X.
So can macOS read NTFS and work with NTFS formatted external hard drives or USB drives? Sure! Follow these solutions in the following, you'll get the NTFS drive readable and writable on Mac for free.
Can you change the read-only state NTFS disk to readable and writable on Mac? Here we collected 3 free solutions that you can follow to enable your Mac to read files from NTFS drives with ease.
3 Ways to Read NTFS on Mac:
| Solution | Detailed Steps |
|---|---|
| Fix 1. EaseUS NTFS for Mac - Easiest | Download and install EaseUS NTS for Mac...Full steps |
| Fix 2. Terminal Command - Medium | Press Command + Space to open Spotlight...Full steps |
| Fix 3. FUSE of macOS - Risky | Open Terminal to download FUSE of macOS...Full steps |
Quick Guide: For the easiest solution to read NTFS on Mac, take EaseUS NTFS for Mac in Method for help.
1-Click Solution for Adding Mac
Unlike NTFS for Mac driver software, third-party NFTS read and write access tool - EaseUS NTFS for Mac doesn't require adding extra drivers to Mac and reboot Mac computers.
It's fully compatible with all macOS and Mac OS X, like Monterey, Catalina, Big Sur, etc. You can also use it on the latest new M1 Mac computers. What's more, it's also free within 7 days after registration.
You can simply make the drive readable and even writable on Mac within 1 click. Let's see the details:
#1. 1-Click to Open and Read NTFS Drive Content
Step 1. Launch EaseUS NTFS for Mac and click "I already have a license" to activate it.
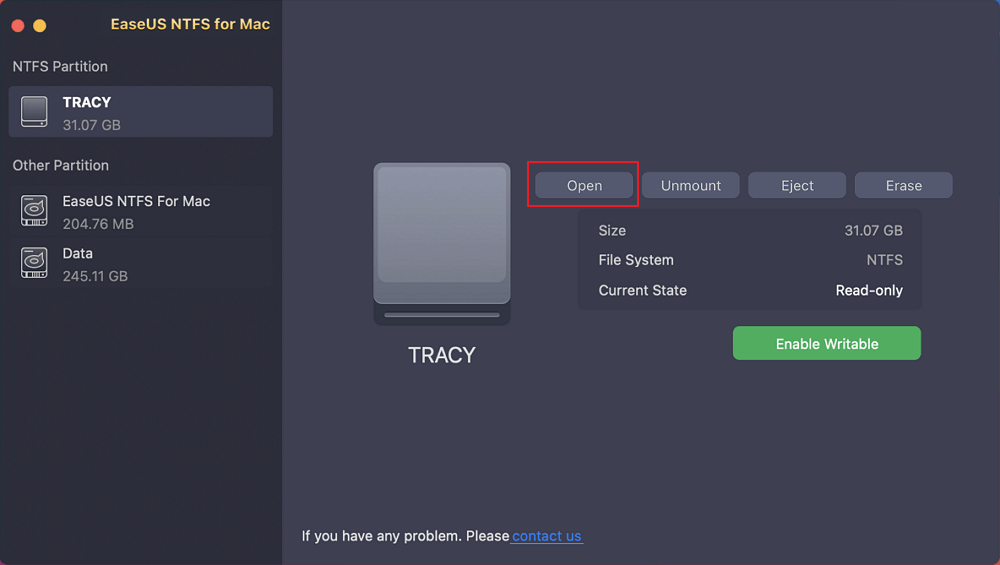
Step 2. Connect your NTFS drive to Mac, EaseUS NTFS for Mac will automatically detect and display the device. Click "Open" to open it on Mac.
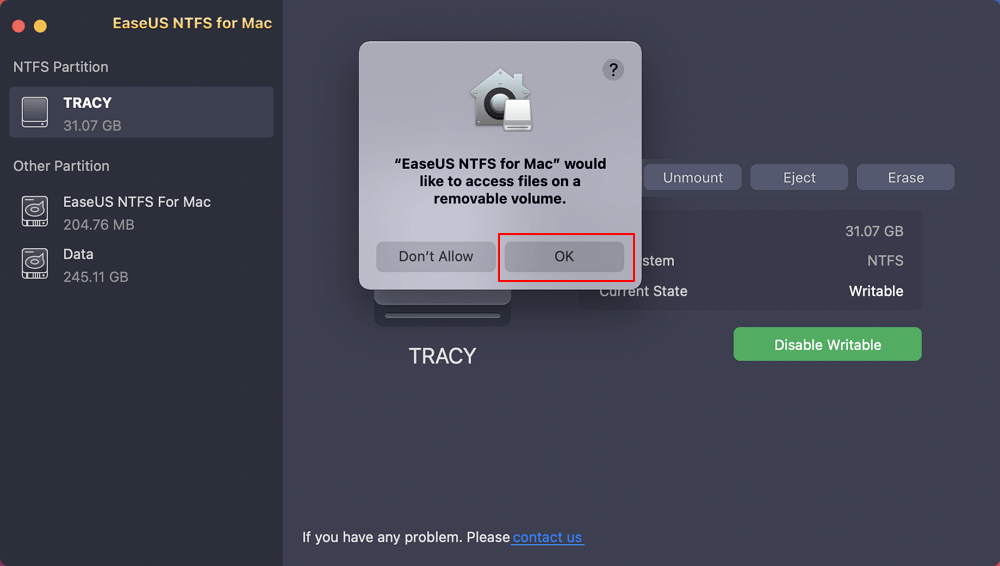
Step 3. Click "OK" to allow NTFS for Mac to access and open NTFS drive on Mac computer.
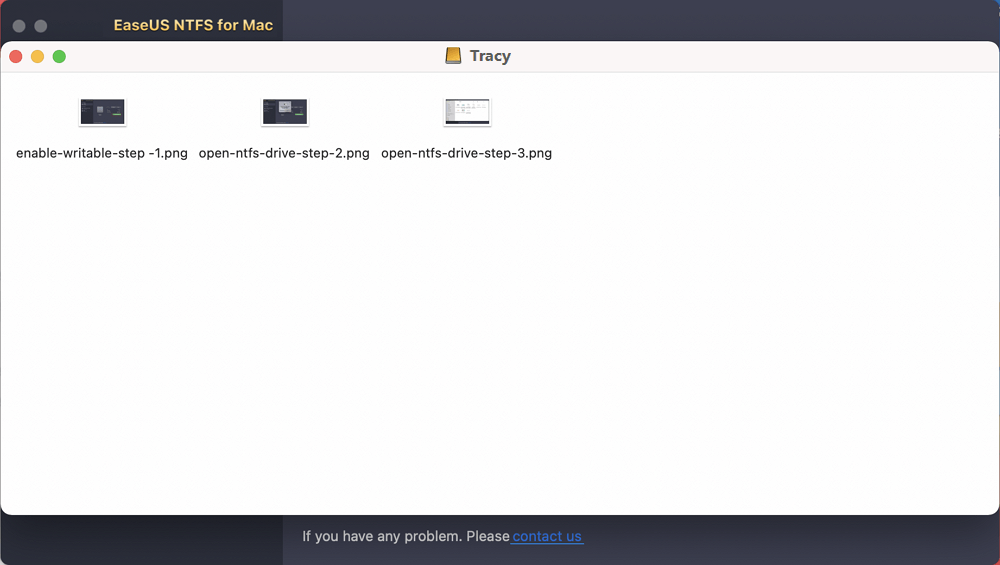
Step 4. Now, you can view and check saved files in the NTFS drive on Mac.
#2. 1-Click to Make NTFS Drive Writable on Mac
Step 1. Launch and activate EaseUS NTFS for Mac. Click "I already have a license" to unlock this software.
Step 2. Connect an NTFS drive to Mac, EaseUS NTFS for Mac will automatically detect the device. Select your drive and you'll see it's now marked as 'Read-only". Click "Enable Writable" to add read and write rights to the drive.
Step 3. When the state of NTFS drives turns into "Writable".
Step 4. EaseUS NTFS for Mac will pops up a window to help Mac get access to the NTFS drive:
Step 5. When EaseUS NTFS for Mac restarts, you can then open to check, read, write, and even modify saved data on the NTFS device.
Aside from making external NTFS drive readable and writable on a Mac computer, EaseUS NTFS for Mac also enables you to directly:
Medium Complex Solution to Add Read Access to NTFS Drive
The terminal is a free and macOS built-in solution that enables most Mac users to make their NTFS drives readable on Mac computers. It's a medium yet bit complex method that requires users to be extremely careful with following this method to add read right to their NTFS drives.
Follow the guide here to make the NTFS drive readable now:
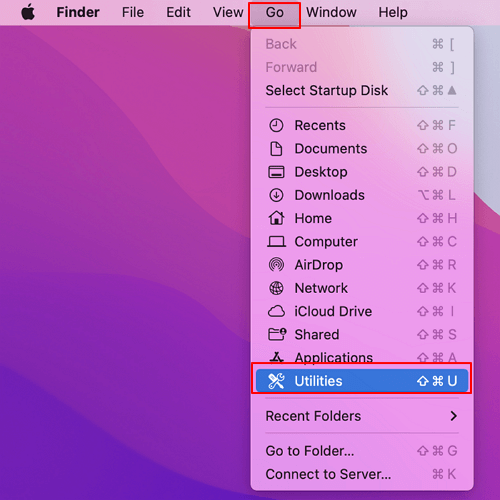
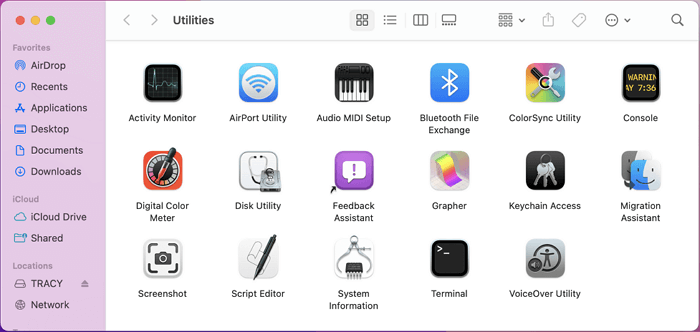
Step 1. Connect the external hard drive to the Mac computer, click "Go" > "Utilities".
Step 2. Double-click to launch "Terminal" from the Utilities folder.
Step 3. Type sudo nano /etc/fstab and press Return.
This requires you to enter your Apple password.

Step 4. Next, type LABEL=NAME none ntfs rw, auto, nobrowse, and press Return.
Replace NAME with the name of your NTFS drive.
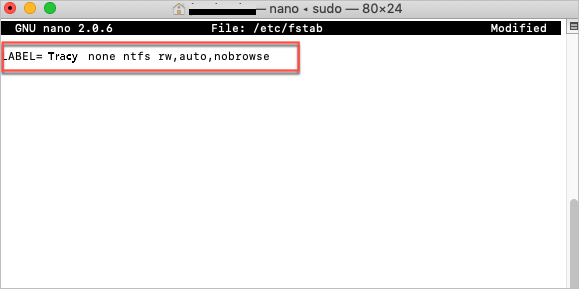
Step 5. Press Ctrl + O, and Press Ctrl + X, to save and exit Terminal.
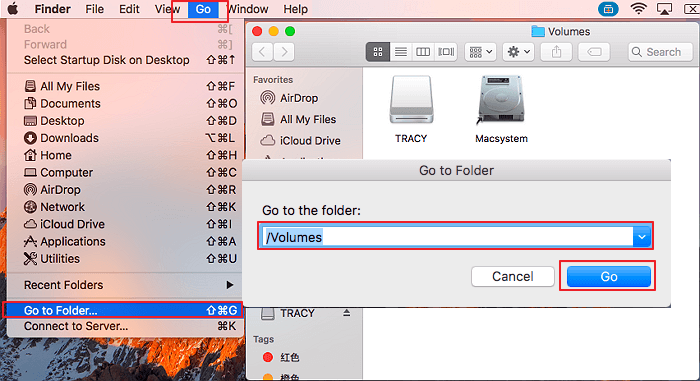
Step 6. Now open and read content in your NTFS drive by following:
Go > Go to Folder > Type "/Volumes" and click "Go" > Click to open your NTFS Drive and view its content.
Workable But Risky Solution
According to some Mac administrators, they don't suggest that all Mac users try this solution as it's risky somehow on some old Mac OS X computers. Some Mac users reported that this method brought a security risk by adding NTFS drivers to Mac computers so to access the NTFS Drive.
For a risk-free solution, take EaseUS NTFS for Mac help as recommended in Method 1. Also, be sure that you'll follow the tutorials here carefully to make the NTFS drive readable on Mac:
Step 1. Install FUSE for macOS:
Download FUSE for macOS and install on Mac: https://github.com/osxfuse/osxfuse/releases
Step 2. Install Xcode:
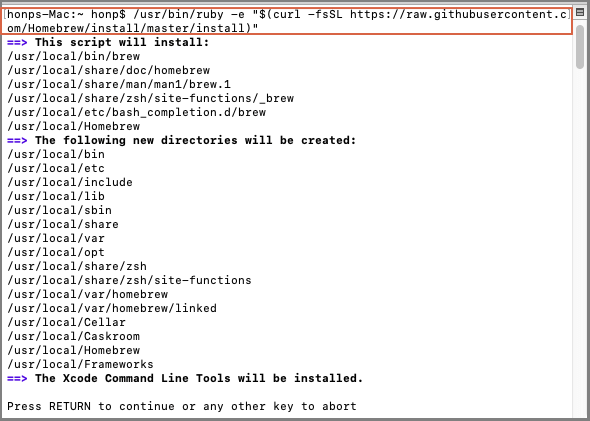
Step 3. Install Homebrew:
Step 4. Install NTFS-3g:
Type: brew install ntfs-3g in Terminal and press Return.
Step 5. Mount NTFS drive on Mac with the two command lines:
Press Return each time.
Step 6. Unmount and remount NTFS drive to make it readable on Mac:
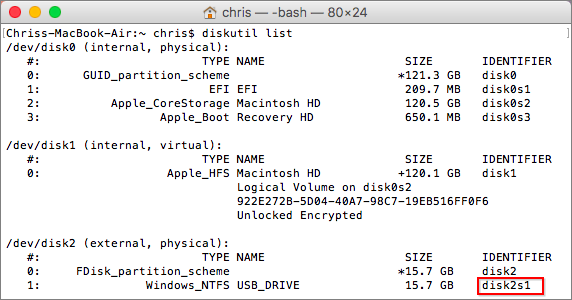
Type the next two command lines in Terminal and press Return each time:
Replace disk2s1 with the drive number of your external disk.

Wait for the operation to complete, then you could be able to view and read the content saved inside the NTFS drive on a Mac computer.
Due to macOS and Mac OS X limits, we've known that Method 2 and Method 3 could cause some unknown security issues on your Mac computer.
Among these 3 methods above, EaseUS NTFS for Mac is the only risk-free solution that all macOS and Mac OS X computer users can make the drive work on Mac computer without any accessing issues.
Full Guide of Using EaseUS NTFS for Mac:
Related Articles - ALSO ON EaseUS SOFTWARE
How to Fix SD Card Read-Only Mac | 2026 Step-by-Step
![]() Cici/2026-01-05
Cici/2026-01-05
Erase Button Greyed Out Mac Disk Utility | How to Fix
![]() Sherly/2025-06-26
Sherly/2025-06-26
(Solved!) Samsung Portable SSD Not Detected Mac
![]() Oliver/2025-06-26
Oliver/2025-06-26
WD Exteranl Hard Drive Shows Read Only on Mac? Why and How to Fix It
![]() Banu/2026-01-05
Banu/2026-01-05
Copyright © 2004 - 2023 EaseUS. All rights reserved.