- Store
-
Support CenterGuides, License, ContactDownloadDownload installerChat SupportChat with a TechnicianPre-Sales InquiryChat with a Sales Rep
Resolve your WD Elements not showing up Mac error with this guide. Here are 8 easy methods for troubleshooting and fixing connectivity problems on your Mac.
Table of Contents
Storing personal photos or important files securely can be a tricky task. A huge amount of data can be dealt with without making your device run out of storage. And here is where external hard drives like WD Elements come in handy. With a portable design and fast performance, they are popular among consumers.
However, even with its excellent functions and specifications, sometimes you might encounter issues like WD Elements not showing up on Mac. If you are in such a situation, follow this guide for step-by-step solutions and have a seamless experience next time.
The simple solution is to find the source of the issue and work it out from there. But before that, let us first understand how to fix it. The following are some of the solutions that will help you solve this issue effectively, and these methods are also suitable for other WD hard drive issues, such as WD My Passport Not Showing on Mac.
On the other hand, if you continue to face a similar problem even after the fixes mentioned below, check it with a professional repair service.
One of the common reasons could be that your USB port or cable might be damaged. In the case of your USB port, first try connecting it with another port. Even after this, try resetting the port if the WD Elements are not showing up on Mac.
To reset the USB Port, you can either click on the Restart button or try to reboot your Mac. You can also use an app like Terminal to skip the whole restarting process. For that, follow the steps below:
Step 1. Open the Terminal app by pressing Command + Space Bar and searching 'Terminal.'

Step 2. Once the Terminal window opens, type in the command: sudo kextunload IOUSBMassStorageClass.kext, and press Enter.
Step 3. You will be asked to type in the admin password and press Enter again, and you should have reset the USB ports.
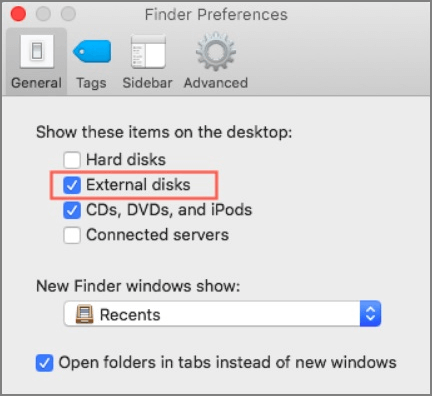
Sometimes, the WD Elements might be hidden due to settings on Finder. Change this, and you will be good to go.
Step 1. On your Mac, click on Finder and select Preferences.
Step 2. On the General tab, select External disks from the items shown on the desktop. This will help you to find the WD external hard drive from your desktop.
NTFS is a file format for HDD, SDD, or flash drives. However, it isn't generally supported on Mac. You can check if the WD hard drive is mounted with NTFS. Mounting means making your drive visible on both the Finder and desktop to access it. You can check this by opening the Disk Utility and checking whether WD Elements is listed within the options.
If your drive isn't visible, then you need to mount your drive on your Mac. To do so, download a tool called EaseUS NTFS For Mac and use the Mount NTFS feature. Just follow the steps below, and you'll be able to use your drive again:
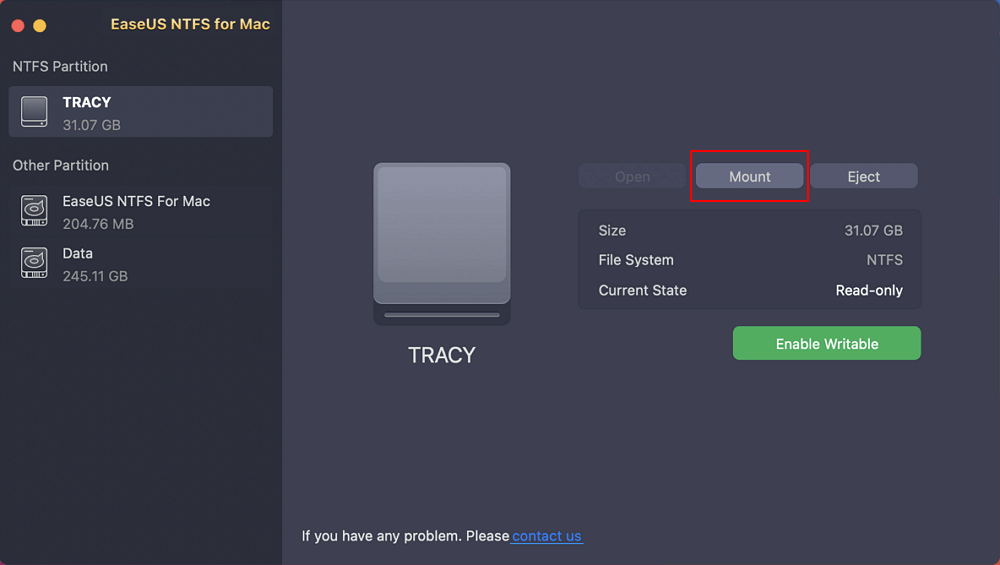
Step 1. Launch EaseUS NTFS for Mac on Mac computer, and click "I already have a license" to enter your code for unlocking the software.
Step 2. Connect your NTFS external storage device to Mac, and let EaseUS NTFS for Mac to detect it. Once it detects your drive, select the drive and click "Mount".
After this, EaseUS NTFS for Mac will mount this drive on Mac and you shall be able to open and view its content.
Another solution is to reformat the WD Elements hard drive. You can use EaseUS NTFS for Mac again. Along with many useful features, it also lets you reformat your hard drive easily.
It also helps you read, write, mount, and unmount NTFS drives on Macs. EaseUs NTFS for Mac has a simple interface, and you can format your drive just by installing it on your Mac and using the Format tool.
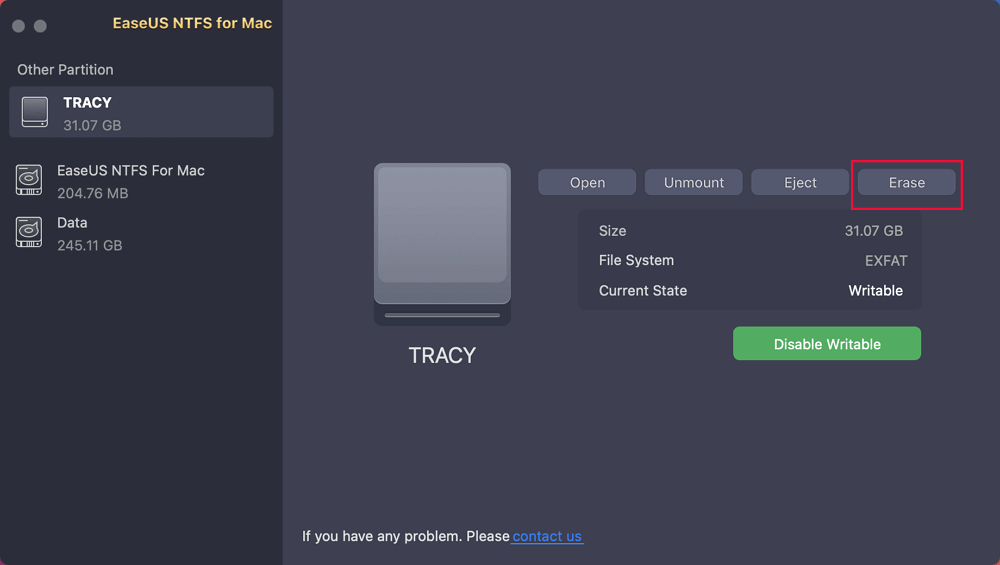
Step 1. Launch EaseUS NTFS for Mac on your Mac, click "I already have a license" and enter your code to activate this software.
Step 2. Connect the target external hard disk to your Mac, locate it and choose "Erase" to move on.
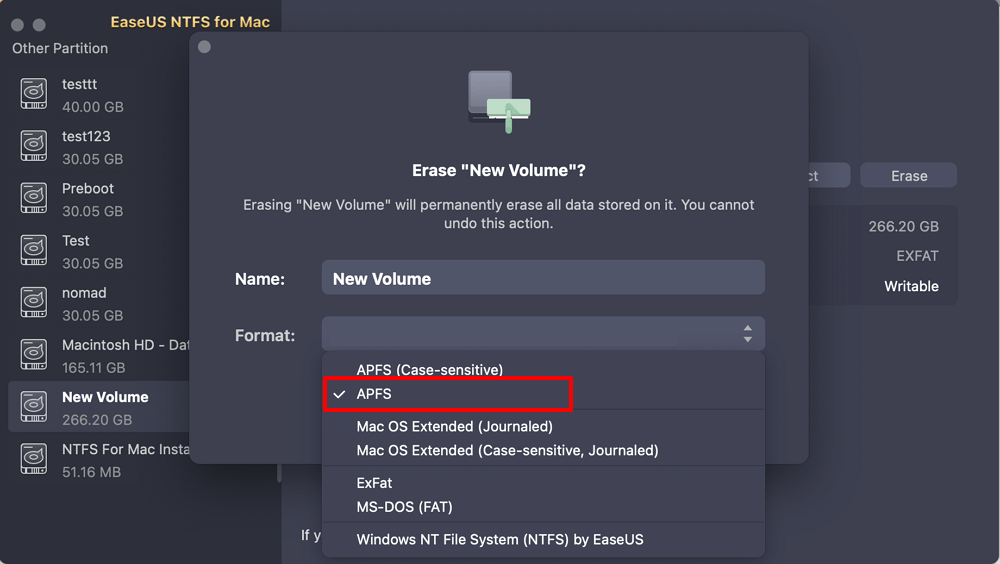
Step 3. In the Format box, select the "APFS" option in the scroll down menu as the new file system.
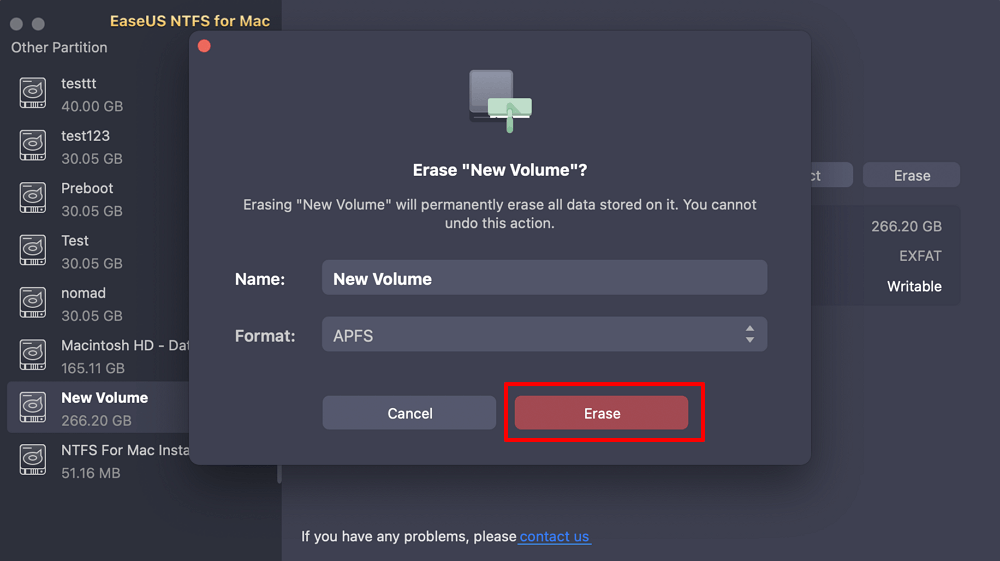
Step 4. Hit on the "Erase" button to confirm the format action and erase all data stored on this external storage device.
Mounting your external hard drive is necessary to make it compatible with your operating system. To do this, you have to use the Disk Utility tool. Here's how to do this:
Step 1. From the search bar, click on Applications and select Utilities.
Step 2. Click on View from Disk Utility and select Show All Devices from the left side.
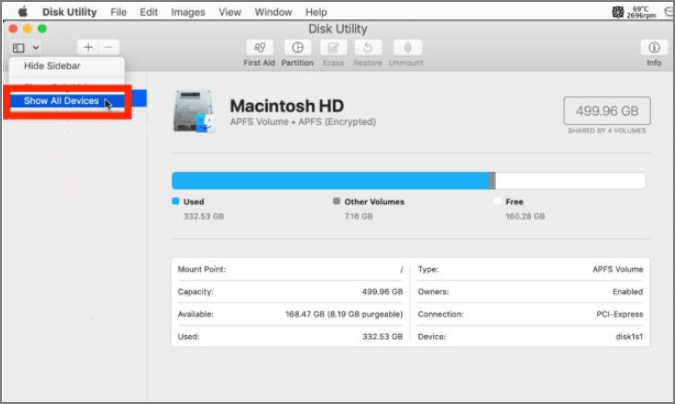
Step 3. This will show the list of the available options. Select the WD external hard drive and click on Mount. And that's it.
If your external hard drives get damaged or corrupted by any means, it can be rectified by in-built tools on your Mac. One such tool is First Aid, which can help you understand the problem with your WD hard drive. Here are the steps that you can follow:
Step 1. From Disk Utility, select WD external hard drive.
Step 2. On top, you can find the First Aid button. Click on the button, and a dialogue box should appear.
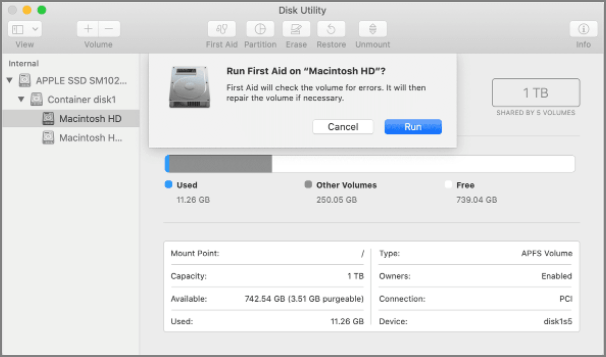
Step 3. Select the option Run to identify and fix all the issues regarding your external hard drive.
The problem of WD Elements not showing up on Mac can also be eliminated by updating your hard drive regularly. This can be done in a few simple steps as follows:
Step 1. On your browser, go to the Western Digital website.
Step 2. From the top panel, select Support and then Downloads. Now, scroll below and download the available updated drivers for Mac.

This will also protect your device and help to solve most bugs and issues of your hard disk drive.
If neither of the above options works, you can try resetting your device's System Management Controller (SMC). If the issue is due to SMC, it could slow down your system and not show your WD drive on your Mac. Here is what you can do to rectify this issue:
Method 1. Quick Reset
Step 1. Press and hold the Power button and wait for a few seconds. Your Mac should restart, and the SMC will be reset.
Method 2. Hard Reset SMC
Step 1. If the first method doesn't work, power off the device again. Press the Shift, Alt, and Control keys and hold for a few seconds.
Step 2. Now, press the Power button and hold it for a few seconds. Hold all four keys together for a few seconds and then restart the device.
The common reasons discussed in the above session are the cause for WD elements not being visible on your Mac. That said, here is a summary of those problems and the helpful solutions for the same:
| Reasons | Descriptions | Solutions |
|---|---|---|
| Physical Connection | Error with the USB port or cable | |
| Permissions | Your OS is hiding the drive due to some permission issues | |
| Compatibility Issues | NTFS formatted drives are not automatically shown on Macs | |
| Corrupted Drive | Your drive might be corrupted and may need a quick format | |
| Drive Not Mounted | The WD Elements drive might not have been mounted properly | |
| Operating System Error | You might face some random bugs or OS issues |
Follow and try the simple steps for each solution and get a better experience with a WD hard drive while using a Mac. Share this guide with your friends and family so they won't face a similar issue.
Facing a technical issue is often time-consuming and frustrating. However, following a few simple steps, you can tackle the issue of WD Elements not showing up on Mac.
Using tools such as EaseUs NTFS for Mac can also greatly help you. The quickest solution is to mount your drive and restart your Mac.
Here are some recurring questions users have on the same topic. If you still have any other doubts, refer below for further clarity.
1. How do I find my WD external hard drive on my Mac?
You can try any of the following methods discussed in this guide for solving this issue.
2. Why is my WD element not detected on my Mac?
This could be due to problems such as damaged drives, incorrect formats, operating systems, or file system errors.
3. How do you fix the WD hard drive not showing up in Disk Utility?
On the Disk Utility, select the Show All Devices option from the View tab to make the WD hard drive visible. For more ways, follow the tutorial.
Related Articles - ALSO ON EaseUS SOFTWARE
Sabrent External Hard Drive Not Recognized Mac | 5 Solutions
![]() Oliver/2025-09-01
Oliver/2025-09-01
Can A Mac Read NTFS | Can Mac Read and Write NTFS (2026 Fixed)
![]() Banu/2026-01-05
Banu/2026-01-05
How to Force Erase Disk Mac Terminal [Quick Guide]
![]() Cici/2025-11-11
Cici/2025-11-11
How to Delete Files from Seagate Exteranl Hard Drive Mac & Windows [2026 Guide]
![]() Banu/2026-01-05
Banu/2026-01-05
Copyright © 2004 - 2023 EaseUS. All rights reserved.