- Products
- Store
- Partner
-
Support
Support CenterGuides, License, ContactDownloadDownload installerChat SupportChat with a TechnicianPre-Sales InquiryChat with a Sales Rep
Table of Contents
When you switch from Windows to Mac, accessing a storage device that was earlier used on Windows is often problematic. This is because Windows supports NTFS file systems, which aren't accessible on Mac. You would have failed to attempt to access your storage devices containing the NTFS drive. Are you searching for how to read/write an NTFS drive on macOS Ventura? In this article, EaseUS provides four solutions for you. Let's take a look!
Encountering a problem with reading/writing while accessing the NTFS drive on a Mac can be overwhelming. Yet various methods exist to solve the error, ranging from ease to effectiveness, accessibility, and reliability. The following section will demonstrate how to implement the methods to enable read-write access on Mac.
The EaseUS NTFS for Mac is the simplest and most reliable method for reading/writing NTFS on macOS without complexities. All you have to do is download the EaseUS NTFS for Mac and follow the steps given below:
Step 1. Launch and activate EaseUS NTFS for Mac. Click "I already have a license" to unlock this software.
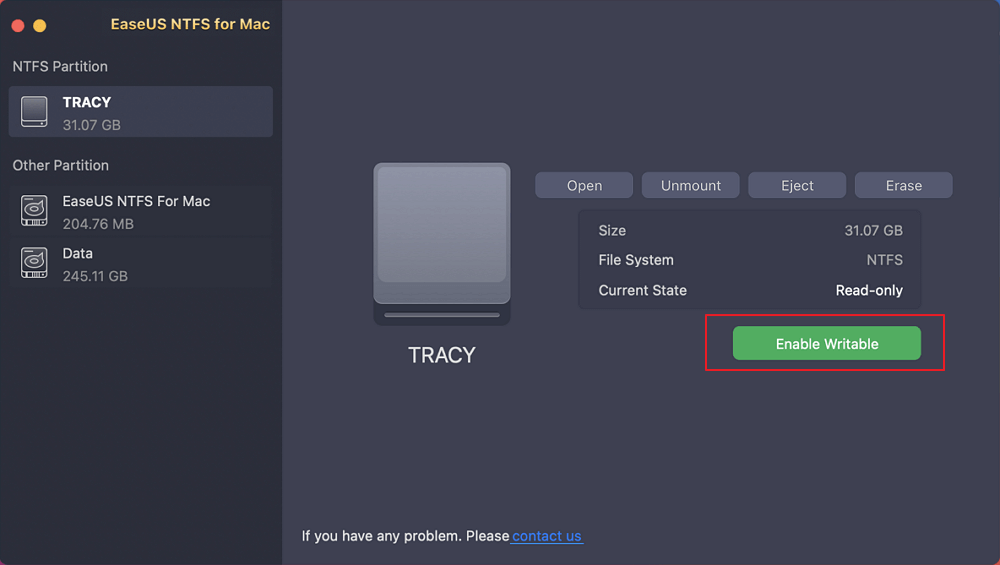
Step 2. Connect an NTFS drive to Mac, EaseUS NTFS for Mac will automatically detect the device. Select your drive and you'll see it's now marked as 'Read-only". Click "Enable Writable" to add read and write rights to the drive.
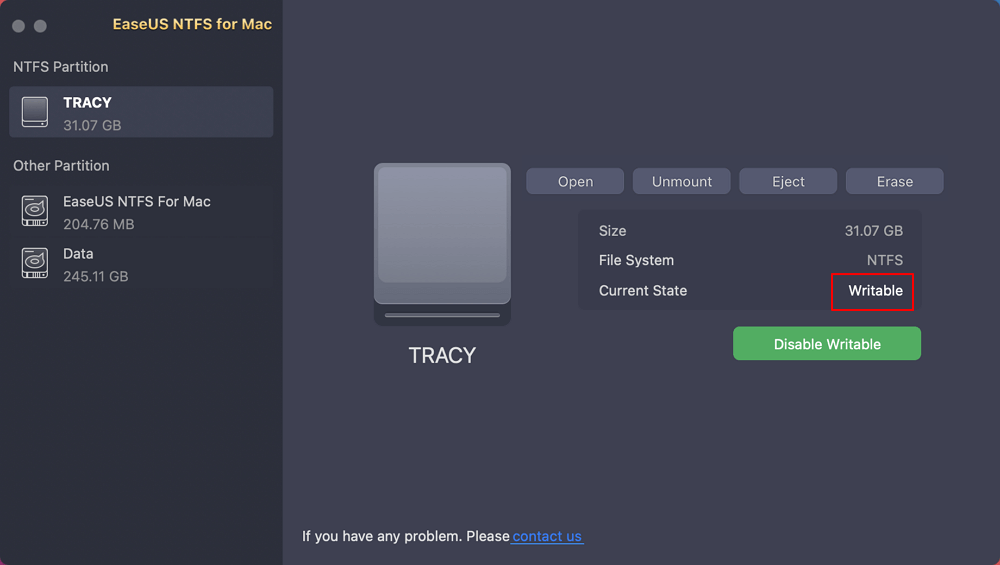
Step 3. When the state of NTFS drives turns into "Writable".
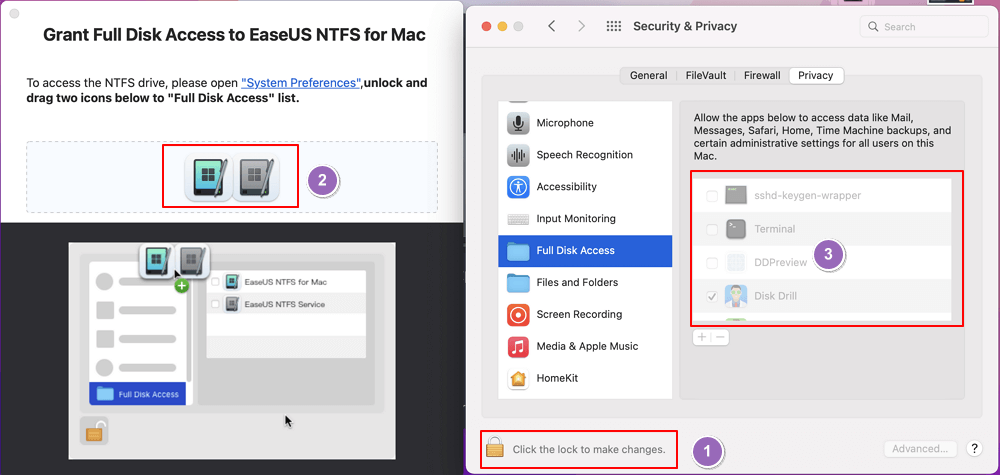
Step 4. EaseUS NTFS for Mac will pops up a window to help Mac get access to the NTFS drive:
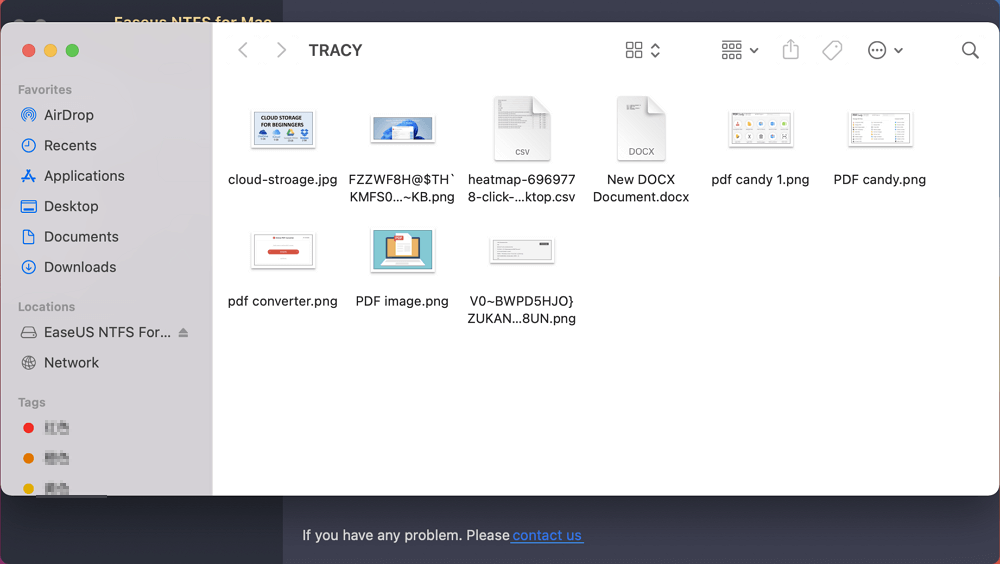
Step 5. When EaseUS NTFS for Mac restarts, you can then open to check, read, write, and even modify saved data on the NTFS device.
Why do we recommend EaseUS NTFS for Mac so much? Well, below is a list of its key features:
You can click here and download EaseUS NTFS for Mac to explore more.
If you want to try in-built methods before purchasing third-party software, the following techniques will help.
The Terminal, macOS's command-line interface, gives you greater control over the kernel. However, if you are a computer novice, you should be cautious when using it, as slight errors can corrupt your system.
Here is a guide for you:
Step 1. Go to Finder and select Applications. Navigate to the Utilities folder and double-click Terminal to open it.
Step 2. Type sudo nano nano /etc/fstab. The command allows you to edit the fstab file to control the mounting and unmounting of files on Mac. Enter the admin account password and do what is needed.
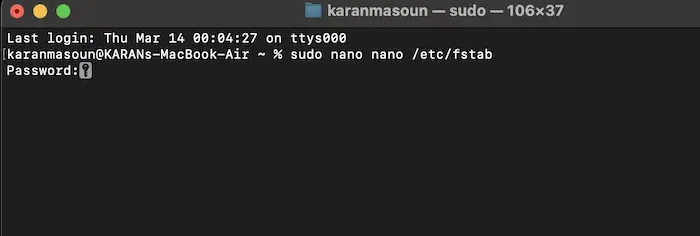
Step 3. Input LABEL=DISKNAME none ntfs rw, auto, nobrowse. Replace DISKNAME with your NTFS drive name.
Step 4. Now press the Ctrl + O keys and press the Enter key. Next, press the Ctrl + C keys simultaneously and Ctrl + X keys to close the Terminal.
Step 5. Now, reconnect your NTFS drive to the Mac.
Step 6. Open Finder again, click Go, select Go to Folder, type /Volumes, and press Enter.
Locate your NTFS drive; the read/write permissions will work now. However, these commands do not work on some Ventura versions. In such cases, you must use the sudo commands on the Terminal.
Step 7. Open Terminal again, execute sudo umount Volumes/DISKNAME, and replace DISKNAME with your NTFS drive.
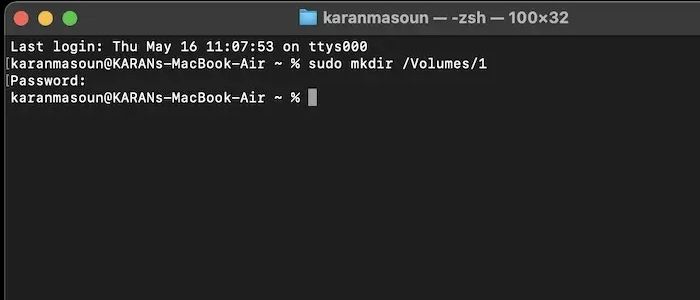
Step 8. Enter sudo mkdir /Volumes/1. This will create a mount point on the NTFS drive.
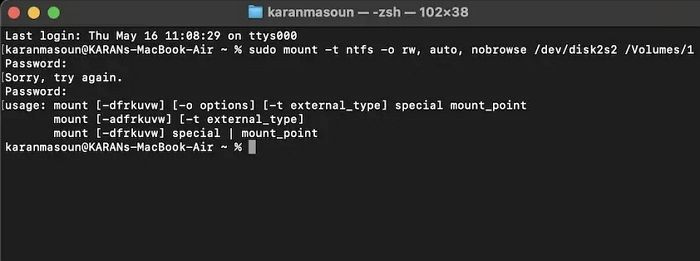
Step 9. Type sudo mount -t ntfs -o rw, auto, nobrowse /dev/disk2s2 /Volumes/1 and press the Enter key. Replace disk2s2 with the NTFS drive storage device information in the disk utility. The command will make the NTFS drive accessible freely on Mac, just like any other drive.
If you could enable read/write access using the methods, feel free to share this article on social media to help others solve their issues without hassle.
The Bootcamp Assistant is a viable option for Intel-based Mac users. It enables you to create a partition on your disk for Windows OS and even install it. Hence, you can also boot into Windows apart from Mac.
Further, it is easy to read/write NTFS drive on Mac. However, if you have an Apple M1 or M2 chip, it is incompatible with Bootcamp Assistant.
This is because both have different architectures, which creates compatibility issues. Hence, it works only on Intel Mac with macOS Ventura or other versions before macOS Big Sur.
Click here to learn more about The Bootcamp Assistant on Mac.
Full Guide of Boot Camp on Mac & How to Use It
This article will explain what Boot Camp is and what are the pros and cons of Boot Camp on Mac.
Formatting NTFS to a macOS-supported File system is helpful if you don't have any crucial files on the drive. You can format the file system to erase its contents and add a Mac-compatible file system like FAT32, HFS+, or similar. To do so, you need to ensure what format works on both Mac and PC. If you have important files, you can use a Windows PC to back them up and format them into a macOS-supported file system.
You can follow the steps below:
Step 1. Go to Finder and open Applications.
Step 2. Navigate to Utility and select Disk Utility.
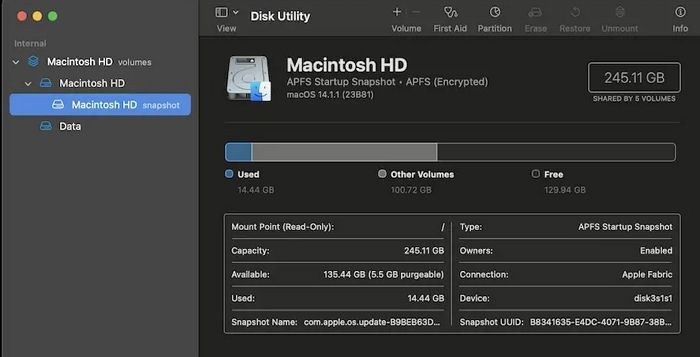
Step 3. Click View > Show All Devices.
Step 4. Now, select the NTFS drive that you have connected from the left pane.
Step 5. From the open Disk Utility, click the Erase button at its top-right.
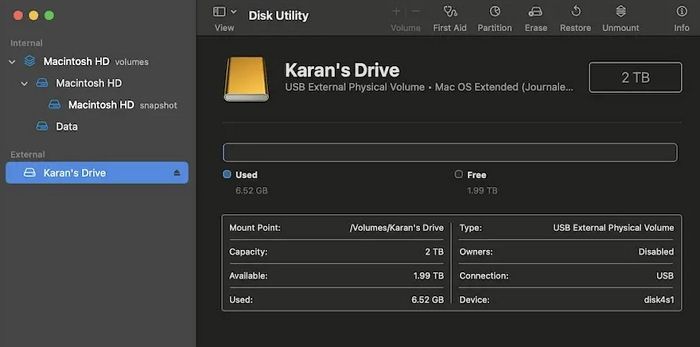
Step 6. Input a suitable name for your drive and select a format option from the pop-up box.
Step 7. Confirm by clicking Erase again to start the process. Besides, restore the NTFS files if you have backed them up using a Windows PC and then mount them to a macOS-supported file system.
Do you find this article helpful? Click the social buttons below to share it with your friends.
If you were looking for answers to enable the read/write NTFS drive on macOS Ventura, you would have gotten your answer. The Bootcamp Assistant helps, but only to Intel-based Mac users. It is a tedious process that consumes time and device resources. Formatting NTFS to a macOS-supported file system is applicable only if you have technical expertise and mostly when the drive is empty. Hence, EaseUS NTFS for Mac is the most effective, reliable, and easy method. It doesn't require technical expertise or pose a risk. With just a few clicks, it solves the issue without any data loss. Besides, it's a viable option as it's available for all macOS versions and both Intel-based and Apple M1/M2 Mac.
You can choose the above solutions after considering their pros and cons. You can also read some frequently asked questions regarding how to read/write NTFS drive on macOS Ventura if interested.
1. Why is my Mac not reading NTFS external hard drive?
If a Mac does not read your external hard drive, the USB port or cable may be broken or damaged, and it may not work. Hence, try using a different one after ejecting the drive, restart your Mac, and try again.
2. How do I enable NTFS to read and write on my Mac?
To enable NTFS read-write operations on Mac, use the EaseUS NTFS for Mac software. You can achieve read/write access without technical expertise or affecting your data by using it in a few clicks.
3. How to write NTFS disk on macOS 13 Ventura?
You can write NTFS disk on macOS 13 Ventura using EaseUS NTFS for Mac, Terminal, or Bootcamp Assistant. You can also format an NTFS drive into a macOS-supported file system.
Related Articles - ALSO ON EaseUS SOFTWARE
Quick Fixes: External SSD Not Mounting Mac
![]() Cici/2025-06-26
Cici/2025-06-26
How to Fix LaCie Hard Drive Not Showing Up on Mac (5 Practical Methods)
![]() Banu/2025-06-26
Banu/2025-06-26
Can't I Format My USB to FAT32 Mac
![]() Banu/2025-06-26
Banu/2025-06-26
Is NTFS Compatible with Mac? Check Your Answer Here
![]() Banu/2025-06-26
Banu/2025-06-26

