- Store
-
Support CenterGuides, License, ContactDownloadDownload installerChat SupportChat with a TechnicianPre-Sales InquiryChat with a Sales Rep
This guide will walk you through the steps of how to mount and access EXT4 partitions in Mac, offering solutions for both read-only access and full read/write capabilities.
Table of Contents
Many of you might have run into this before. Macs and Linux computers don't always get along regarding files! Since macOS doesn't natively support EXT4, specialized tools are required.
I stared at my Mac in frustration. My important files were trapped in my external hard drive, and my Mac wouldn't recognize it! Ugh! I fiddled endlessly, but nothing worked. "How do I mount and access EXT4 partitions in Mac?" I desperately searched online. I was about to pull my hair out! Do I need special software?
EaseUS will delve into how to mount and access EXT4 partitions in Mac. We'll cover methods ranging from open-source solutions to third-party software, empowering you to choose the right approach for your needs.
Think of a VM as a "system within your computer." It lets you run a different operating system, like Linux, in a window on your Mac. Since Linux natively understands EXT4, this gives you full access to your files.
Step 1: You are required to choose a VM software. Several popular options include VirtualBox (free) and Parallels Desktop.
Step 2: Once you have the VM software, Install Linux. Explore the internet to download a Linux distribution on the VM. The VM software will guide you in accessing the files you need.
Step 3: Now, mount the EXT4 drive on your Mac. Your VM will automatically recognize and let you access the drive.
We will continue to provide more information about the EXT4 partition on Mac. Click the social buttons if you think it is useful.
This method allows your Mac to understand and work with EXT4 drives directly. It's a great choice if you regularly interact with EXT4 formatted storage, offering seamless access and file transfer. Let's learn how to mount and access an Ext4 partition on a Mac by adding EXT4 support to MacOS.
Note* MacFuse is a translator between your Mac and different file systems.
Step 1: Download and install macFUSE. Follow the link: official website.
Step 2: It will take you to the installer window. Click on the install macFUSE, and it will start downloading the macFUSE. Follow the on-screen instructions.

Step 3: Before the installation is completed, you will get a message saying the software was blocked from loading. In the new window, click on the Allow button.
Step 4: If you see a message about the software being blocked during installation. It's a normal security notification; just click 'Allow' to keep things moving.
Step 5: Homebrew makes installing ext4fuse easier! If you need Homebrew on your Mac, check their website for instructions.
Step 6: Once it's set up, go to your Terminal app and run this command:
brew install ext4fuse
Step 7: Now, run the following command to expand the list of connected drives on your Mac.
diskutil list
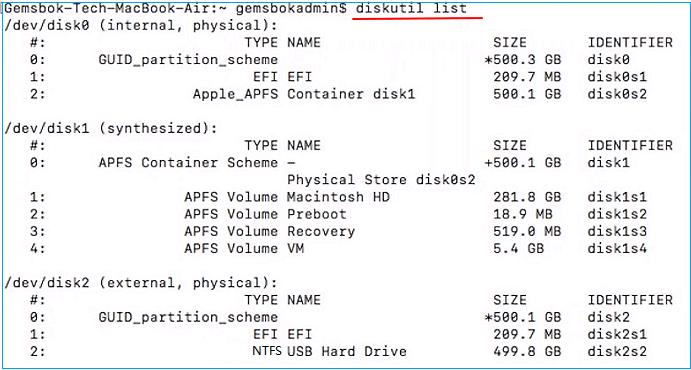
Look for your EXT4 drive in the list; its ID will look like /dev/disk2r3.
Step 8: Let's assume the disk ID is /dev/disk2r3.
Step 9: Use this command to mount your drive on Mac. Don't forget to replace the ID with yours):
sudo ext4fuse /dev/disk2r3 ~/tmp/MY_DISK_PARTITION -o allow_other
Step 10: Go to the Mac Finder and check if you can see your drive.
Pro Tip: Although this method is convenient, ext4fuse on macOS is primarily read-only. Experimental write support exists but proceed cautiously as there is a risk of data corruption. Also, macOS updates can sometimes cause compatibility issues, so be aware.
Paragon ExtFS for Mac is a commercial software solution that provides easy read and write access to EXT2/3/4 partitions on your Mac. This option is ideal if you need reliable writing support for EXT4 drives and prefer a user-friendly interface to working with a Terminal.
Step 1: Visit Paragon's website (https://www.paragon-software.com/home/extfs-mac/ ) to purchase and download ExtFS for Mac.
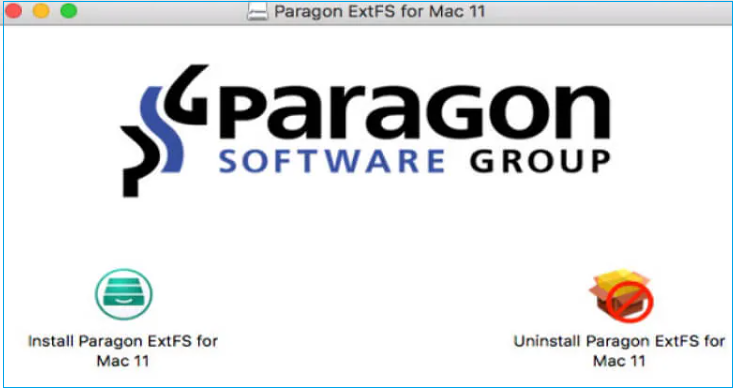
Step 2: Follow the on-screen instructions to install the software.
Step 3: Connect your EXT4 drive: your Mac will automatically recognize and mount it.
Step 4: Launch Paragon ExtFS for Mac from your Applications folder. Your EXT4 drive will appear within the software's interface, allowing you to read, write, modify, and manage files as needed.
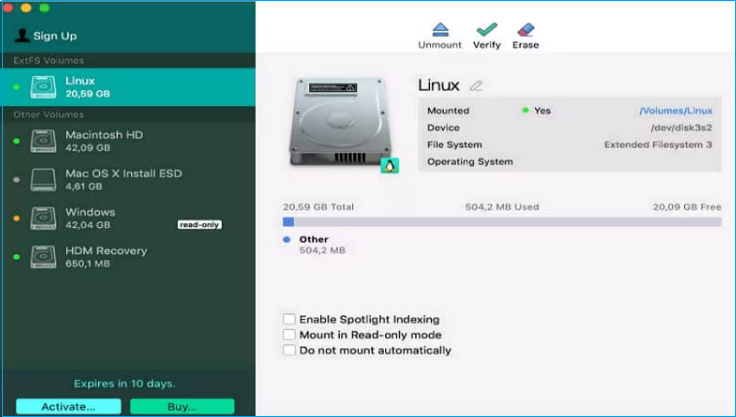
Your EXT4 drive will appear in Finder like any other drive. You can now read, write, and modify files directly.
Sometimes, the best way to start fresh with a drive is to set it up. Remember, MacOS doesn't play nicely in EXT4 by default. Formatting is usually the first step to using an unsupported drive on your Mac. But what do you do? Fortunately, there is a tool that makes this process incredibly easy - EaseUS NTFS for Mac.
Why EaseUS NTFS for Mac is the Best Choice
EaseUS NTFS for Mac doesn't just read and write to other file systems. It's also a fantastic tool when you need to format drives specifically for use on your Mac. Here's why it shines:
Note* Formatting the drive erases all existing data. Always back up anything important before starting! While Disk Utility (built into macOS) can format drives, EaseUS NTFS for Mac provides a smoother experience, especially when working with different file systems.
If you expect to format drives frequently or work with Mac computers, EaseUS NTFS for Mac makes the whole process a breeze.
Although your Mac may not natively speak EXT4, many ways exist to bridge this gap. Whether you prefer free command-line tools, the convenience of a virtual machine, or a dedicated software solution, you can now access those EXT4 drives. Remember, if you encounter other file system problems with hard drives on your Mac, EaseUS NTFS for Mac can be a lifesaver. It makes formatting drives and working with different file systems a breeze!
Have more questions about working with EXT4 drives on your Mac? Let's dive into some common ones.
1. Is EXT4 compatible with Windows and Mac?
EXT4 is mostly used in a Linux file system. Windows or Mac cannot read EXT4 drives. You will need additional tools or software to access EXT4 partitions on the operating systems.
2. How do I mount a partition on a Mac?
Mac provides a built-in tool called Disk Utility to fix disk-related problems. To mount a partition using Disk Utility, follow these steps: Open Disk Utility: Go to Finder -> Applications -> Utilities -> Disk Utility. Locate the drive you want to access and click "Mount."
3. How to read an EXT4 partition?
Methods such as ext4fuse or FUSE for macOS with a virtual machine are the most common for read-only access.
Related Articles - ALSO ON EaseUS SOFTWARE
How to Delete Files from Seagate Exteranl Hard Drive Mac & Windows [2026 Guide]
![]() Banu/2026-01-05
Banu/2026-01-05
How to Easily Fix Read-Only File System on Mac [Step-by-Step Guide]
![]() Cici/2025-11-11
Cici/2025-11-11
Solved: Can't Delete Photos From SD Card on Mac - 2023 New
![]() Sherly/2025-11-11
Sherly/2025-11-11
How to Fix SD Card Read-Only Mac | 2026 Step-by-Step
![]() Cici/2026-01-05
Cici/2026-01-05
Copyright © 2004 - 2023 EaseUS. All rights reserved.
