We all knew that Mac only gets read access to Windows-formatted NTFS drive. But re-formatting to the Mac file system isn't an ideal option in terms of data loss. So, how to write to NTFS on Mac? You will get the right answers in this article.
Table of Contents
We all wholeheartedly agree that Mac only supports read access for NTFS drive. That means all data can not be edit and move on a Mac device. Inconvenient? Isn't it? We saw many questions sprung up from mac forums to ask for solutions to write to Windows-formatted NTFS drive stored most of the important data. Third-party software, free Mac built-in tool, terminal......Among these solutions, at least one method can help you easily get write access.
All useful solutions are included in this article, explaining each step about how to write to NTFS on Mac.
| Workable Solutions | Step-by-step Troubleshooting |
|---|---|
| Fix 1. Robust Third-party Software (Easiest) | Download and install EaseUS NTFS for Mac...Full steps |
| Fix 2. FUSE of macOS (A bit Risky) | Download developer tool and Homebrew...Full steps |
| Fix 3. Run Terminal | Run Terminal and type command line...Full steps |
Here is a third-party NTFS driver for Mac to install, compatible with an M1-based computer, featuring writing, open, mount, safely eject data on NTFS drive. Compare with the free solution on part 2, EaseUS NTFS for Mac does need to pay for the advanced version but a 7-day free trial is allowed, cost $14.95 if you want to continue using it. You can easily enable write to NTFS in one click after connecting an external device.
Why do we recommend EaseUS NTFS for Mac in the beginning? Considering a clear interface and easy operation, this third-party software could win more praise than macFUSE and terminal. macFUSE requires complex steps and the terminal becomes harder that cause you to mess up. After installation, you can read, write, transfer, delete files without worry.
Get more surprises on Mac:
Download EaseUS NTFS for Mac:
Step 1. Launch and activate EaseUS NTFS for Mac. Click "I already have a license" to unlock this software.
Step 2. Connect an NTFS drive to Mac, EaseUS NTFS for Mac will automatically detect the device. Select your drive and you'll see it's now marked as 'Read-only". Click "Enable Writable" to add read and write rights to the drive.
Step 3. When the state of NTFS drives turns into "Writable".
Step 4. EaseUS NTFS for Mac will pops up a window to help Mac get access to the NTFS drive:
Step 5. When EaseUS NTFS for Mac restarts, you can then open to check, read, write, and even modify saved data on the NTFS device.
Fuse for macOS is a free utility but contains risks that need to temporarily shut down System Integrity Protection. Your mac will be vulnerable to risks. This way does enable the transfer of files from mac to NTFS but it requires a long way to done. Follow the in-depth tutorial to get read-write mode in a manual way:
Step 1. Get to install Xcode.
Go to Finder > Applications > Terminal > Type and run the command line: xcode-select -- install
Then you can check a prompt window to ask to install the command line developer tool. Click Install to start.
Step 2. Download and install Homebrew.
You can install it via inputting command line on Terminal window: /usr/bin/ruby -e "$(curl -fsSL https://raw.githubusercontent.com/Homebrew/install/master/install)"
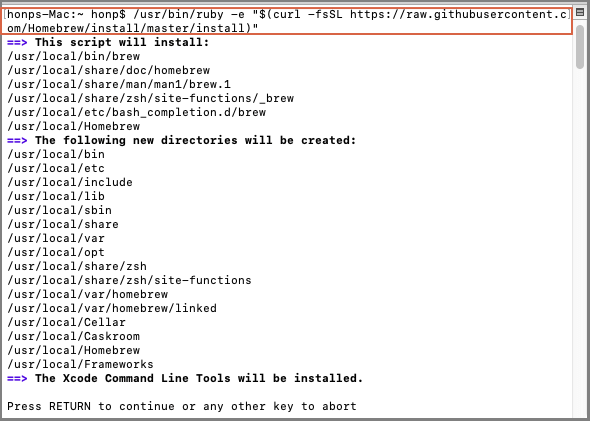
Press Enter and type password if prompted. Homebrew download and install will automatically be completed.
Now you have installed the command line develop tool and Homebrew, next, continue to type the command line for installing ntfs-3g.
Step 3. Type command line - brew install ntfs-3g
Step 4. Disable System Integrity Protection.
If you are using the macOS 10.15 Catalina or higher version, you will need to do more steps on Terminal.
Input command line:
A bit of work! If you update to a new macOS, it is required that repeating the whole process each time. That's all. You can start to edit your files on an NTFS drive.
Apple native tool, Terminal, lets you enable write access to NTFS drive via some command lines. However, this method is more dangerous than Fuse for macOS. Any mistake will cause file damage and your mac may be stuck. So we put Terminal at the end of this guide. Honestly, as we tested before, it's not a good choice.
Step 1. Open Terminal on Mac:
Go to Finder > Applications > Utility > Double-click to open Terminal
Step 2. Connect your NTFS drive on Mac.
Step 3. Type command line on Terminal window: sudo nano /etc/fstab
Input password if the prompted windows ask for.

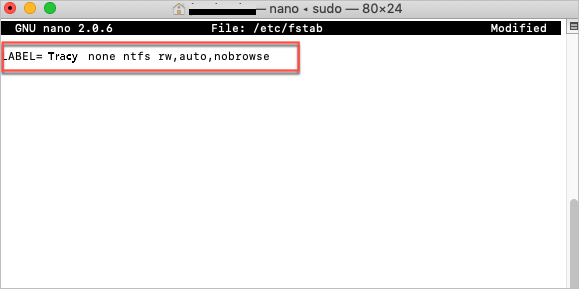
Step 4. Type the command line and hit Enter.
Go to the end of the file list: LABEL=NAME none ntfs rw, auto, nobrowse (Replace NAME with your NTFS drive name.)
Step 5. Save and exit.
Press Ctrl + O > Hit Enter > Press Ctrl + X to exit.
Step 6. Reconnect device on mac.
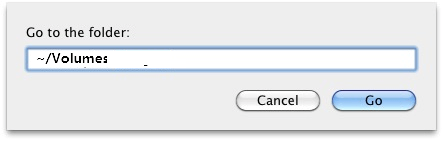
Step 7. Click Go from taskbar and select Go to Folder...
Step 8. Input ~/Volumes on the Go to Folder window, click the Go button to go on.
Have you successfully write to NTFS on Mac? Considering data security and simple process, we rank EaseUS NTFS for Mac in the first place. If you don't mind temporary risks, Fuse for macOS is worth trying than Terminal.
Related Articles - ALSO ON EaseUS SOFTWARE
How to Enable Full Disk Access on Mac | Full Guide
![]() Cici/2023-12-20
Cici/2023-12-20
How to Change Read and Write Permissions Mac [Step-by-Step]
![]() Cici/2024-01-17
Cici/2024-01-17
Can A Mac Read NTFS | Can Mac Read and Write NTFS (2024 Fixed)
![]() Tracy King/2024-01-04
Tracy King/2024-01-04
3 Reliable Ways to Format SD Card to FAT32 on Mac
![]() Tracy King/2024-01-16
Tracy King/2024-01-16
Copyright © 2004 - 2023 EaseUS. All rights reserved.


