User Guide. How to use NTFS on Mac? Below is a complete guide on how to use NTFS on Mac.
Table of Contents
Many Mac users have an issue using their NTFS on Mac. However, Windows users have never faced such an issue as the NTFS format was created to allow Windows users to plugin easily and work on their files.
To save its users from the inconvenience, Apple has designed their MacOS to read NTFS-formatted drives, but Mac users can only open their NTFS files; they cannot change them or copy new files to their NTFS format disk.
Mac users want to use this drive to set up their game drive, construct a unique test environment, or transfer their big files. But can Mac users enable their NTFS drive on Mac? This article will explain how to use NTFS on your Mac. It will also provide you with a step-by-step guide to the best accessible solution.
Yes! Mac users can format their NTFS on Mac. In this guide, we have found several options for you. Below is the step-by-step guide to using NTFS on Mac.
Option 1. Use a Powerful Software- EaseUS NTFS for Mac
Option 2. Format NTFS Driver to FAT32
Option 3. Enable Writable in Terminal
Mac doesn't support Windows NTFS drive, which has led to the development of such third-party software. As NTFS is proprietary, this software needs to be licensed to read and write the NTFS disk.
Only a compatible and robust software like EaseUS NTFS for Mac can allow you to mount your NTFS drive on Mac and read and write your content. EaseUS NTFS for Mac is a new featured tool released by EaseUS to set up your NTFS drive on your Mac device.
This software offers you a seven-day free trial to enable your NTFS on a Mac device with just one click. Along with a breakneck speed, this software provides excellent compatibility that you may not get from any other NTFS software. Some of the best features provided by EaseUS NTFS include:
Along with some of these best features offered by EaseUS NTFS, you can also use this software for reading and writing on USB, flash drives, external drives, SD cards, and memory sticks. The good news? you get a 7-day free trial with a $0 order.
Step 1. Launch and activate EaseUS NTFS for Mac. Click "I already have a license" to unlock this software.
Step 2. Connect an NTFS drive to Mac, EaseUS NTFS for Mac will automatically detect the device. Select your drive and you'll see it's now marked as 'Read-only". Click "Enable Writable" to add read and write rights to the drive.
Step 3. When the state of NTFS drives turns into "Writable".
Step 4. EaseUS NTFS for Mac will pops up a window to help Mac get access to the NTFS drive:
Step 5. When EaseUS NTFS for Mac restarts, you can then open to check, read, write, and even modify saved data on the NTFS device.
To make your NTFS drive readable and writeable on Mac, you can use macOS disk utility and reformat your file to FAT32. Though FAT32 isn’t as efficient as NTFS and can only support your file videos up to 4GB, you can still follow this method if you want to rewrite some small storage files on your NTFS.
STEP 1. To launch utility disk, select the spotlight from the top right of your screen and enter "disk" to launch your disk utility.
STEP 2. Insert your NTFS drive and highlight the disk name at the left panel of your screen.
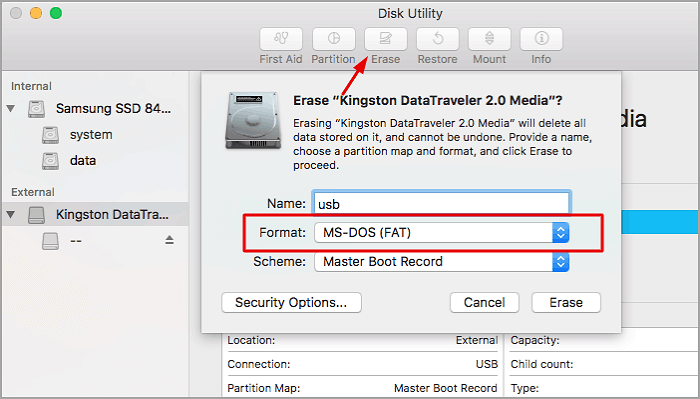
STEP 3. From the 'erase' tab. Select 'format' and from the format menu select "(MS-DOT-FAT)" and enter a new name.
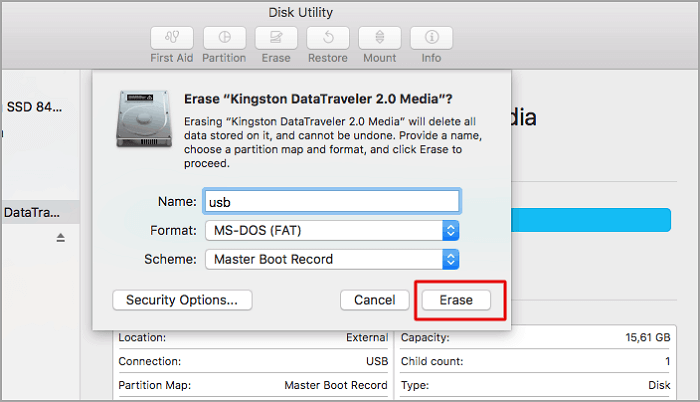
STEP 4. Now click on "Erase" to format your drive your FAT32.
Once all these steps are completed, you can now edit your files from your macOS.
The terminal is widely used in Mac for changing and editing things. You can also use this application to make changes to the NTFS drive. This method is a bit difficult, but it can help you enable your NTFS support on Mac by following these steps:
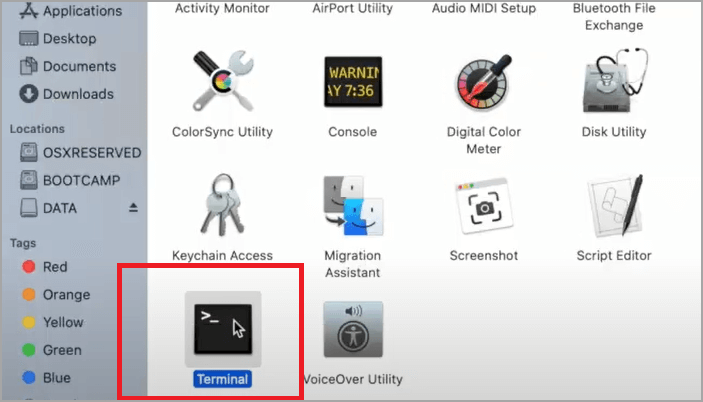
STEP 1. Open the terminal and connect to the NTFS drive.
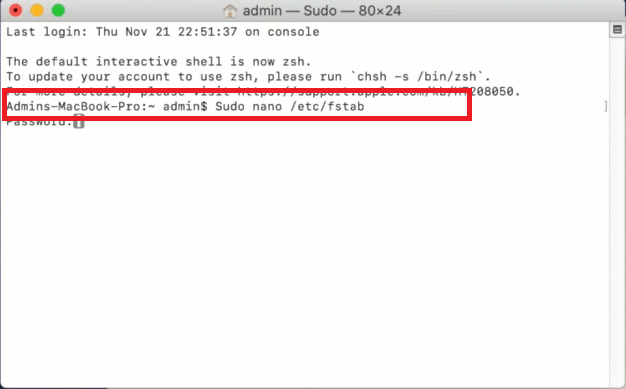
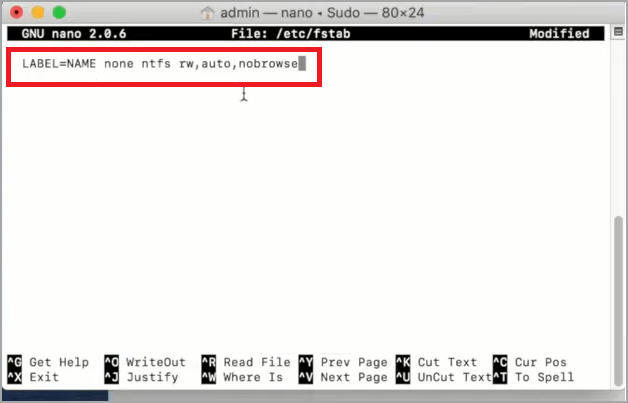
STEP 2. Type the "sudo nano /etc/fstab" command here and click on return.
STEP 3. Now, type "LABEL=NAME none NTFS rw, auto, no browse" to replace the name of the NTFS drive and click on return.
STEP 4. On your Mac keyboard, press "ctrl+ O > Ctrl + X". Now, go to Finder and select Folder.
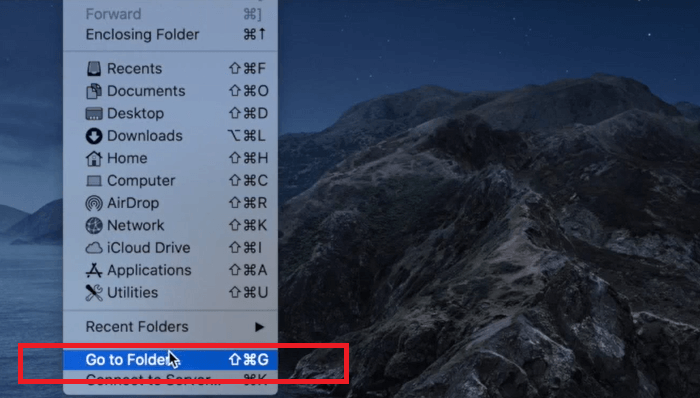
STEP 5. Type '/Volumes', and select" Go."

Now to completely read, write, edit or change your NTFS files, rename them with the name of your NTFS drive. This will give you the access to make changes in your NTFS drive.
Though Apple has not gained the license of writing on an NTFS drive, it is still possible for Mac users to access and edit their NTFS drives. There are many easy solutions available that let Mac users manually format or rewrite on their NTFS drives.
We have suggested the three most accessible solutions that can make using NTFS devices easy for you. EaseUS NTFS, being the easiest one, is the best tool though it only offers a seven-day free trial. It has excellent compatibility with Mac and lets you successfully make your NTFS writeable.
Related Articles - ALSO ON EaseUS SOFTWARE
How to Format WD Passport on Mac [Effective Ways]
![]() Roxanne/2024-01-16
Roxanne/2024-01-16
Quick Fixes: External SSD Not Mounting Mac
![]() Cici/2024-01-17
Cici/2024-01-17
How Do I Read and Write NTFS Drives on Mac? 3 Best Solutions Available to Help
![]() Tracy King/2023-12-19
Tracy King/2023-12-19
External Hard Drive Not Mounting on Mac? Fixes Here!
![]() Tracy King/2023-12-19
Tracy King/2023-12-19
Copyright © 2004 - 2023 EaseUS. All rights reserved.


