How to eject external hard drive on Mac? When I connect an external hard drive on Mac, this annoying note will show up sometimes. Speaking of properly eject the hard drive, the article can help you a lot. And we also discuss how to unmount external hard drives on Mac.
Table of Contents
| Workable Solutions | Step-by-step Troubleshooting |
|---|---|
| Fix 1. Eject External Hard Drive on Mac |
Option 1. Eject Drive via Finder...Full steps |
| Fix 2. Unmount External Hard Drive on Mac |
Option 1. Use Disk Utility...Full steps |
macOS Operating System forum: "Hello, I have too often this notice telling me that my Time Machine external disk was not ejected properly......I have found that until 2013 there exist on the support site apple many complains on this issue......when I am on almost the last version and it continues to appear. My fear is that these "exercises" will finally damage my external disk. Is there a way to avoid it or to skip it?"
See comments on YouTube:"...I didn't know how to do that and the message I would always receive was so annoying!"
When we finish using the external hard drive for editing or other operation, you should eject the device properly and then remove it. However, many users seed feedback like the two cases above. The error message - "Disk Not Ejected Properly" comes so often and lowers the user experience. Don't fret. You can get reliable methods on this page.
The article will focus on the basic move to unmount external hard drives on Mac. If you encountered the "Can't unmount external hard drive on Disk Utility" error. Unfortunately, the methods here are not for you.
Read on to know how to mount an external device on Mac.
Force removal volumes will trigger data loss. That's why we collect noticeable options for you. Eject SD card, USB properly from Mac is easy with the three below methods. Option 1 and option 2 are suitable for drives with any file type. Or, Option 3 is used for the NTFS drive on Mac.
Option 1. Eject Drive via Finder
Option 2. Eject External Device Without Finder
Option 3. Safely Eject NTFS External Hard Drive with EaseUS NTFS for Mac
Step 1. Open Finder by press the Option+Command+Space shortcut.
Step 2. Go to Devices and the connected external disk will list under that tab. Click the eject icon next to the drive name.

Without Finder, the other two simple methods also provide straightforward ways.
1 - Right-click Desktop icon
When you connect volume on Mac, its icon will appear on the Desktop. Directly eject without Finder can be achieved by a right-clicking drive and select Eject "X(name)".

2 - Drag volume to trash
Drag the device icon to the trash can to do work. Plays as an Eject button. Just hold it and drag, then check if it successfully removes from Mac.
If your connected volume is an NTFS drive, resorting to a free third-party tool is a good choice. EaseUS NTFS for Mac is a powerful tool that allows Mac to safely eject, write, mount external storage devices. One click lets you safely remove storage devices. 0$, 7 days free trial.
Click to download software:
How to safely eject NTFS drive by EaseUS NTFS for Mac:
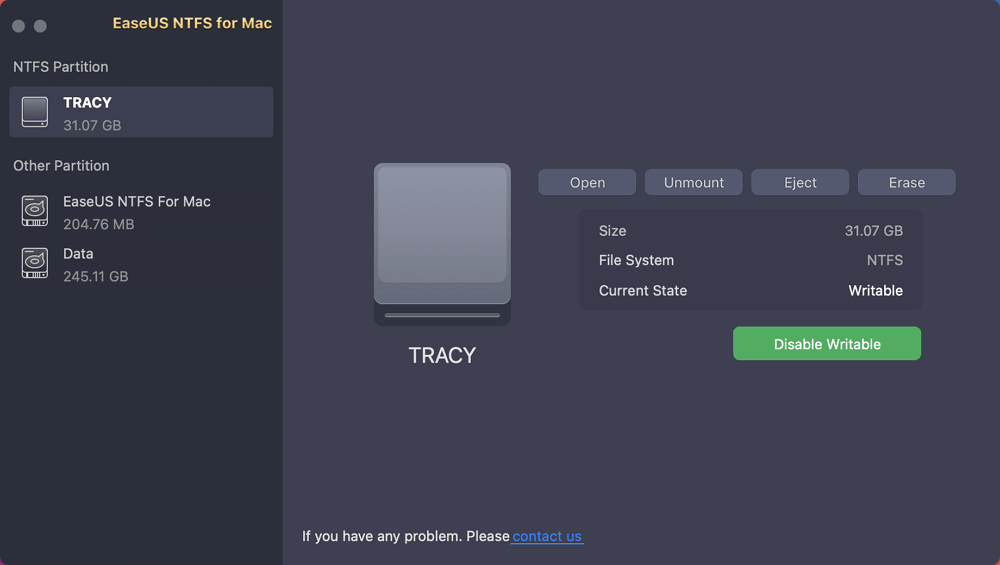
Step 1. Launch EaseUS NTFS for Mac on Mac computer, click "I already have a license" to activate this software.
Step 2. Let EaseUS NTFS for Mac detect the connected drive that you want to eject.
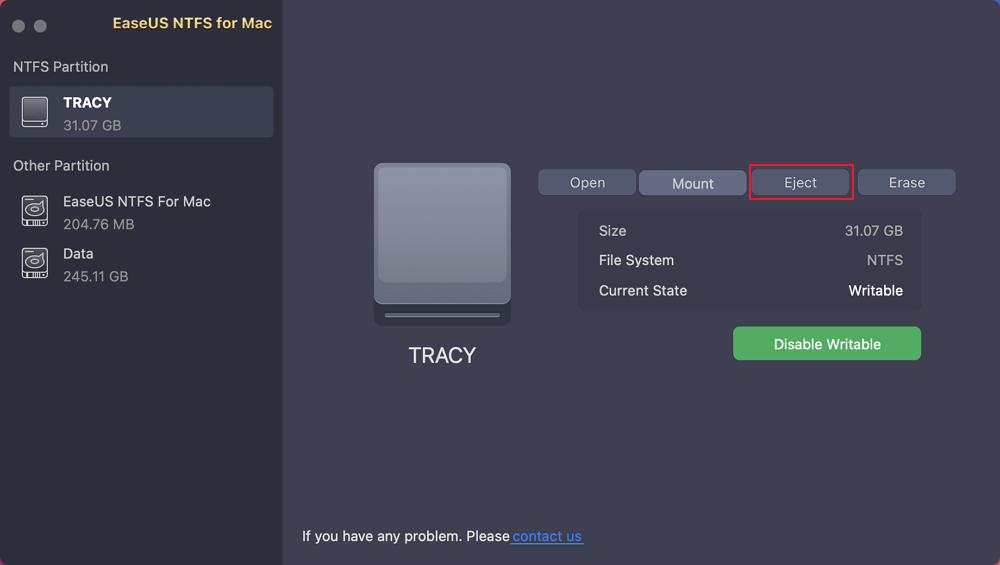
Step 3. Once detected, select the target drive and click "Eject". This will safely remove your drive without affecting the saved files and data.
Why you need EaseUS NTFS for Mac:
Take two solutions to unmount the external hard drive:
Option 1. Use Disk Utility to Unmount External Hard Drive
Option 2. Unmount NTFS Drive on Mac
Step 1. Open the Disk Utility app on Mac, navigate to the Devices section, and choose the disk you want to unmount.
Step 2. Click Unmount button beside the disk.
Working with mac, third-party software can also unmount NTFS drive quickly. Running EaseUS NTFS for Mac, and follow the instructions. Sometimes the disk utility couldn’t unmount devices, if that happens, check this NTFS driver.
How to unmount the external hard drive:
Step 1. Run EaseUS NTFS for Mac.
Step 2. Once it is detected by the software, click the "Unmount" button.
Easy Ways to Mount NTFS on Mac | How to Mount NTFS Drive on Mac
Have your mac device failed to mount NTFS for Mac? You are lucky to get 3 ways for mounting NTFS drive on Mac.
We've set two topics on this post. Ejecting an external hard drive comes with 3 methods. Pick any of them based on your file type. In the second part, Disk Utility and NTFS driver could perform well.
Related Articles - ALSO ON EaseUS SOFTWARE
How to Write to NTFS on Mac? Don't Missing Free Methods!
![]() Tracy King/2023-11-07
Tracy King/2023-11-07
Toshiba NTFS Driver for Mac! Enable Read and Write Toshiba External Hard Drive
![]() Tracy King/2023-11-07
Tracy King/2023-11-07
How to Fix LaCie Hard Drive Not Showing Up on Mac (5 Practical Methods)
![]() Tracy King/2023-11-07
Tracy King/2023-11-07
What Is NTFS for Mac, Everything You Should Know About It
![]() Daisy/2023-11-07
Daisy/2023-11-07
Copyright © 2004 - 2023 EaseUS. All rights reserved.