- Store
-
Support CenterGuides, License, ContactDownloadDownload installerChat SupportChat with a TechnicianPre-Sales InquiryChat with a Sales Rep
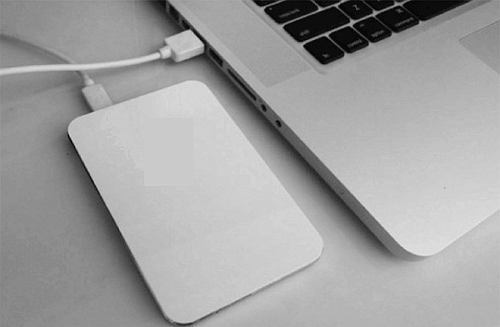
Can't add files to Toshiba external hard drive on Mac? This guide should help and fix the error with Toshiba external hard drive on your Mac device.
Table of Contents
| Workable Solutions | Step-by-step Troubleshooting |
|---|---|
| 1. Change or Ignore Permissions. | Go to the info screen for the drive and check...Full steps |
| 2. Run First Aid or Basic Checks. | Launch Disk Utility on your Mac...Full steps |
| 3. Format the Toshiba Drive. | Connect your drive to Mac...Full steps |
| 4. Add NTFS Driver to Mac. | Launch and activate EaseUS NTFS for Mac...Full steps |
Imagine a situation where you have bought a new Toshiba external hard drive. You may want to use it on a mac, but it can get very frustrating. One of the common errors that one would come across when using the Toshiba drives and the users have reported is that "Toshiba External Hard Drive Won't Allow Me Add Files." How to fix the error message and how to resolve the issue? Let us explore the causes and the solutions that should fix this problem on the device.
There can be several reasons that can prevent Mac users from adding files to Toshiba drives, and the issue can affect the external hard drives from other brands. Let us explore a few possible reasons that can cause the problems.
The drive is not connected correctly - Improper connection of the drive can be the leading cause of this problem. It will help one find it quite handy enough, and checking the connections can prove convenient.
A locked Drive - A locked drive can be yet another reason that can cause the issue where you are not allowed to write on Toshiba drive. Unlocking the drive can resolve the issue.
Permission issues - The permission error on the drive can affect the functionality, and improper permissions can lock out the drive.
A corrupted drive – A corrupted drive can also create issues in writing or reading from Mac.
NTFS drive – If the drive is formatted in the NTFS file format, Mac will not detect it. It is expected to utilize the special tools for working with them.
The same fixes that one can apply when fixing the error where you suffer from the Toshiba External Hard Drive Won't Allow you Add File can be to check out the causes first. Let us explore the fixes and solutions one by one.
1. Change or Ignore Permissions.
Is the drive formatted correctly, yet you cannot write files on the computer? It may be because of the wrong permissions on the drive.
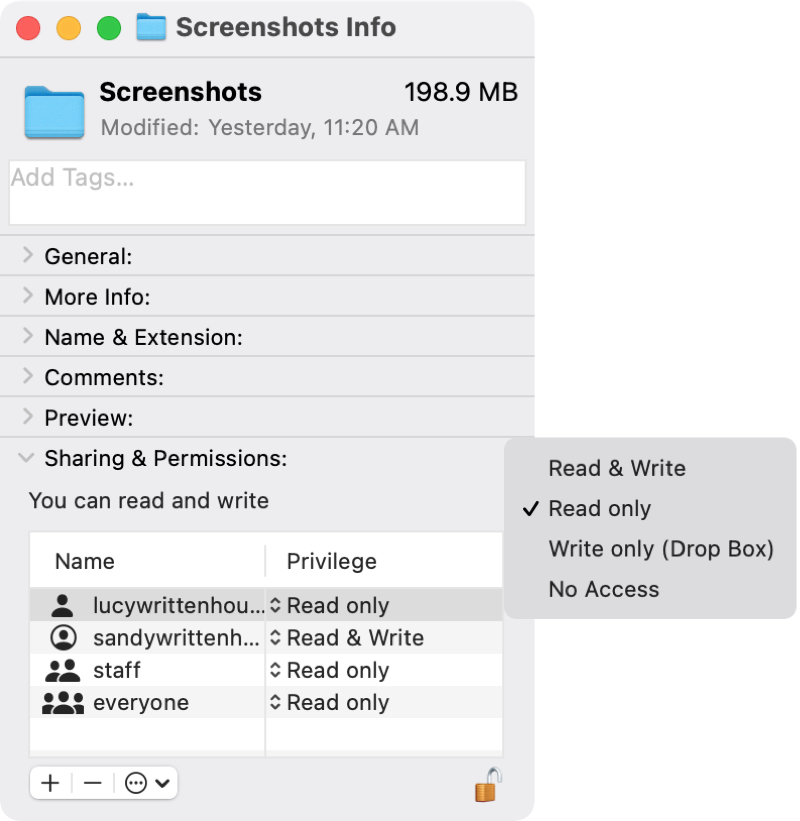
It may also be set to allow everybody to read and write on the specific drive so that anyone can access the drive.
2. Run First Aid or Basic Checks
First Aid is a unique option available on Mac Disk Utility that assists you in repairing a drive. If you have your Toshiba drive throwing errors when adding files, you can follow the steps here below –
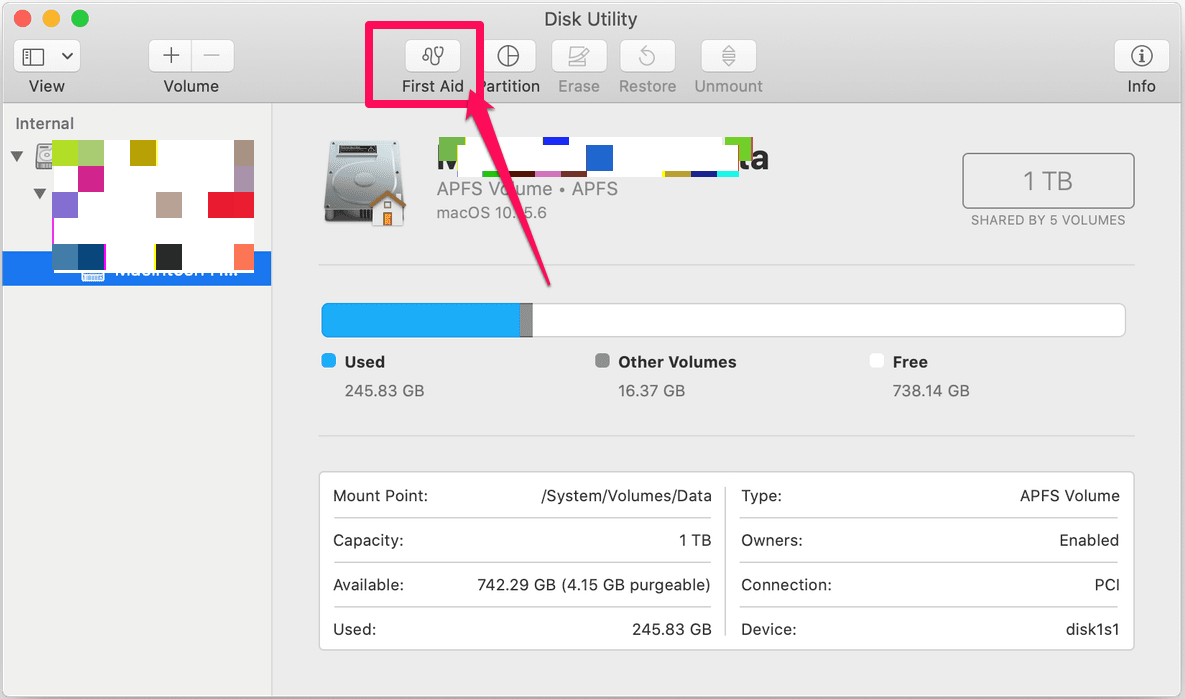
Let the First Aid process run and complete. When done, click on the Done button.
3. Format the Toshiba Drive
The drive itself may have any issues and may need to be formatted. Sometimes, formatting the drive can be quite effective in resolving the issue. If the Toshiba drive is new, it may be necessary to format it.

To format your drive, follow the steps here below –
That does it. Your drive will be formatted.
4. Add NTFS Driver to Mac
If the Toshiba drive that one is trying to work with or add files to is formatted in NTFS file format, it will stop working on the Mac device. Mac devices do not detect the NTFS drives. That is why you will find it difficult to get direct access or even read, write or edit the files on the drive.
NTFS for Mac is one of the unique software options that can simplify detecting the NTFS drive on a mac. The software essentially enables the read and write functionality on the NTFS drive to work on the Mac device.
EaseUS NTFS for Mac is excellent and best for enabling the read and write functionality on an NTFS drive on the Mac and should work with your Toshiba drive. The software is available in both free and Pro versions. The Pro version could prove to be a great choice to provide a lifetime of working with NTFS drives in the Mac. However, the free version offers seven days of access to enable the read and write functionality on the NTFS drive on a Mac.
Step 1. Launch and activate EaseUS NTFS for Mac. Click "I already have a license" to unlock this software.
Step 2. Connect an NTFS drive to Mac, EaseUS NTFS for Mac will automatically detect the device. Select your drive and you'll see it's now marked as 'Read-only". Click "Enable Writable" to add read and write rights to the drive.
Step 3. When the state of NTFS drives turns into "Writable".
Step 4. EaseUS NTFS for Mac will pops up a window to help Mac get access to the NTFS drive:
Step 5. When EaseUS NTFS for Mac restarts, you can then open to check, read, write, and even modify saved data on the NTFS device.
Some of the advantages offered by the software can include
Well, if you have faced any issues on the new Toshiba drive and find it challenging to add files on your drive on the Mac device, this can be a result of several reasons. Once the actual reasons and causes have been identified, it will be easy to fix the issue.
If the problem is due to the drive being in the NTFS file format, using a capable NTFS for Mac can prove to be handy. We recommend you opt for the EaseUS NTFS for Mac for an exciting degree of experience and professional service quality.
Related Articles - ALSO ON EaseUS SOFTWARE
Quick Fixes: External SSD Not Mounting Mac
![]() Cici/2026-01-05
Cici/2026-01-05
How to Fix Can't Delete Files from USB on Mac | 2026 New
![]() Cici/2026-01-05
Cici/2026-01-05
How to Fix Lacie Read-Only Mac (Two Easy Ways)
![]() Banu/2025-06-26
Banu/2025-06-26
How to Read and Format NTFS Drives on Mac
![]() Banu/2025-06-26
Banu/2025-06-26
Copyright © 2004 - 2023 EaseUS. All rights reserved.


