- Store
-
Support CenterGuides, License, ContactDownloadDownload installerChat SupportChat with a TechnicianPre-Sales InquiryChat with a Sales Rep
Are you using WD NTFS drive for mac? Due to license restrictions, Mac only provides read support for NTFS drives. Don't fret. Download and launch the robust Western Digital NTFS drive for Mac to read and write. See how to use WD My Passport NTFS driver for Mac.
Table of Contents
"I recently purchased a WD My Passport 2TB (WDBYVG0020BBK) that came pre-formatted for Windows. I would like to use this interchangeably between my Windows & macOS laptops. The drive packaging in the Compatibility section says: Downloadable NTFS driver for read/write on macOS Where can I find this driver/software for macOS Catalina......"
We knew that Windows and Mac all have their own file system, APFS, and HFS for Apple Native and NTFS for Windows. Speaking of using the WD NTFS driver on Mac, unfortunately, you can only open the NTFS driver with read-only mode. But your hope is not lost. Take 5 minutes to catch a wise software to enable read/write support on WD My Password driver and master a manual to format WD device that both work with Windows and Mac file systems.
Quick Navigation:
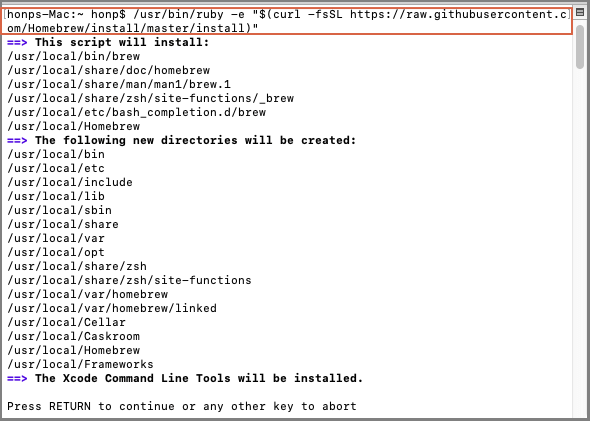
Like the case shown on the very first, WD is reminded of using the NTFS driver for reading and writing on macOS. But how to find such software compatible with macOS? Although there is an open-source method with the Terminal method, it is too complicated for users to follow. So a simple NTFS driver software is needed.
EaseUS NTFS for Mac is software with a Mac-like interface and clear steps for instruction. The writing support can be achieved with a salient green button. After activation, EaseUS NTFS for Mac will exist on the tray automatically, no need to open software every time, you can directly read and write data on it.
Note: Under the read-write mode for NTFS drive on Mac, if you disconnect the NTFS external drive in a straightforward way, the worst-case scenario is data loss. So EaseUS NTFS for Mac unveils a Safe Eject function for you.
Without reboot the Mac computer, you can enjoy the automatic read and write mode.
Download and launch EaseUS NTFS for Mac
Step 1. Launch and activate EaseUS NTFS for Mac. Click "I already have a license" to unlock this software.
Step 2. Connect an NTFS drive to Mac, EaseUS NTFS for Mac will automatically detect the device. Select your drive and you'll see it's now marked as 'Read-only". Click "Enable Writable" to add read and write rights to the drive.
Step 3. When the state of NTFS drives turns into "Writable".
Step 4. EaseUS NTFS for Mac will pops up a window to help Mac get access to the NTFS drive:
Step 5. When EaseUS NTFS for Mac restarts, you can then open to check, read, write, and even modify saved data on the NTFS device.
Mac Writing to NTFS: How to Enable Mac to Write NTFS
Learn to use an automatic third-party NTFS manager, one apple native program, and one free NTFS driver.
If your WD My Passport drive is blank, formatting can be another wise choice to convert your file system work with a Mac computer. If the drive is full of precious data, take a backup on a Windows computer immediately, otherwise, you need to use the data recovery method after data is getting formatted.
To format a WD My Passport NTFS drive on a Mac computer, the Apple native Disk Utility is a good format tool same as Disk Management on Windows.
Step 1. Connect the Western Digital My Drive to a Mac. Then a computer will detect the drive and you can see WD My Passport on the Desktop.
Step 2. Click the Finder icon from dock > Go to left panel, locate and click Applications.
Step 3. Then you can check a bunch of tools on the right panel. Locate and click to open Utilities.
Step 4. Find Disk Utility and click to open it.
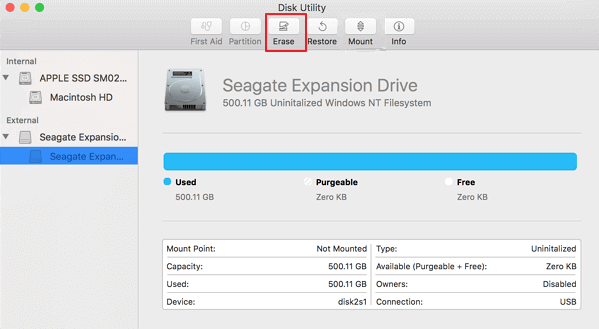
Step 5. Check Western Digital NTFS drive on Disk Utility. Click Erase tab.
Step 6. In the Erase window, Rename your Device (Optional), Select Volume Format.
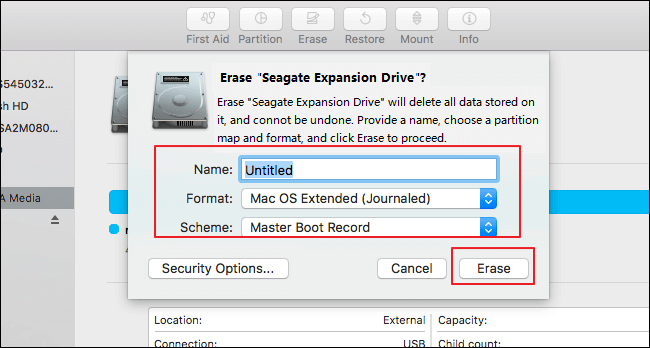
Step 7. Click Erase button.
Wait for the format to be finished, now you can use the drive in Mac computer.
Writing to WD external hard drive on mac no longer a hard issue via professional NTFS driver software. You can get a WD NTFS driver free download. Also, some users choose to format their drive compatible with Mac. Both are workable and welcome to inexperienced users. But the third-party software is equal to shortcuts. Why not take a 7-day free trial first?
EaseUS NTFS for Mac:
Format File System by Disk Utilities:
Related Articles - ALSO ON EaseUS SOFTWARE
Best WD My Passport for Mac Driver Free Download | How-to-Use
![]() Banu/2026-01-05
Banu/2026-01-05
How Do I Read and Write NTFS Drives on Mac? 3 Best Solutions Available to Help
![]() Banu/2025-06-26
Banu/2025-06-26
Disk Won't Format on Mac? Fixes Available Here
![]() Banu/2026-01-05
Banu/2026-01-05
How to Change Read-Only Files on Mac [No Data Loss]
![]() Sherly/2025-06-26
Sherly/2025-06-26
Copyright © 2004 - 2023 EaseUS. All rights reserved.