Mac can not enable write to NTFS drive. If the formatting drive is not your idle choice, then an NTFS reader for mac free is necessary to help you access the device. Check the list of NTFS apps for free download.
Table of Contents
Because the NTFS file system is not licensed by Apple, so your Mac can not write to NTFS. If you want to work with the files or folders on the NTFS drive, you need third-party NTFS software to get the writing support. Here, in this post, we've collected several NTFS drivers. You can check the pros and cons of these apps and pick the one based on your needs.
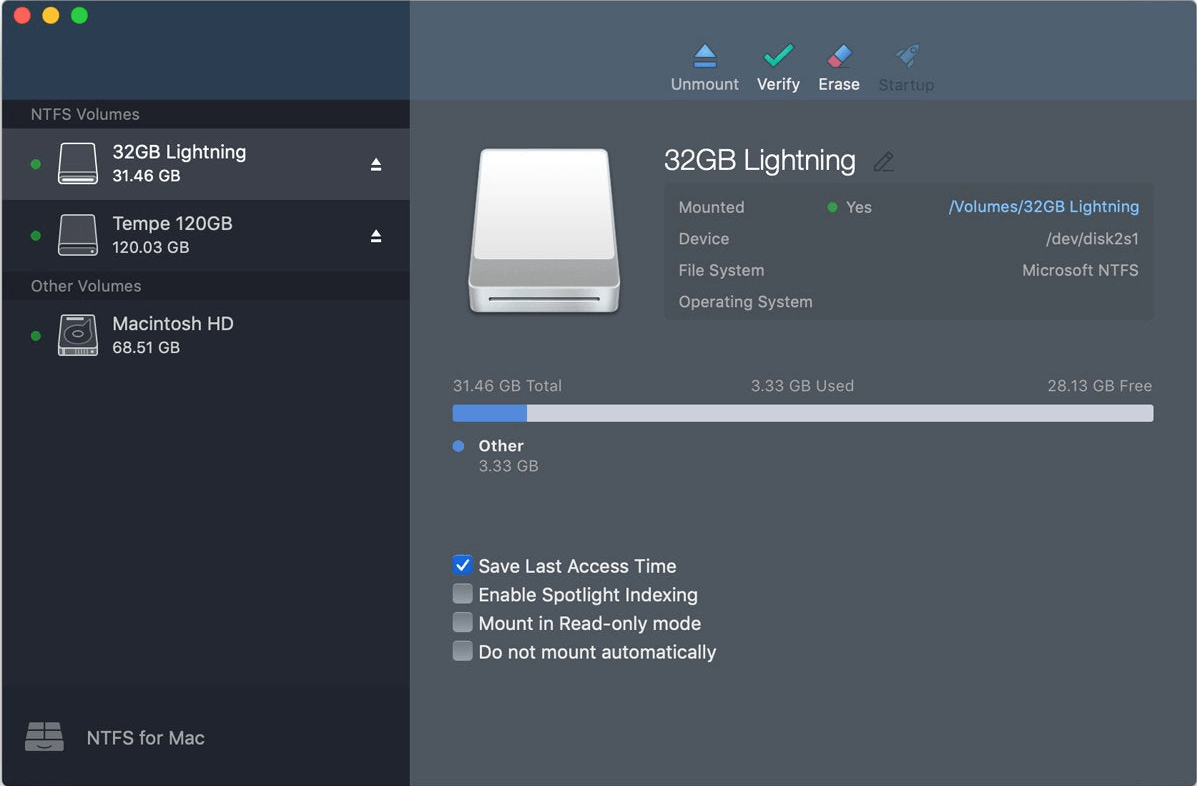
EaseUS NTFS for Mac is reliable software to enable read-write mode for your NTFS drive. It works with the newest M1-based Mac computers. After the software got free download, you can click the "Enable Writable" button to full access to the Windows NTFS volumes in macOS. Moreover, if you've activated software, then you will not need to run EaseUS NTFS for Mac again the next time. It will mount and unmount NTFS drive from Mac's status bar.
Price: $14.95/month
Step 1. Launch and activate EaseUS NTFS for Mac. Click "I already have a license" to unlock this software.
Step 2. Connect an NTFS drive to Mac, EaseUS NTFS for Mac will automatically detect the device. Select your drive and you'll see it's now marked as 'Read-only". Click "Enable Writable" to add read and write rights to the drive.
Step 3. When the state of NTFS drives turns into "Writable".
Step 4. EaseUS NTFS for Mac will pops up a window to help Mac get access to the NTFS drive:
Step 5. When EaseUS NTFS for Mac restarts, you can then open to check, read, write, and even modify saved data on the NTFS device.
Paragon NTFS for Mac is a robust NTFS reader which fully compatible with the M1 chip. If you need to read and write files from HDD, SSD, and a flash drive, you can download this Microsoft NTFS software to write, edit, delete, copy, format files on it.
Price: $19.95
Step 1. Download and install Microsoft NTFS for Mac by Paragon Software (https://www.paragon-software.com/home/ntfs-mac/).
Step 2. Restart your Mac computer.
Step 3. Then your connected Windows NTFS volumes are available on Finder.
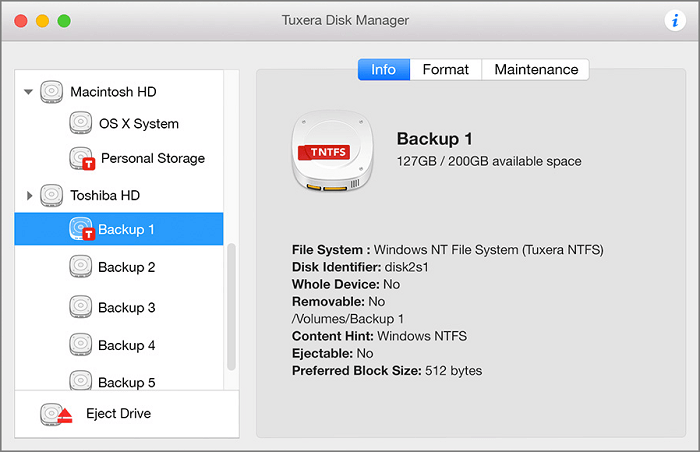
Tuxera NTFS for Mac is an easy-to-use software to edit, open, move, copy, delete files on a USB drive with the NTFS file system. With this tool, it's easy to get write access on Mac. This software not only can add read-write compatibility for NTFS drive, but it also can create NTFS partitions, verify and repair NTFS volumes.
Price: $15/month
Step 1. Download and install Tuxera NTFS for Mac (https://ntfsformac.tuxera.com/).
Step 2. Reboot your Mac by clicking the Restart button.
Step 3. Connect your NTFS drive to mac and open the drive in Finder.
Now you can write, edit, move, delete files on NTFS drives.
NTFS-3g (https://www.tuxera.com/company/open-source/) is an open-source and cross-platform utility compatible with macOS, Android, Linux, and other OS. With its help, you can easily enjoy the read-write support.
Mounty for NTFS is a completely free tool to allow writing to NTFS drive.

Step 1. Download and install Mounty for NTFS from the official site (https://mounty.app/).
Step 2. Click the icon from the menu bar to manage the mounted drive.
When it comes to picking a powerful NTFS for Mac, here are six programs you can choose to enable read-write support. To try a stable app, the above 4 tools can help you. All 4 tools have free trials but the EaseUS NTFS for Mac has the lowest price for the upgrade. Download the one based on your needs.
Related Articles - ALSO ON EaseUS SOFTWARE
(2023 Fixed) Can A Mac Read NTFS | Can Mac Read and Write NTFS
![]() Tracy King/2023-11-07
Tracy King/2023-11-07
How to Fix WD My Passport Not Showing up Mac
![]() Tracy King/2023-11-07
Tracy King/2023-11-07
Toshiba NTFS Driver for Mac! Enable Read and Write Toshiba External Hard Drive
![]() Tracy King/2023-11-07
Tracy King/2023-11-07
Fixed: Can't Add Files to Seagate Hard Drive on Mac
![]() Roxanne/2023-11-07
Roxanne/2023-11-07
Copyright © 2004 - 2023 EaseUS. All rights reserved.


