This page recommends 3 best NTFS Mounter for Mac to help you make inaccessible or unrecognized NTFS drives readable and writable on Mac computer. Follow and take try, you can successfully mount and get your NTFS drives accessible on Mac.
Table of Contents
Cross-platform incompatibility is a significant hindrance for users who frequently switch between Mac and windows, particularly when sharing files via an NTFS drive between the two operating systems. NTFS drive worked fine once it was hooked up to the computer's USB port, but there was no way to edit, rename, copy, paste, delete, move, or create files on it. So, can MacOS read and write NTFS? Yes, Drives, Storage devices, memory sticks, and external hard disks formatted in Windows NTFS can be read without issue.NTFS disks can be read on any Mac, whether a desktop or a notebook running either macOS or Mac OS X. You can see what's in your files by accessing them. The quality of the files will be the same as on a PC.
| Workable Solutions | Step-by-step Troubleshooting |
|---|---|
| 1. EaseUS NTFS for Mac | Launch EaseUS NTFS for Mac on Mac, click "I already have a license" ...Full steps |
| 2. Add NTFS Drivers | Download and install Xcode. Xcode is the official macOS...Full steps |
| 3. Terminal | Launch Terminal by selecting Applications...Full steps |
Mac users can do more than only read and write to NTFS files. Changing file formats is possible, but the process will take time. Write permissions on NTFS can be granted by using Terminal and the NTFS user account you created before. The best way to format NTFS drives is through third-party drivers and programs available in various forms.
There are a few possibilities here, and you'll need to pick one.
Paid Third-Party Applications: It's possible to use paid third-party NTFS drivers on your Mac; these drivers perform perfectly. This is a premium option, but it is simple to set up. As a result, it should provide better results than the free alternatives listed above.
Free Third-Party Drivers: You can enable write functionality on a Mac using an available open-source NTFS driver. As a result, installing this takes a bit of time on Macs due to 10.11 El Capitan's new System Integrity Protection feature. In comparison to paid solutions, it's slower. In addition, it offers a security risk by mounting NTFS volumes in read-only mode automatically.
Apple's NTFS-Write Experimentation: Writing to NTFS disks is now supported in an improved manner by the macOS operating system. It is, however, disabled by default and must be enabled via the terminal. Even if it works, there's no guarantee it won't ruin your NTFS file system. In reality, it's destroyed data in the before. This is something we strongly discourage you from attempting to use. It is turned off by default for a good reason.
If you must do this, buying for a third-party NTFS driver is the way to go, as the free alternatives don't perform well and are more challenging to set up.
Third-party Drivers such as EaseUS NTFS for Mac are designed to bridge the gap between the Mac OS and the NTFS file system when it writes to NTFS. Thanks to this application, the files on Microsoft NTFS-formatted drives on Mac can be written, edited, moved, copied, pasted, and deleted quickly, flawlessly, and efficiently.
You will be able to read and write to the Windows NTFS file system without using a Mac-compatible file system while using. To make it Mac-compatible, you don't have to reformat the Windows NTFS file system. Using this Mac NTFS software, you may also remove, repair, and reformat the NTFS drives on your Mac with ease.
Step 1. Launch EaseUS NTFS for Mac on Mac computer, and click "I already have a license" to enter your code for unlocking the software.
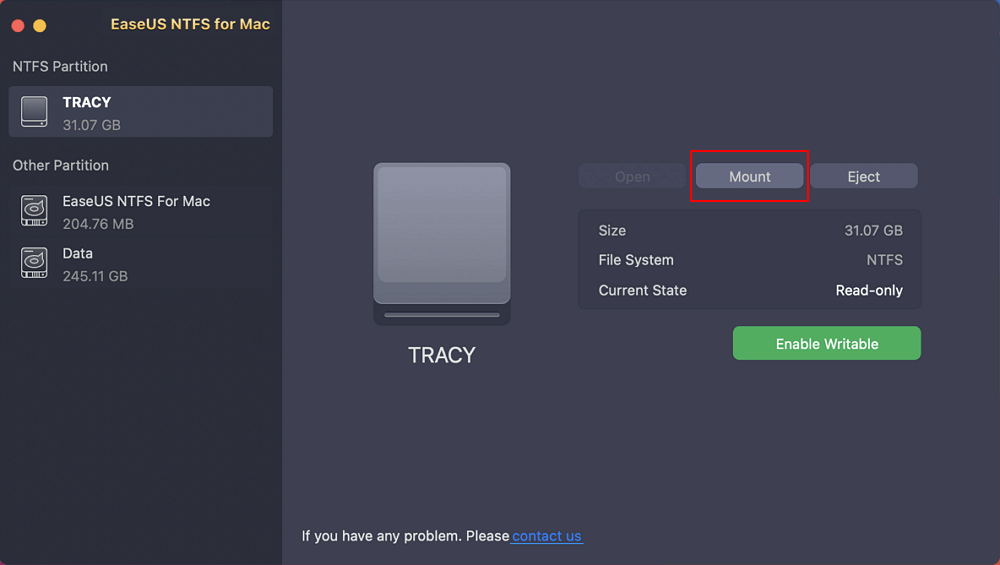
Step 2. Connect your NTFS external storage device to Mac, and let EaseUS NTFS for Mac to detect it. Once it detects your drive, select the drive and click "Mount".
After this, EaseUS NTFS for Mac will mount this drive on Mac and you shall be able to open and view its content.
Lets have a look at notable features of this third party application:
FUSE is the best free NTFS driver option for Mac, without a doubt. It's up-to-date and compatible with the latest versions of macOS, but a paid NTFS mounter for Mac is more reliable. In addition, the installation method and command lines are complicated, so steer clear of this one if you're not comfortable using the command prompt.
It is assumed that you are familiar with the use of Terminal before continuing. To prevent damage to your operating system, be sure to follow the instructions exactly.
1. MacOS 10.13 and later users should disable SIP. System Integrity Protection (SIP) exists to keep the operating system safe from unwanted changes. For example, a faulty startup disk could happen if SIP is turned off, as this leaves your design open to attack. On the other hand, disabling SIP will force your NTFS devices to mount in read-only mode when you boot up automatically.
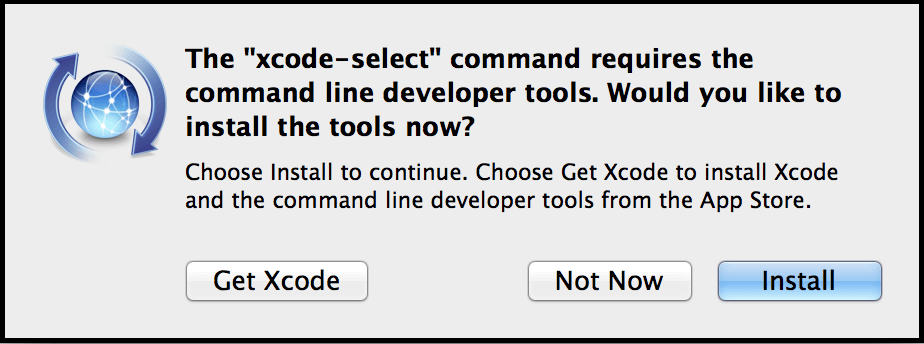
2. Download and install Xcode. Xcode is the official macOS, iOS, watchOS, and tvOS development environment. You can use this to create and modify software with the help of this tool.
a) Go to Finder > Applications > Utilities > Terminal.
b) Run the command line: xcode-select –install.
c) Click "install" when asked to install command line developer tools.
3. Download and Install Homebrew. Homebrew is a software package management system available for free. It simplifies the installation of software on macOS.
a) Go to Terminal window.
b) Type in the command line:
c) /usr/bin/ruby -e “$(curl -fsSL https://raw.githubusercontent.com/Homebrew/install/master/install)”
d) Hit Enter to install it (type password when prompted)
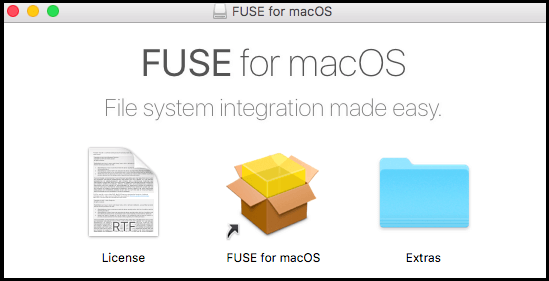
4. Download FUSE from Github and install it.
5. Install NTFS-3G, it is an another open source project that helps to make NTFS writable on macOS.
a) Go to Terminal prompt and type in the following command line:
b) brew install ntfs-3g
c) Hit Return
Reboot the mac and follow these steps:
You should enable SIP after utilizing NTFS drives on your Mac to help protect your computer against viruses and other malware.
Apple is still testing NTFS write support because it has not yet been officially supported for full read-write access on Macs. It's not a good idea for people who want to use their Mac's NTFS drives for work as drive corruption, and data loss is both possible side effects of using this option.
The steps to enable native NTFS write support on a Mac are also included here, in case you're interested. Even though you'll have to go back to Terminal and re-type the command, following the steps is much more straightforward this time.
1. Launch the Terminal program by selecting Applications > Utilities > Terminal from the menu bar.
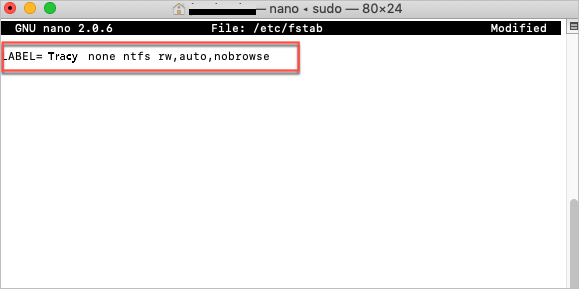
2. To edit the fstab file, run "Sudo nano /etc/fstab" (provide your password when prompted). When you type in a password, no letters will appear.

3. Type "LABEL=VOLUME NAME none NTFS rw, auto, browse" to write "Control + O" into the fstab file editing window. (VOLUME NAME must be replaced with the name of your NTFS volume.
Tip: Write a different line for each NTFS drive if you want to write to numerous NTFS volumes.
4. To exit, press "Control + X" followed by "Enter."
5. Remove the NTFS drive on the Mac and reconnect it.
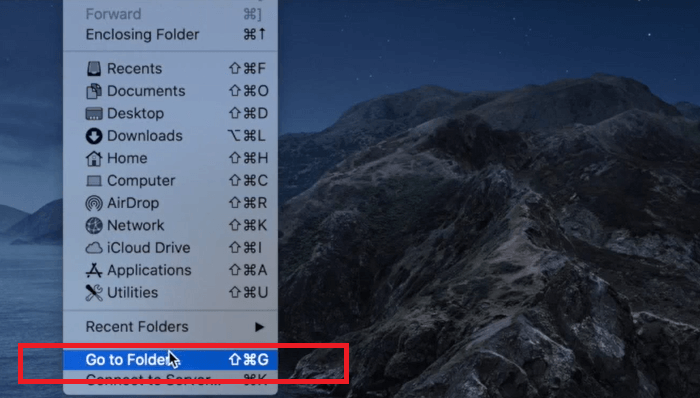
6. Click "Go" from the "Go to Folder" menu at the top left of the screen.
7. Enter /Volumes into the text box and press Enter.

8. Locate the NTFS volume or drive and drag it to the sidebar for quick access.
Tip: Repeat steps 1 and 2, remove the command line from your terminal to undo the change—exit after saving your changes.
Backing up all vital files, reformatting the disks, and restoring the files can take a long time if you have a lot of NTFS drives with lots of data. As a result, making NTFS drives writable on Mac requires enabling NTFS write support in macOS. It's also possible that users who use Boot Camp on their Mac will need NTFS to write access. In all likelihood, the Windows partition will require file transfers shortly. The simplest and safest method to enable Mac NTFS write capabilities is to use a paid third-party NTFS driver.
EaseUS NTFS for macOS is a quick and easy process that adds much-needed compatibility for Mac OS X users who want to write to NTFS disks. Switchers, Boot Campers, and individuals who need to share disks across Windows and OS X systems can benefit from Parallels. Even though there are free solutions to explore, users demand consistency in file transfers because they do not want to lose their data. So why take the risk of uploading files through questionable methods when an option is practical and affordable.
Related Articles - ALSO ON EaseUS SOFTWARE
How to Change Read-Only Files on Mac [No Data Loss]
![]() Sherly/2023-12-19
Sherly/2023-12-19
Can A Mac Read NTFS | Can Mac Read and Write NTFS (2024 Fixed)
![]() Tracy King/2024-01-04
Tracy King/2024-01-04
How Do I Change My External Hard Drive from Read-only on Mac
![]() Tracy King/2023-12-19
Tracy King/2023-12-19
Mount External Hard Drive Mac Terminal [All Details You Need]
![]() Roxanne/2023-12-19
Roxanne/2023-12-19
Copyright © 2004 - 2023 EaseUS. All rights reserved.