Explore the three best and free NTFS file explorers for Mac to access, read, write and modify NTFS files on your macOS in 2024.
Table of Contents
Today, this post will walk readers through the three best and free NTFS file explorers for Mac.
| Workable Solutions | Step-by-step Troubleshooting |
|---|---|
| Fix 1. Download NTFS for Mac Reader Software | Step 1. Launch and activate EaseUS NTFS for Mac. Click "I already have a license"...Full steps |
| Fix 2. Run NTFS-3G to Explore NTFS File | Step 1. If you are using macOS 10.13 or higher, Disable SIP...Full steps |
| Fix 3. Terminal to Enabling NTFS File Exploring Feature | Step 1. Launch the Terminal program from the Applications > Utilities > Terminal...Full steps |
Do you often transfer files between Windows and Mac computers?
If yes, then you probably want to know whether you can mount NTFS drives on Mac. Then, the answer is yes.
You can mount Windows NTFS drives on Mac but in read-only mode. Mac users can read NTFS files on macOS but can't write or edit them in any way. That is because NTFS, aka New Technology File System, was developed by Microsoft. MacOS doesn't support the NTFS file system.
Here many people format NTFS to a FAT file system to run the external disk on both Windows and Mac. But we won't recommend it because the NTFS file system has way more benefits than FAT, such as:
All in all, NTFS is a great file system, except for limited MacOS support. But that can be fixed.
Yes, using the robust NTFS file explorer for Mac, one can effortlessly read-write NTFS files on macOS. Let's find the best NTFS file explorer for Mac!
NTFS write support might be disabled by Apple for macOS, but can enable it using these solutions:
The best option to read and write NTFS drives on Mac is to download an NTFS for Mac reader software. This software will open an NTFS file explorer to read, write and edit NTFS content on Mac.
Among all the available NTFS reader software for Mac, EaseUS NTFS for Mac is one of the best and free tools. The software is compatible with macOS 11 to MacOS 10.13 devices along with M1 Mac devices.
It helps mount and unmount Windows NTFS volumes from Mac's status bar and edit the NTFS files on Apple devices. Without any terminal commands, this NTFS file explorer will open NTFS files with a click.
Pros
Cons
Here's how EaseUS NTFS file explorer can view and edit NTFS on Mac:
Step 1. Launch and activate EaseUS NTFS for Mac. Click "I already have a license" to unlock this software.
Step 2. Connect an NTFS drive to Mac, EaseUS NTFS for Mac will automatically detect the device. Select your drive and you'll see it's now marked as 'Read-only". Click "Enable Writable" to add read and write rights to the drive.
Step 3. When the state of NTFS drives turns into "Writable".
Step 4. EaseUS NTFS for Mac will pops up a window to help Mac get access to the NTFS drive:
Step 5. When EaseUS NTFS for Mac restarts, you can then open to check, read, write, and even modify saved data on the NTFS device.
NTFS-3G is an open-source and secure software to read-write Microsoft NTFS files on a Mac. It is free software that often uses the FUSE file system, which can run unmodified on different operating systems.
Pros
Cons
Here are the detailed steps to use the NTFS-3G file system driver to mount NTFS drives on Mac:
Step 1. If you are using macOS 10.13 or higher, Disable SIP that can put your Mac in danger.
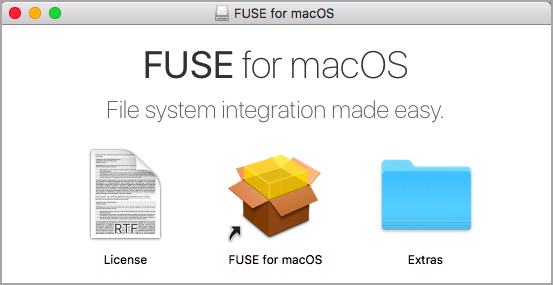
Step 2. Go to GitHub.com to download and install FUSE for Mac.
Step 3. Next, download and install Homebrew on Mac.
Step 4. Click on the Go from the upper right corner of the desktop, select Utilities > Terminal.
Step 5. Enter brew install ntfs-3g in the command prompt and press Enter to install NTFS-3G from Homebrew. The password needs to be entered when a prompt asks for it.
Step 6. Enter sudo mkdir /Volumes/NTFS in the Terminal and press Enter to create an NTFS mount point.
Step 7. Next, enter diskutil list to open up the list of volumes connected to the Mac.
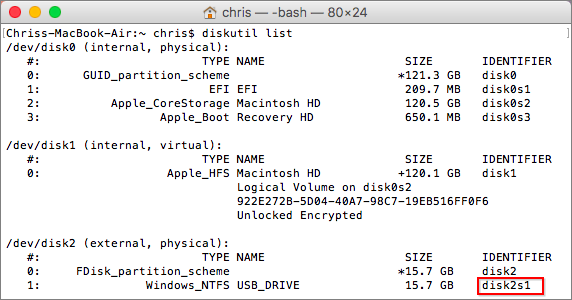
Step 8. Finally, enter sudo /usr/local/bin/ntfs-3g /dev/disk3s1 /Volumes/NTFS -olocal -oallow_other and press Enter. Now, you will see the NTFS volume mounted on thev desktop in read-write mode.

Mac might not yet support the NTFS writing ability, but it is in the experimental phase. That means the NTFS writing feature is just disabled by default. So, using the command lines in Terminal, NTFS file explorer for Mac can be enabled.
Though, NTFS writing support isn’t still stable on Mac, so use this solution very carefully. If you accidentally press any wrong keys in Terminal, it can damage NTFS drives or lose data from them.
Pros
Cons
We don't recommend using this method, but if users follow our instructions precisely, they can safely enable NTFS file explorer in Terminal. Follow these steps very carefully:
Step 1. Launch the Terminal program from the Applications > Utilities > Terminal.
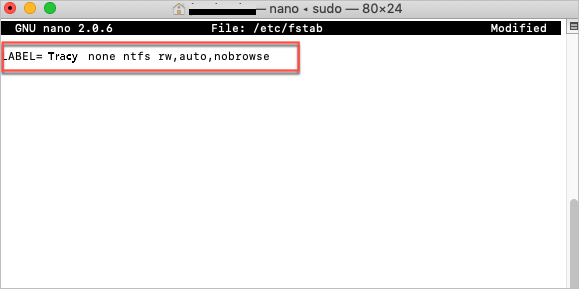
Step 2. Type sudo nano /etc/fstab to edit the fstab file and provide the password.

Step 3. Enter LABEL=VOLUME_NAME none ntfs rw,auto,nobrowse in the editor window and hit Control + O to write.
Step 4. Press Enter and then Control + X keys to exit.
Step 5. Remount NTFS drive to Mac.
Step 6. From the top of the desktop, click on the Go and select Go to Folder.
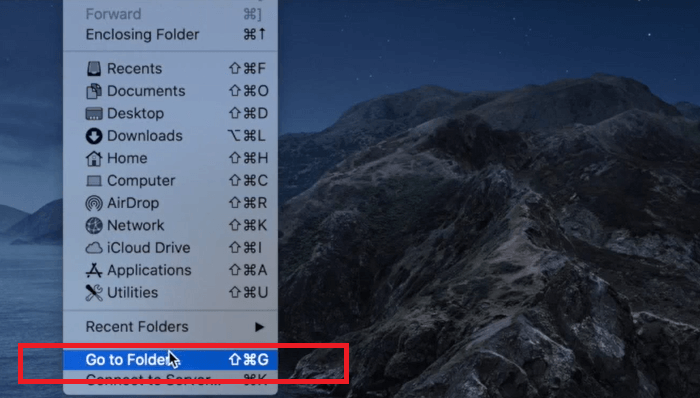
Step 7. Enter /Volume in the Go to Folder field.

Step 8. Navigate to the NTFS drive and drag it to the sidebar.
After exploring all three NTFS file explorer solutions for Mac, all our readers must have selected a suitable way to access NTFS files.
But if you ask for an expert’s recommendation, we will suggest using EaseUS NTFS for Mac. That is because it is an easy to use, less complicated, and powerful solution than NTFS-3G or Terminal.
However, the program might not be 100% free, but you can use a 7-day free trial. Also, the software price isn’t high compared to the features offered. So, go for EaseUS NTFS to easily access NTFS on Mac.
Related Articles - ALSO ON EaseUS SOFTWARE
EaseUS NTFS for Mac Cataline/Big Sur and M1 Full Version Free Download with Serial Key
![]() Tracy King/2023-12-19
Tracy King/2023-12-19
Can Mac Write to NTFS, Yes! Your 2023 Full Tutorial
![]() Sherly/2023-12-19
Sherly/2023-12-19
How to Read/Write NTFS drive on macOS Big Sur
![]() Tracy King/2023-12-19
Tracy King/2023-12-19
How to Format USB to FAT32 on Mac Using 3 Methods with Pictures
![]() Oliver/2023-12-19
Oliver/2023-12-19
Copyright © 2004 - 2023 EaseUS. All rights reserved.


