Mac users can do more than just read from and write to NTFS drives. It's possible to modify file types, but the process will take some time. Instead, use Terminal and grant yourself write permissions to obtain access to NTFS.
Table of Contents
If you're unfamiliar with the NTFS file system format, you may think, "what really is NTFS format, so why would I use it?"
The NT File System (also known as New Technology File System) was introduced as the primary file system in Windows NT 3.1. External storage devices are frequently formatted as NTFS by default because Windows is the most widely used operating system on desktop PCs.
Mac cannot natively write to it because NTFS is a patented file system that Apple does not license. Mac will need an additional NTFS driver if you want to work with NTFS data on Mac. Mac users may have access to these documents, but that seems unlikely.
Does it mean Mac users cannot read and write NTFS drives?
In addition to reading NTFS files, Mac users can perform other operations on them. File types may be changed, but it will take some time to go through all of that. To gain access to NTFS, users can use Terminal and gain writing permissions. Format NTFS drives in disk utility third-party drivers and apps are the best bet, and they come in a range of packages.
This article will list down some options to read and write NTFS drive on macOS Catalina.
| Workable Solutions | Step-by-step Troubleshooting |
|---|---|
| Third-party software | Launch and activate EaseUS NTFS for Mac. Click "I already have a license"...Full steps |
| Enable writing on Terminal | Launch the Terminal program by selecting Applications > Utilities > Terminal...Full steps |
| Format NTFS drive in Disk Utility | Go to Tools & Extensions -> Applications -> Open Disk Utility...Full steps |
Third-party applications are an option if you don't want to take the chance of bricking NTFS disk drive or find the other procedures too tricky.
Mac users using OS Catalina or other versions can read and write NTFS drives with ease using EaseUS NTFS for Mac.
EaseUS NTFS for Mac is a small utility software. It's a Mac NTFS mounter that lets you mount and un-mount Windows NTFS drives in applications like Finder and Disk Utility. You can view and copy files from an NTFS-formatted external drive on Mac with this Mac NTFS reader. As an NTFS writer, it gives access to NTFS write support for Macs as well.
Step 1. Launch and activate EaseUS NTFS for Mac. Click "I already have a license" to unlock this software.
Step 2. Connect an NTFS drive to Mac, EaseUS NTFS for Mac will automatically detect the device. Select your drive and you'll see it's now marked as 'Read-only". Click "Enable Writable" to add read and write rights to the drive.
Step 3. When the state of NTFS drives turns into "Writable".
Step 4. EaseUS NTFS for Mac will pops up a window to help Mac get access to the NTFS drive:
Step 5. When EaseUS NTFS for Mac restarts, you can then open to check, read, write, and even modify saved data on the NTFS device.
There is no need to format the Windows NTFS file system to make it Mac-compatible if you use this application. This Mac NTFS software also works as a disk management tool to help users remove, repair, and reformat NTFS drives on their Mac.
Salient features of EaseUS NTFS for Mac are:
The experimental NTFS write functionality is included in the Mac operating system; however, it is deactivated by default. To make it work, enter some commands into the Terminal.
Apple, on the other hand, hasn't made NTFS-writing support official just yet. It's been shown to be generally unstable and dangerous. It may corrupt hard drive and erase all of the data. If you've lost data from NTFS drives due to a lost password or other error, you can use Ease US data recovery to get it back.
Apple NTFS write support is not advised. However, if you want to know how to enable it, follow these steps:
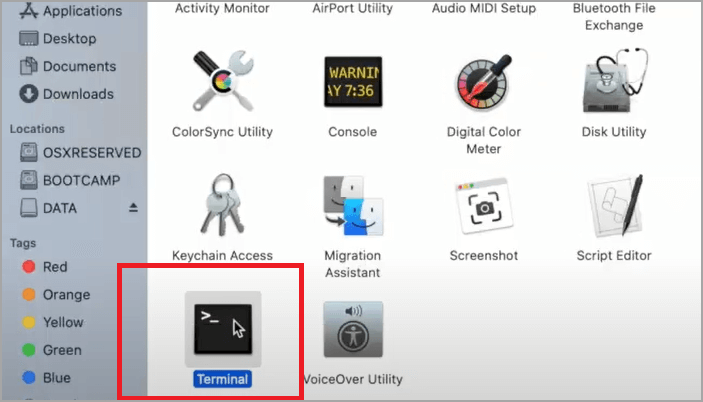
1. Launch the Terminal program by selecting Applications > Utilities > Terminal from the menu bar.
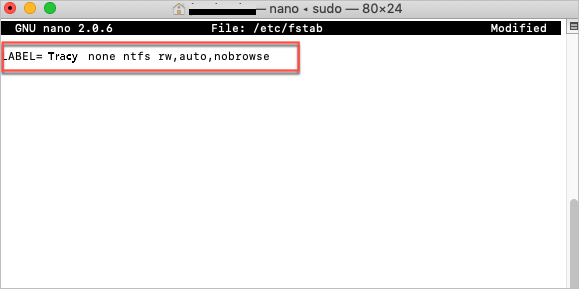
2. To edit the fstab file, run "sudo nano /etc/fstab" (provide password when prompted). When you type in a password, no letters will appear.

Type "LABEL=VOLUME NAME none NTFS rw,auto,nobrowse" to write "Control + O" into the fstab file editing window. (VOLUME NAME must be replaced with the name of NTFS volume.
Tip: Write a different line for each NTFS drive to write to numerous NTFS volumes.
4. To exit, press "Control + X" followed by "Enter."
5. Remove the NTFS drive on the Mac and reconnect it.
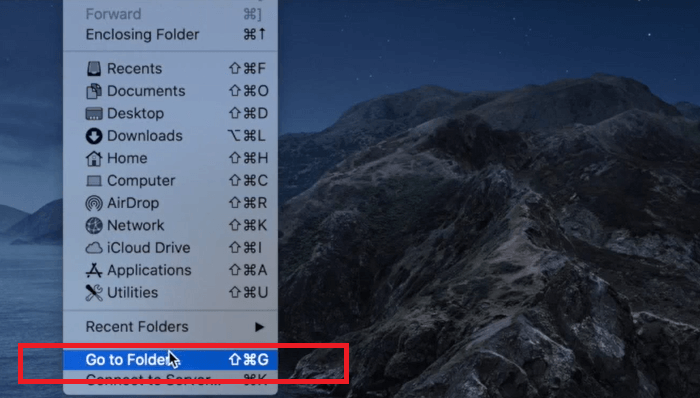
6. Click "Go" from the "Go to Folder" menu at the top left of the screen.
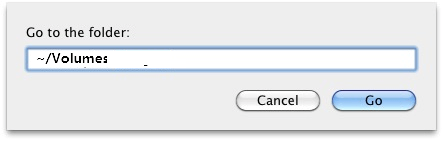
7. Enter /Volumes into the text box and press Enter.
8. Locate the NTFS volume or drive and drag it to the sidebar for quick access.
Tip: Repeat steps 1 and 2, remove the command line from Terminal to undo the change. Exit after saving changes.
NTFS drive on Mac can be converted to FAT using the Disk Utility app with macOS. Think about what's in NTFS files before you change the format.
In the case of high-quality videos or documents, FAT32's inefficiency can result in data loss. This occurs as a result of the fact that FAT-formatted disks are clustered based on their size. File fragmentation necessitates frequent FAT disk updates, and failing to do so is a leading cause of declining file quality. Files that are too large to fit on a single disk are divided into smaller files, and FAT disks have to be instructed to find these smaller disks regularly.
This is one of the main reasons you should use EaseUS data recovery to back up your Mac. To prevent data loss or corruption when switching from NTFS to FAT, create a disk backup first.
Formatting a flash drive with Disk Utility to FAT will delete all the data on it. Make sure to back up any critical files to another safe location before you do this.
Follow these procedures to format USB device in the FAT format
1. Connect the USB flash drive to your Mac computer.
2. Go to Tools & Extensions -> Applications -> Open Disk Utility by double-clicking the selected file.
3. Choose Erase from the sidebar once you've selected your USB flash drive from the list.
4. Rename the USB flash disk that you just made (It is optional).
5. Select MS-DOS (FAT) as the Format and Master Boot Record as the Scheme, then click Next. Once you've done that, click Erase.
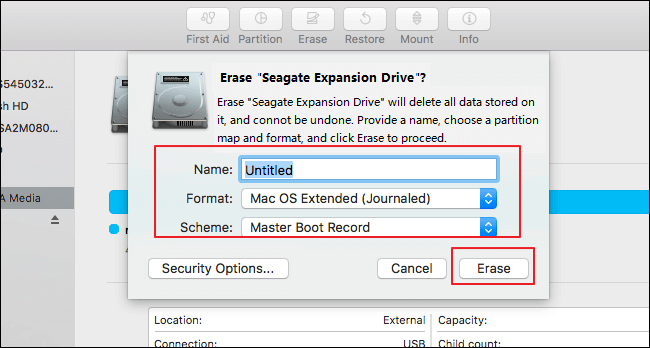
Afterwards, you'll have a new USB flash drive with FAT as the file system and no data on it. You can re-save data with it.
Maybe you've discovered that NTFS-write compatibility can be activated via the Mac terminal. However, Apple hasn't validated the integrity of this technique till now. It may bring some trouble to the Mac. NTFS files are still a relative niche file type, but it can be frustrating to not have complete access when you need to access them. If you attempt to make modifications and mistakenly destroy Mac's data, things can be far worse for.
Is EaseUS NTFS for Mac worth the try? Definitely. Anyone utilizing dual boot on a Mac (macOS and Windows) will find this helpful program. Also, for those interacting with NTFS-formatted disks frequently, this application is an excellent investment since it permits communication between the two platforms. Without this program, you cannot write on an NTFS volume on Mac trouble-free, which will be almost essential in specific scenarios. EaseUS NTFS for macOS is a dependable software for routine daily use.
Related Articles - ALSO ON EaseUS SOFTWARE
Disk Won't Format on Mac? Fixes Available Here
![]() Tracy King/2023-11-07
Tracy King/2023-11-07
Why Is My External Hard Drive Shows Read Only on Mac? Answered
![]() Tracy King/2023-11-07
Tracy King/2023-11-07
How to Change Read-Only Files on Mac [No Data Loss]
![]() Sherly/2023-11-07
Sherly/2023-11-07
How to Format SSD to exFAT on Mac? Full Guide Here
![]() Tracy King/2023-12-05
Tracy King/2023-12-05
Copyright © 2004 - 2023 EaseUS. All rights reserved.


