- Store
-
Support CenterGuides, License, ContactDownloadDownload installerChat SupportChat with a TechnicianPre-Sales InquiryChat with a Sales Rep
This page guides you through safely and easily format SSD to exFAT on Mac. Follow the steps provided to ensure a smooth process, along with additional tips to avoid exFAT format failure.
Table of Contents
This guide aims to explain three solutions to format an SSD to the exFAT file system on a Mac. By adopting the exFAT file format, your SSD will gain versatile compatibility to support all types of operating systems. The exFAT format also ensures the seamless exchange of files larger than 4GB. Follow the solutions outlined below to embark on your formatting journey.
Preparation is crucial before diving into any formatting tasks. If your SSD holds essential data, it's crucial to back up your files beforehand:
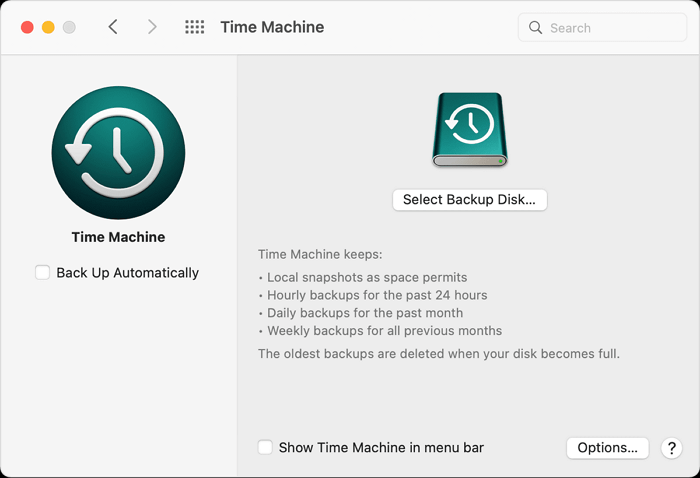
This way, you can regain your data after the reformatting operation.
This section will introduce the most reliable ways to enable Mac users to format SSD to exFAT on Mac. We included the respective guides for each solution. Please follow all the steps attentively, and see the attached images for better navigation.
Using a reliable third-party tool - EaseUS NTFS for Mac is the easiest way to format SSD to exFAT on Mac. It is a handy formatting tool to ensure a seamless process without diving into complex manual procedures. Any Mac user can apply its one-click formatting feature and let it do the rest. EaseUS NTFS for Mac is well-known for its efficient results and intuitive interface.
Download EaseUS NTFS for Mac, and follow these simple steps to format SSD to exFAT on Mac:
Step 1. Launch EaseUS NTFS for Mac on Mac computer, click "I already have a license" to activate this software.
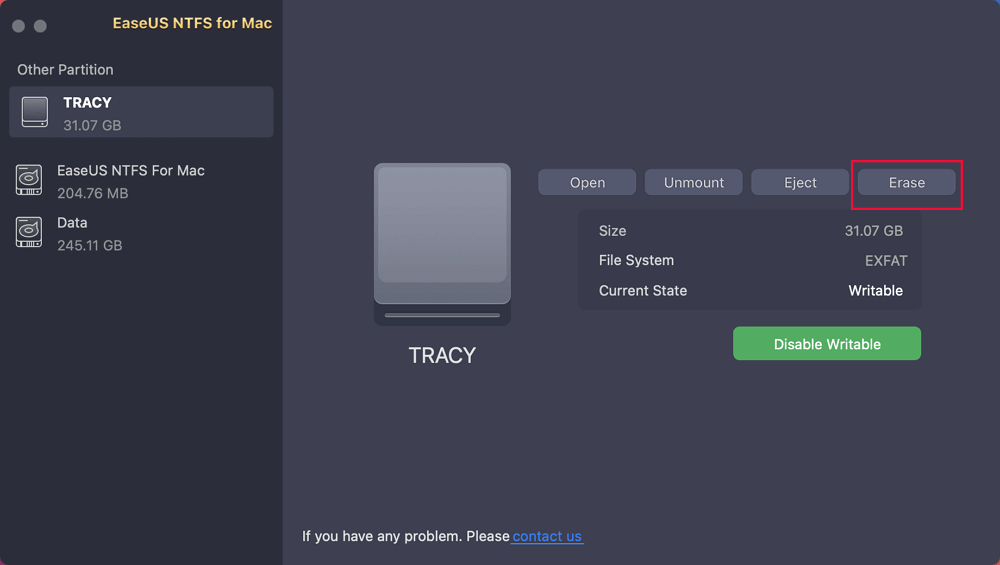
Step 2. Select target disk drive or removable device you want to erase, and click "Erase."
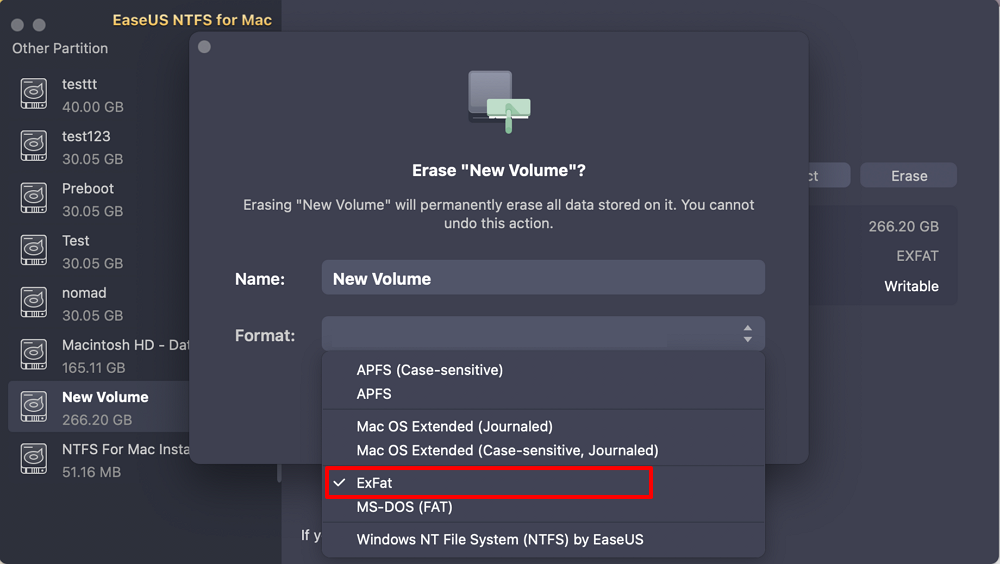
Step 3. In the Format section, select ExFAT as your target file system from the drop-down box.
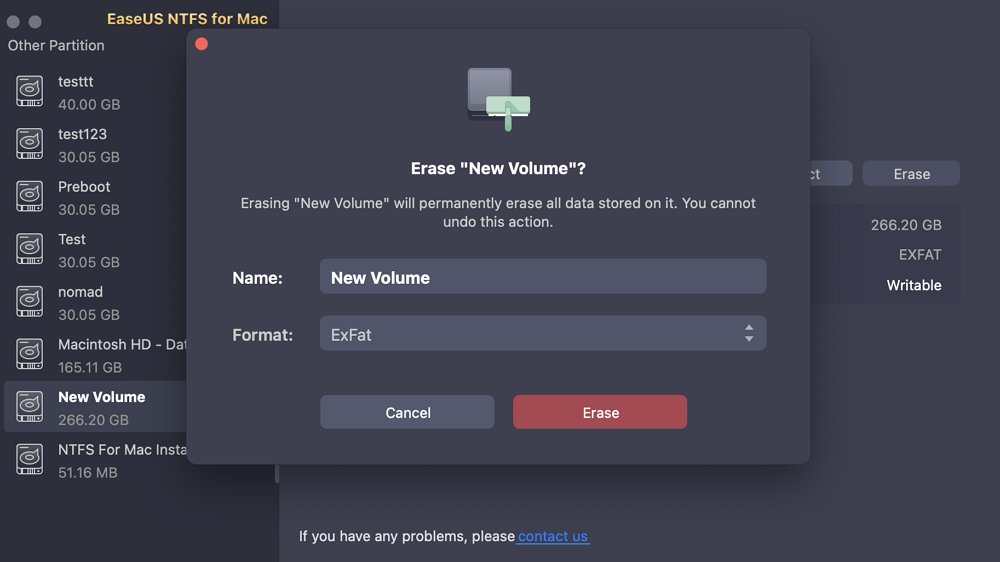
Step 4. Click the "Erase" button to confirm the format process and erase all data stored on the external storage device.
The tool will take some time to format the disk, depending on the storage size.
Key Features you may like in EaseUS NTFS for Mac:
If you like this SSD formatting tool, don't for get to share it online to help more of your friends take full control of their SSD or other storage devices:
Disk Utility is a built-in disk management tool with a friendly interface. It can be used to format and change the file system of different storage devices, including hard drives, SSDs, SD cards, etc.
Let's go through the detailed steps to format SSD to exFAT on Mac using Disk Utility.
Step 1: Open "Finder" and navigate to "Applications."
Step 2: Select "Utilities" and open "Disk Utility."
Step 3: Find the SSD on the left sidebar and click to select it.
Step 4: Click the "Erase" button from the top menu.
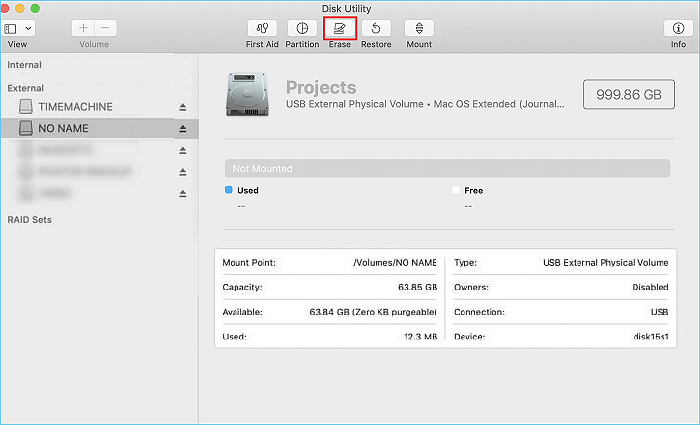
Step 5: Click the "confirm" button to format the SSD.
Step 6: Give a name to the SSD and expand the format menu to choose exFAT file format.

Step 7: Select "Security Options" to modify the frequency to write over the erased data.
Step 8: Click "OK" and then hit the "Erase" button to begin the formatting process.
Wait till the computer erases the existing data from your SSD and format it to the exFAT file system.
Key Features of Disk Utility you may like:
If this method is unsuccessful, head to the coming method using the advanced terminal commands.
Mac users with professional computing skills can directly format the SSD by performing specific Terminal tasks. It is an efficient formatting tool but the process is a bit complicated and time-consuming. We do not recommend this method for newbies. Please note that a wrong command may harm your system or lead to disk corruption, so perform the command line with attentiveness.
Here are the detailed steps to format SSD to exFAT using the Terminal command.
Step 1: Connect the SSD to your Mac.
Step 2: Open "Applications" and choose "Utilities."
Step 3: Select "Terminal" from the list.
Step 4: Type the following command and hit "Enter".
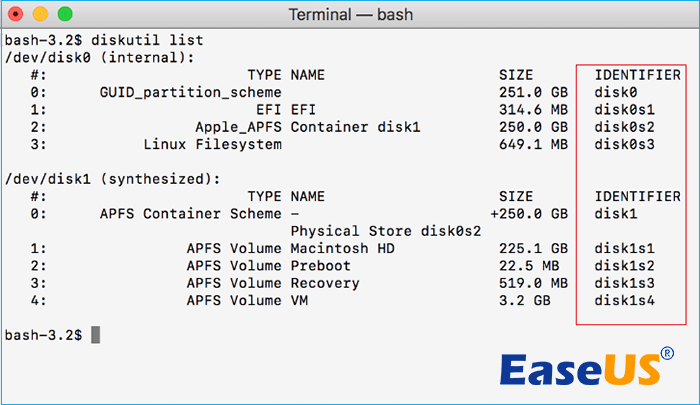
This command will show all available devices on your Mac. Navigate your SSD under the "IDENTIFIER" section, and note its "size" and "name."
Step 5: Apply the following command and hit "Enter" to format your SSD.
Note* Replace "diskname" with the real name of your SSD.
Step 6: Insert the admin password if asked. Terminal will start the formatting process.
Key Feature of Terminal you may like:
Certainly! Apply these easy tips to avoid SSD formatting failure issues on Mac:
If you like this tutorial and successfully formatted your SSD to exFAT without losing any data, feel free to share it to help more of your friends online switch their storage devices to any desired file system:
This comprehensive guide covers easy solutions to format SSD to exFAT on Mac. The detailed steps will help beginners in the formatting process using the specific tool. Formatting disks to the exFAT file system helps users transfer data between Mac and Windows without compatibility issues. It allows users to use a drive across different operating systems. Additionally, beginners should utilize the maximum capacity of the EaseUS NTFS for Mac. It enables Mac users to format SSDs in one click.
Please follow this FAQs section if you still have additional queries about the topic discussed here.
1. Is exFAT a good format for Mac?
Yes, exFAT is a suitable format for Mac, which creates a cross-compatibility of drives with both Mac and Windows systems. It also supports massive data transfer of files larger than 4 GB.
2. What is the best format for an SSD drive on a Mac?
Generally, APFS (Apple File System) is a perfect format for SSD drives on Mac. It is a specific file format for Mac devices to optimize overall disk performance.
3. When should I format SSD to exFAT on Mac?
You should consider the exFAT file format if you want to transfer data between Mac and Windows systems using the same SSD. It will allow you to copy files between different file systems without reformatting.
Related Articles - ALSO ON EaseUS SOFTWARE
Sabrent External Hard Drive Not Recognized Mac | 5 Solutions
![]() Oliver/2025-06-26
Oliver/2025-06-26
Disk Won't Format on Mac? Fixes Available Here
![]() Banu/2025-07-07
Banu/2025-07-07
How to Delete Files from WD Elements on Mac
![]() Banu/2025-06-26
Banu/2025-06-26
How to Delete Files From NTFS on Mac
![]() Daisy/2025-06-26
Daisy/2025-06-26
Copyright © 2004 - 2023 EaseUS. All rights reserved.