- Products
- Store
- Partner
-
Support
Support CenterGuides, License, ContactDownloadDownload installerChat SupportChat with a TechnicianPre-Sales InquiryChat with a Sales Rep
Table of Contents
Today, NTFS USB flash drives are used by a great number of users to portably run their Windows operations. Numerous people use NTFS drives to run their Windows-specific games, apps, and other files on Mac.
If you are one of those users who use NTFS USB drives to keep files in your pocket, then it is important to learn about safely ejecting NTFS drives on Mac Catalina.
Not many people actually know that forceful ejection of NTFS or other USB flash drives can lead to serious problems like data corruption, hard drive malfunctioning, and more.
This post will help you understand the importance of safely ejecting NTFS drives and the correct methods to do that. Let's get started.
Way 1. EaseUS NTFS for Mac - 1-click Ejection
Way 2. Eject from Desktop
Way 3. Drag to Trash
Way 4. Eject from Menu Bar/Finder
Way 5. Eject from Finder Sidebar
Firstly, let's understand what damages the Mac Catalina or NTFS drive will encounter if the drive isn't ejected safely.
One of the common things that forceful ejection can do is data corruption. How? For this, it is important first to understand how Mac and USB interact.
Suppose you are copying a file from a Mac Catalina to an NTFS drive. The machine is here using a write cache to transfer files from one device to another. It is simply a local memory that Mac uses to work quickly.
The write cache completes the file copying process in the background in milliseconds. During this process, if the NTFS drive is ejected on Mac Catalina, you are pulling out a drive without informing your machine.
If the process isn't done by the time you pull the drive out, it can corrupt the file in the process. Since Macs always use write cache to transfer files; thus, safe ejection is an important process.
Besides corrupting data, unsafe ejection of NTFS drives from Mac Catalina can negatively impact the drive’s performance. There might not notice a sudden problem with the NTFS drive, but over time, you will find the drive is working slower than usual.
This problem happens due to the cache memory creation in USB. Every time the NTFS drive is connected with the Mac, it will create a cache of USB. The sudden removal of the drive can decay the cache and gradually lead to performance degradation.
Unsafe ejection can also cause problems in the logical file system. The forceful NTFS drive ejection can sometimes damage the cells.
Just like the brain cells, Mac has some cells that hold internal drive information. Thus, when an NTFS drive is pulled out in read/write mode, it can damage internal drive information and make it inaccessible for you.
Mac users have no option like Windows users to stop a write cache while transferring from one device to another. Therefore, being a Mac Catalina user, you have to learn how to safely eject NTFS drives on Mac.
Further, it is not at all hard to safely eject NTFS drive on Mac Catalina. Here are the five easy options to eject drive on Mac:
If you want a hassle-free solution to eject NTFS drives, go and get EaseUS NTFS for Mac today. This is a perfect tool to mount and unmount NTFS formatted drives from Mac’s status bar. The software also allows to safely eject NTFS drives on M1 Mac devices.
Besides the safe ejection, the program will allow to read and write NTFS drives in macOS. It will help read and write all types of NTFS external drives on Mac, including hard drives, SSD devices, and USB flash drives.
Other EaseUS NTFS for Mac Features
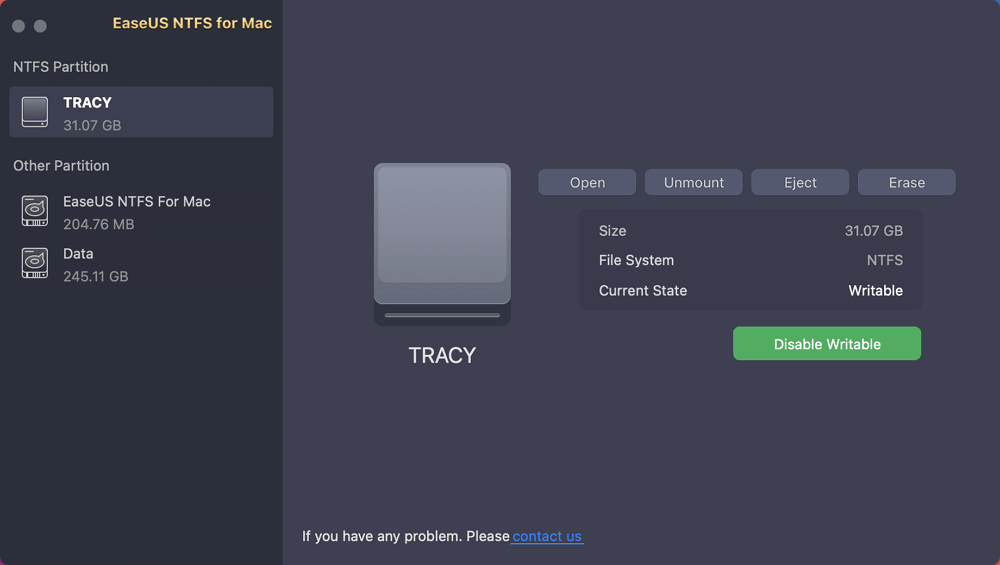
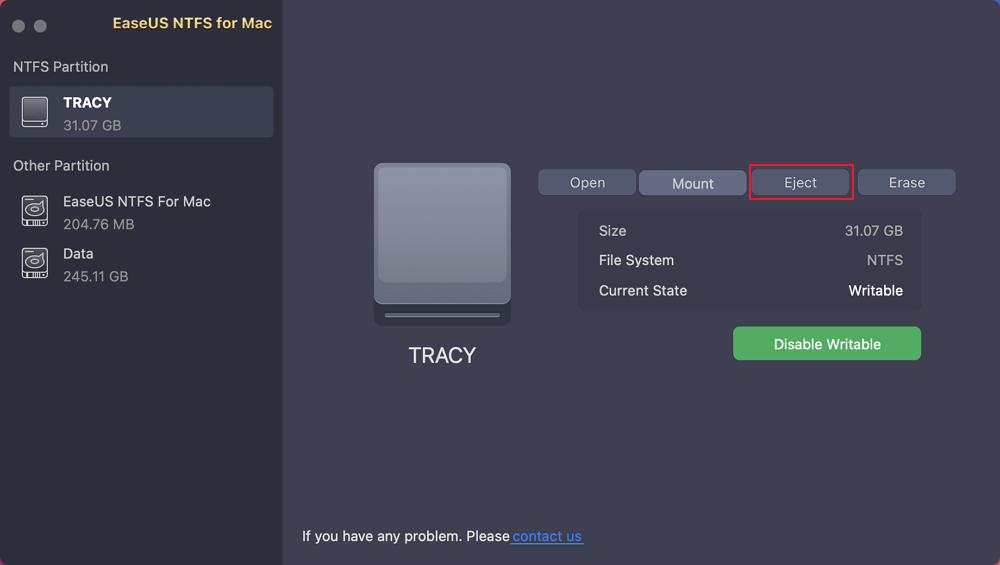
Using the EaseUS NTFS for Mac, one can easily eject the NTFS drive on Mac Catalina as follows:
Step 1. Launch EaseUS NTFS for Mac on Mac computer, click "I already have a license" to activate this software.
Step 2. Let EaseUS NTFS for Mac detect the connected drive that you want to eject.
Step 3. Once detected, select the target drive and click "Eject". This will safely remove your drive without affecting the saved files and data.
Whenever a USB drive or other external drive is connected to the Mac, it appears on the desktop screen. All you have to do is:
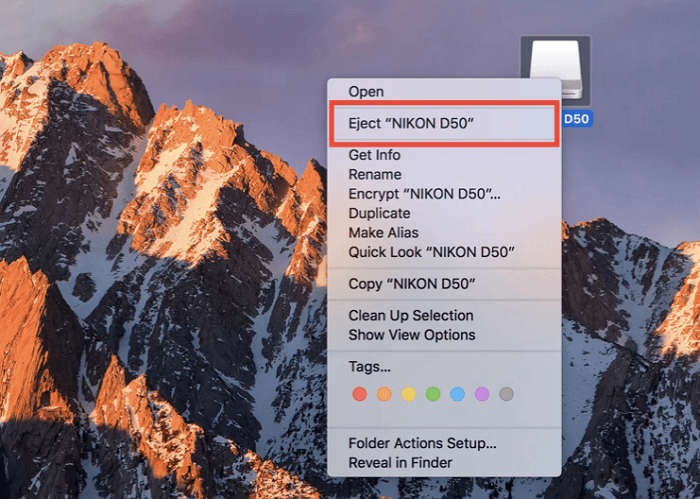
Step 1. Right-click on the external drive located on Mac's desktop.
Step 2. Select the Eject "drive name", and you can safely eject NTFS drive.
Another option to safely eject the NTFS drive on Mac Catalina is to drag your drive icon to the Trash folder. Here's how this works:
Step 1. Drag the external drive icon to the Trash can in the Dock.
Step 2. The Trash can will turn into a big ejection button when you start dragging the icon. Just click on it, and that's it.
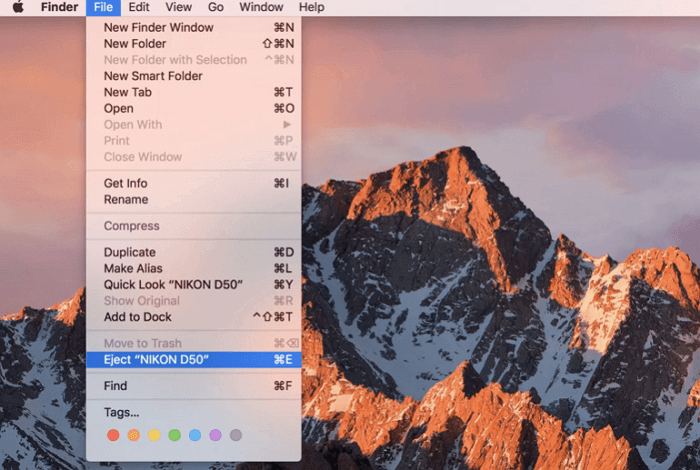
There is also an option to eject the NTFS drive from the Menu bar at the top of the screen. For this, select an NTFS drive on your desktop or in Finder, just File > Eject from the menu.
Finally, if you are on the Finder window, expand the Locations section in the sidebar. There you will find the tiny eject icon next to the name of your drive in the list.
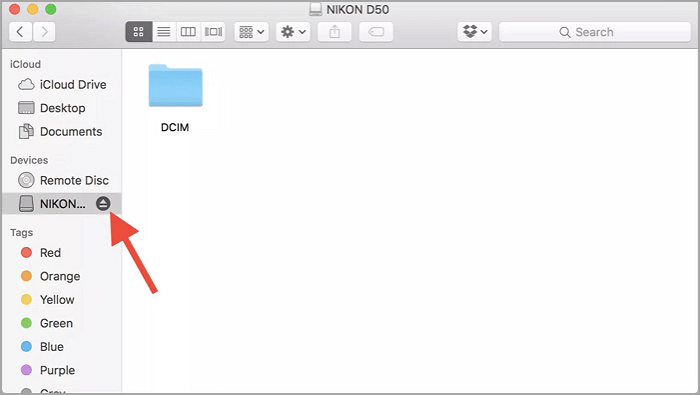
There you have many options to eject NTFS drives safely on Mac Catalina. You can use Finder, Trash can, and many other options to prevent NTFS drive from getting damaged.
However, among all the options, using EaseUS NTFS for Mac is the best. That’s because it is a robust tool that can help read and write Microsoft NTFS drives easily on Mac. Additionally, the software offers several great features to optimize NTFS files.
You can get EaseUS NTFS for Mac free trial and always practice the safe external drive ejection on your Mac.
Related Articles - ALSO ON EaseUS SOFTWARE
How to Delete Files from External Hard Drive Mac
![]() Banu/2025-06-26
Banu/2025-06-26
How to Fix Toshiba External Hard Drive Not Working on Mac
![]() Banu/2025-06-26
Banu/2025-06-26
Can't I Format My USB to FAT32 Mac
![]() Banu/2025-06-26
Banu/2025-06-26
How to Enable Full Disk Access on Mac | Full Guide
![]() Cici/2025-06-26
Cici/2025-06-26

