
Shred Files to Delete Files Permanently on Windows 10/11
Whether it's your personal or company's confidential information, keeping it secure is essential for you. Keeping documents in your computer which you no longer need is an open invitation to numerous threats.
Therefore, the way you spring clean your home, it is also recommended to shred unwanted files in Windows 10 and fully clean them. It is common knowledge that simply deleting a file from Windows won't wipe out all its traces from your system. Thus, it is important to learn a way to fully shred unwanted files from your computer.
Fortunately, there you have numerous options to shred files from Windows 10/11 without leaving any physical trail behind. So, let's explore those options in detail.
Why You Need to Shred Files on Windows
Shredding files that you no longer required can safeguard your interest in many ways, such as:
- You can protect yourself from identity theft as hackers can dive into your Recycle Bin and steal your identity.
- You can free up space on your hard disk to store other important files.
- Shredding files can protect your personal or business information from getting into the wrong hands.
- You can build customer trust by shredding confidential documents and so on.
Undoubtedly, shredding files on your Windows 10 is highly important. So, if you are wondering, "how do I shred files in windows 10"? Then, no worries as using these two options, you can swiftly shred your files:
Shred Files with Robust File Shredder on Windows 10/11
Manually shredding or deleting files from your Windows 10 PC can consume lots of time and effort. Plus, it is not possible to permanently delete data from your computer without cleaning the Recycle Bin.
Therefore, when you want to quickly and safely shred files from your Windows 10 PC, the software is the best option for you. Plus, you can use free and robust EaseUS LockMyFile software anytime to shred your files.
This safe and effective tool can directly add files or drives to shred in Windows. In fact, it can shred files/folders/drives from both your external and internal drives. In addition, this tool can safely delete your data and fully wipe out your disk within a few clicks.
EaseUS LockMyFile has an intuitive user interface that you can follow the steps below to easily shred your files.
Step 1. Launch EaseUS LockMyFile, enter easeus to run the Trial version.
To run the full version, register with a valid email address and a license code.
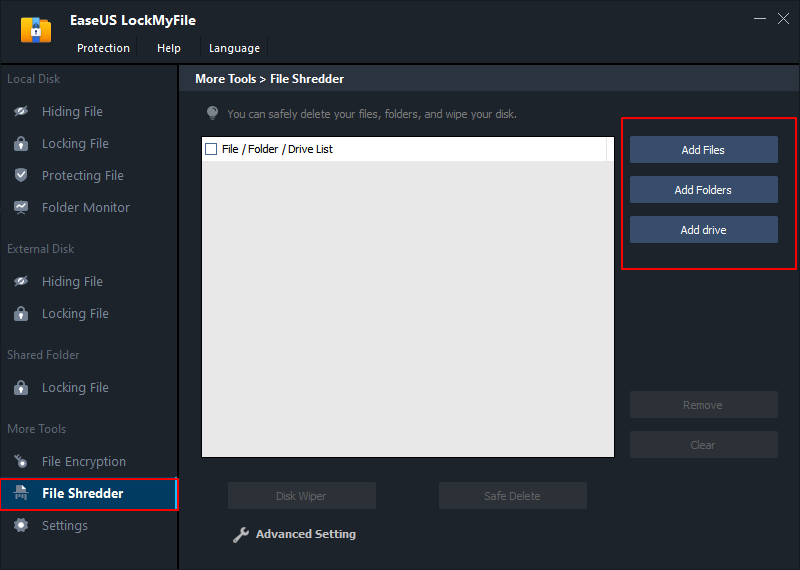
Step 2. Click File Shredder under More Tools, click Add Files, Add Folders, or Add drive to select files, folders, or a disk that you need to shred.
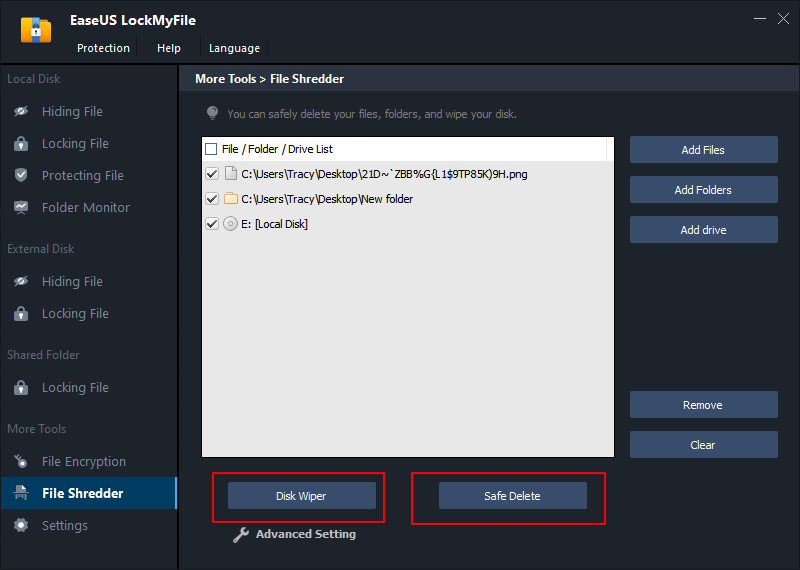
Step 3. Confirm the files, folder, or drive that you need to shred, click Safe Delete or Disk Wiper to shred the selected items.
What Else Can EaseUS LockMyFile Do for You
Apart from the easy file shredder feature, EaseUS LockMyFile can offer you various other features, such as:
- Protection: EaseUS LockMyFile offers military-grade encryption and password protection to secure your files and folders. The software-protected files can't be deleted or modified without the right password.
- Lock and hide your files: EaseUS Invisible Mode can hide your files or folders on local and external disks. All hidden files are never shown in search results or can be accessed without a password. You can even lock files on USB with client and master password.
- Lock LAN shared files: EaseUS LockMyFile allows you to securely transfer your files via the LAN network. It can password lock your files so that access to them can be minimized.
- File monitoring: The software can monitor files, folders, or disks whenever you change or make any operational changes. Thus, you can open the Program Log anytime to check previous changes made on the file.
- Portable encryption: A high-level AES encryption algorithm can encrypt files and folders into EXE or GFL format.
Shred Files with Windows Built-in Cipher
If you don't want to use a third-party tool to shred files from Windows 10 or Windows 11, you can use Cipher. It is a built-in Windows secure deletion tool that allows you to delete files without recovery permanently.
However, you have to configure Cipher first, which can be a bit challenging. That's because the tool doesn't have an intuitive interface like LockMyFile.
To configure Cipher, you have to follow these steps:
Step 1. Open Windows PowerShell from the Start menu.
Step 2. Then, input this command: cipher /w:C:.
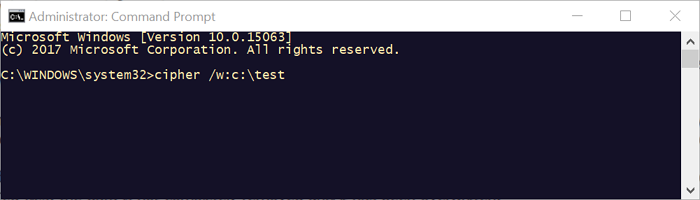
Step 3. This command will overwrite all the delocated files on your computer's C drive. Your existing files will remain safe; only the deleted files will be permanently erased.
Here, you can replace the letter C in the command with the letter from which you want Cipher to delete the files. This process might take a long time. Therefore, the command: 'cipher /w:C:' is the safest and quickest method to delete files permanently.
Besides the builtin secure deletion tool, you have two more options to shred files from your Windows 10, such as:
Change Recycle Bin Settings to Permanently Delete Files
By default, all Windows deleted files move to the Recycle Bin. Here you can configure Recycle Bin settings to delete files on your computer as: permanently
Step 1. Right-click on the Recycle Bin.
Step 2. Open the "Properties" tab and then select the drive from where you want to delete the data permanently.
Step 3. Mark the option "Don't move files to the Recycle Bin. Remove files immediately when deleted".
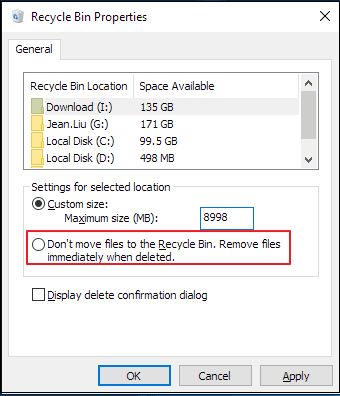
Step 4. Just click on the "Apply > OK" button. Now, when you delete files from the selected drive, they will not go to the Recycle Bin for recovery. In fact, the files will be permanently deleted from your system.
Use SDelete to Shred Files on Windows 10/11
SDelete is a Sysinternals command line that can also help you shred files from your Windows 10 or Windows 11 computer. You can download the SDelete utility command from the Microsoft site for free.
You can extract the two SDelete files, usually from drive C: C:\Windows\System32.
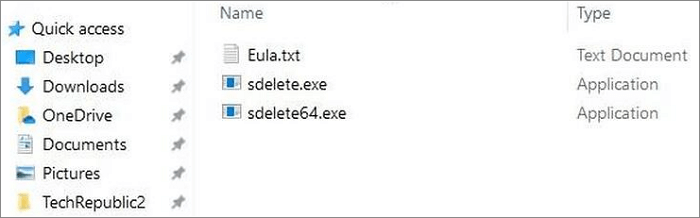
The System32 folder will provide you access to the application no matter where your deleted files are located. The basic SDelete command line is sdelete -p -s -q.
To use the SDelete utility command, follow these steps:
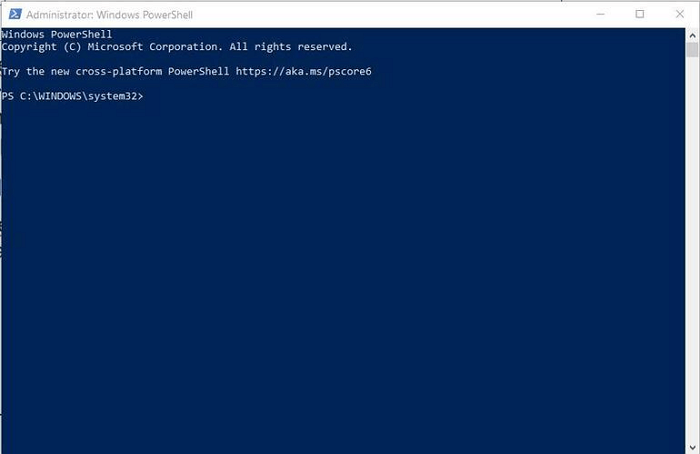
Step 1. Open an administrative-level command prompt by right-clicking the Start button.
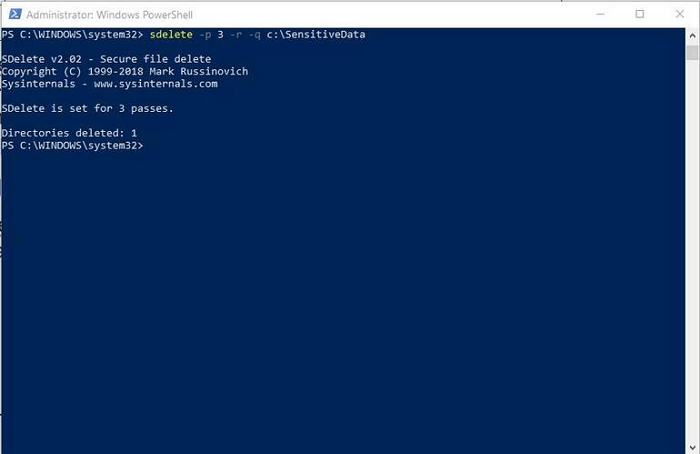
Step 2. At the prompt, type in your command for SDelete, like the screenshot below.
The SDelete utility won't delete or shred your files. Instead, it will simply overwrite the memory sector where previously deleted files are located.
Sum Up
Shredding files from your Windows 10 PC can safeguard your data privacy and security. In addition, it can free up adequate space on your hard disk and offer you many other benefits.
Here you can use EaseUs LockMyFile or a built-in secure deletion tool to permanently delete files on Windows PC. Both methods are quite effective, but the LockMyFile one is simpler and easier as it has a graphic interface.
Thus, if you aren't comfortable with the command-line structure, you should use EaseUs LockMyFile to quickly delete files on your computer.
Related Articles - ALSO ON EaseUS SOFTWARE
-
How to Lock an External Hard Drive? 2024 Beginners Guide
![Jean]() Jean/2025-04-15
Jean/2025-04-15
-
How to Hide Files or Folders on Windows 10 and Mac
![Jean]() Jean/2025-04-15
Jean/2025-04-15
-
How to Protect A PowerPoint Presentation from Being Copied | Protect PowerPoint from Editing
![Jean]() Jean/2025-04-15
Jean/2025-04-15
-
How to Open a Lock in Windows 11/10/8/7 [Solved]
![Jean]() Jean/2025-04-15
Jean/2025-04-15