
Speaking of write protection, there would be a lot of people wondering what is the point of making your USB flash drive on your own system. If you have the same question, you are right. The point of write protection is not for your own system.
Imagine if you need to make a presentation at a conference, you copied the PPT from your computer to a USB flash drive. Then at the conference, you plugged the drive into the provided computer and finished the presentation. But when you come back home and ultimately plug the drive back into your own PC... Yes, the point of making a flash drive read-only would be so that when you're using the drive on other PCs, it doesn't "catch something", for example, the virus.
Now you have aware of the importance of write protect your flash drive. In the next parts, we will introduce how to write protect a flash drive.
Method 1. Turn On the Write Protect Lock
In order to help users to make their USB flash drives at any time and at anywhere, some of the flash drive manufacturers have designed a write protect lock. This lock is usually a small switch, located on the side or the back of the USB flash drive. If your flash drive has such a small switch, turn it on, the USB flash drive would be read-only.
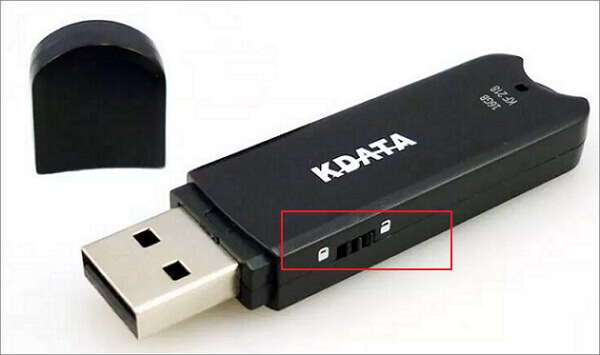
If you don't find such a lock on your drive, don't worry, there are other methods you can apply. Keep reading.
Method 2. Write Protect a Flash Drive with Command Prompt
For flash drives that do not have a write protection switch, the Windows command prompt is a solution. Follow the steps here to write-protect your flash drive.
Step 1. Connect the USB flash drive to your computer.
Step 2. Search CMD in the search bar, right-click on Command Prompt, and select Run as administrator.
Step 3. Type the following command. Remember to press Enter after each command.
Diskpart
List disk
Select disk X (X is the drive letter of your USB flash drive)
Attributes Disk Set Readonly
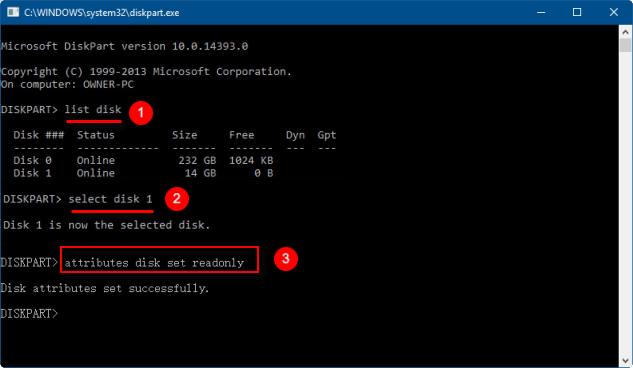
Note: You can also disable the write protection within Command Prompt. Replace the "Attributes disk set readonly" with "Attributes Disk Clear Readonly".
Method 3. Write Protect A Flash Drive with Third-Party Software
Another optimal choice for users to write-protect the flash drive is to use the file locker software. There are many products that offer reliable encryption solutions, including denying access to USB flash drives. One such tool is EaseUS LockMyFile. It is designed for users to fully protect all kinds of data in every aspect.
Besides write-protect a flash drive, EaseUS LockMyFile also enables users to lock and hide files, folders, and drives. With this tool, protecting a file is not a simple idea of setting a password, users now have more choices to apply.
Key features of EaseUS LockMyFile
- Lock, hide, as well as write-protect files and folders.
- Secure both individual files/folders and any drives, including local hard drive, external hard drive, USB flash drive, and shared network drive.
- Others can't uninstall the program without a password.
- The forgotten passwords can be recovered through the pre-defined email address.
Download EaseUS LockMyFile now, and follow the step-by-step guide below to see how to write protect the USB flash drive.
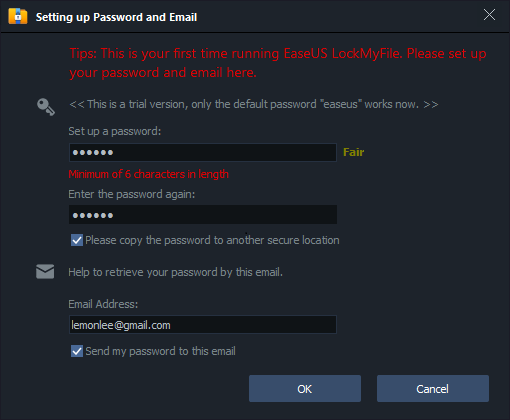
Step 1. Download and install EaseUS LockMyFile on your computer. For the first time setup, enter a strong authentication password for use, and a valid email address for password retrieval in case you forgot the password. You can change the password anytime in "Settings".
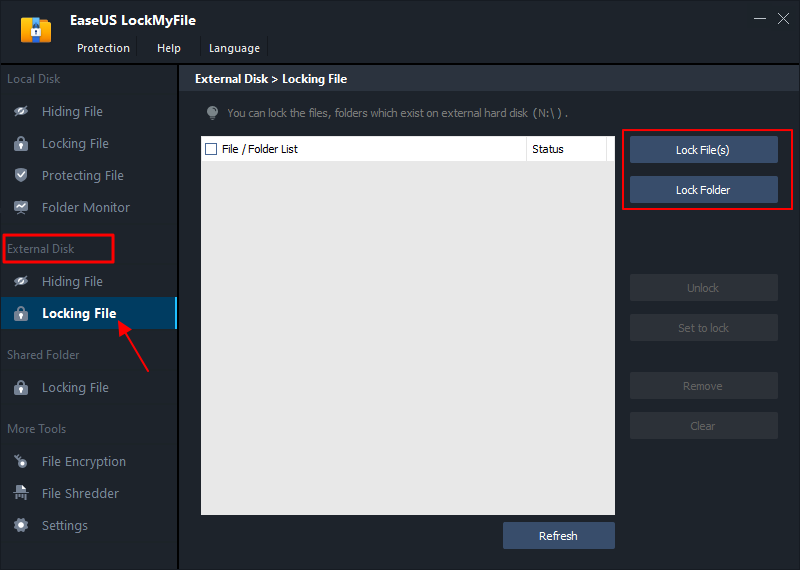
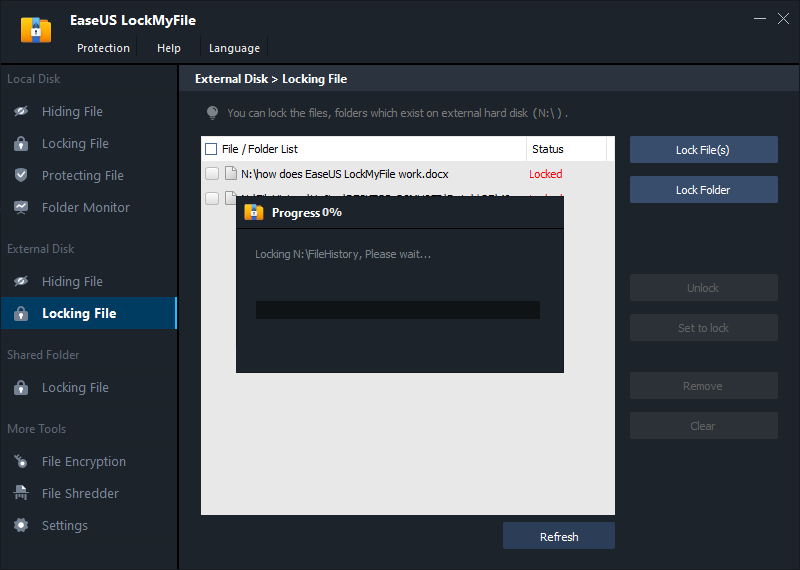
Step 2. To lock files or folders on an external device, navigate to the "External Disk" section and then click "Locking File". Next, on the right menu, choose the "Lock File(s)" or "Lock Folder" option.
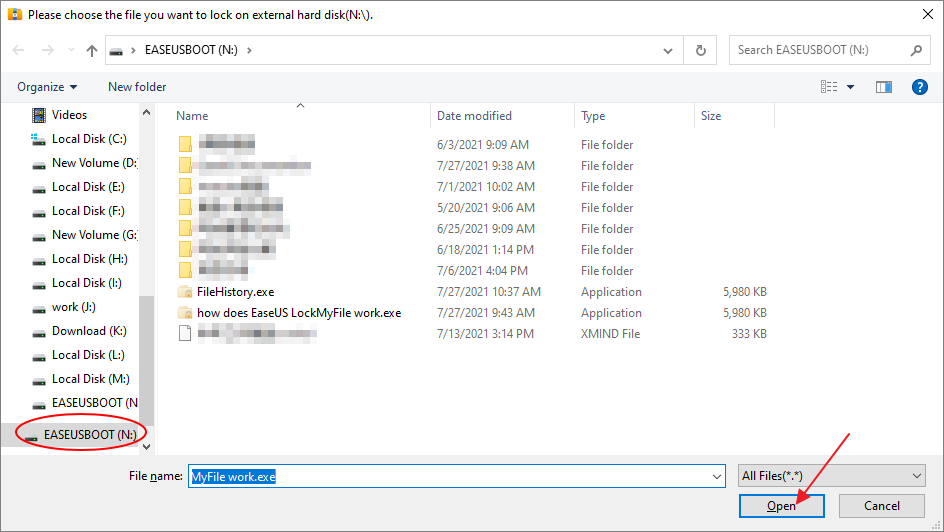
Step 3. Select the target external drive and choose specific files or folders you want password protect, and then click "Open".
Step 4. Enter the password and confirm it once, and click "Lock". Wait for the process to complete. Your important files and folders should be fully protected with a strong password.
Bonus Tip: How to Format Write Protected USB
If you want to format a USB flash drive, but received an error message saying that the disk is write-protected, what can you do to remove the write protection? Here we give you three methods to solve the problem.
Fix 1. Change the Read-Only Status in File Explorer
Step 1. Connect your USB or pen drive to your PC. Open Windows File Explorer, right-click the target USB flash drive, and select Properties.
Step 2. Go to the General tab, uncheck "Read Only", click "Apply" and "OK" to finish.
Fix 2. Remove Write Protection Using CMD
Step 1. Connect the USB flash drive to the computer.
Step 2. Enter Command Prompt and run as administrator.
Step 3. Type the following command lines. Remember to hit Enter after each command line.
diskpart
list disk
select disk #
attributes disk clear readonly
*# is the number of your write-protected flash drive.
Fix 3. Remove Write Protection Using Regedit
Step 1. Type Regedit in the search box, click "Regedit.exe" to open the Registry editor.
Step 2. Navigate to:
Computer\HKEY_LOCAL_MACHINE\SYSTEM\CurrentControlSet\Control\StorageDevicePolicies
Step 3. Double-click on the "WriteProtect" value in the right-hand pane of Regedit.exe.
Step 4. Change the "Value" data from "1" to "0" and click "OK" to save the change.
Step 5. Close Regedit and restart your computer.
Final Words
That's all about how to write protect a flash drive. You can choose whatever methods depending on your need. Whichever method you choose, it can prevent your flash drive from false editing and virus attack. What's more, always remember to protect your sensitive data.
Related Articles - ALSO ON EaseUS SOFTWARE
-
How to Lock Files on Windows 11/10/8/7? 3 Best Ways in 2024!
![Jean]() Jean/2025-04-15
Jean/2025-04-15
-
How to Encrypt USB Drive with or Without BitLocker Windows 10
![Jean]() Jean/2025-04-15
Jean/2025-04-15
-
How to Protect A PowerPoint Presentation from Being Copied | Protect PowerPoint from Editing
![Jean]() Jean/2025-04-15
Jean/2025-04-15
-
Free Download the Top 5 Best File Locker Software for PC Windows 10/11
![Jean]() Jean/2025-04-15
Jean/2025-04-15