
How to Protect Word File from Editing (Windows & Mac) | Restrict Editing on Word Documents
If you have written about secret info on Microsoft Word, you can take these solutions to secure the sensitive content to avoid anyone can modify or edit it. Most of the useful fixes are related to the built-in feature of Microsoft Word, which offers several options to restrict editing. You can try it on your preference.
5 Ways to Protect Word File from Editing (Windows)
For Windows users, you can choose 5 ways to protect word documents from editing and copying. Four of the methods are built-in functions of the software, of course, you can also try more convenient third-party software.
1 - Enforce Protection on Word Document
Step 1. Open your word file and go to the Review tab in the Word ribbon.
Step 2. Click Restrict Editing under the Protect section.

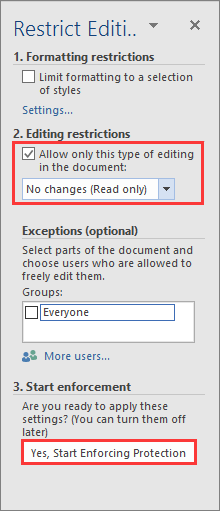
Step 3. Once the Restrict Editing pop up, move to the second option. Check Allow only this type if editing in the document, and select No changes (Read-only).
Step 4. Click Yes, Start Enforcing Protection.
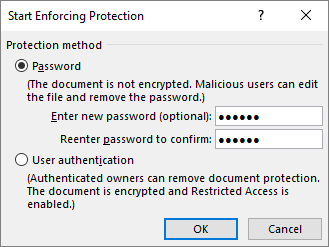
Step 5. Type a password and confirm it again.
2 - Use Word Document Protection Software
To protect your word document into Read-only mode, there is an easy and safe software, EaseUS LockMyFile, you can use this word file protection tool on PC to protect files from editing and copying. Nobody can rename, delete, and modify the word document.
Not only protect files, but this software also has many reliable functions you can try:
- Let your files, folders, and drives turn invisible and unsearchable.
- Lock your data with password in the local drives, external hard drive, USB flash drive.
- Use the AES encryption algorithm to encrypt files and folders.
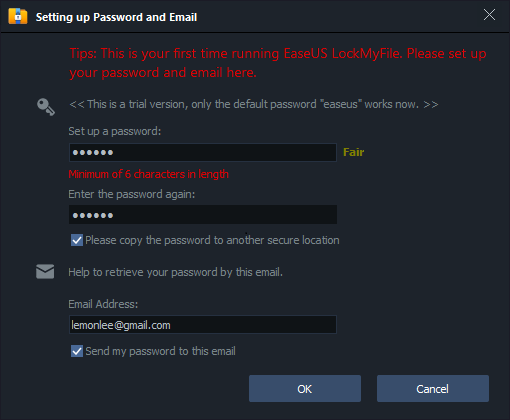
Step 1. Launch EaseUS LockMyFile, enter the valid email, and set password to register.
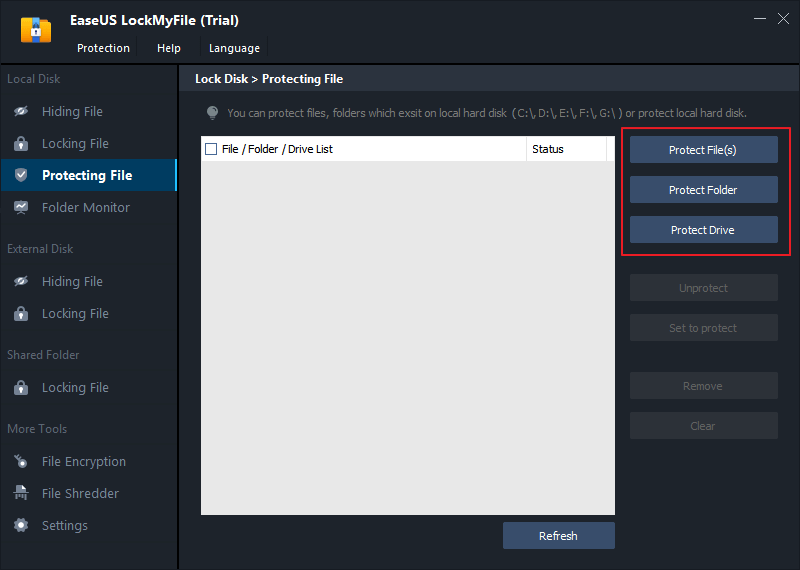
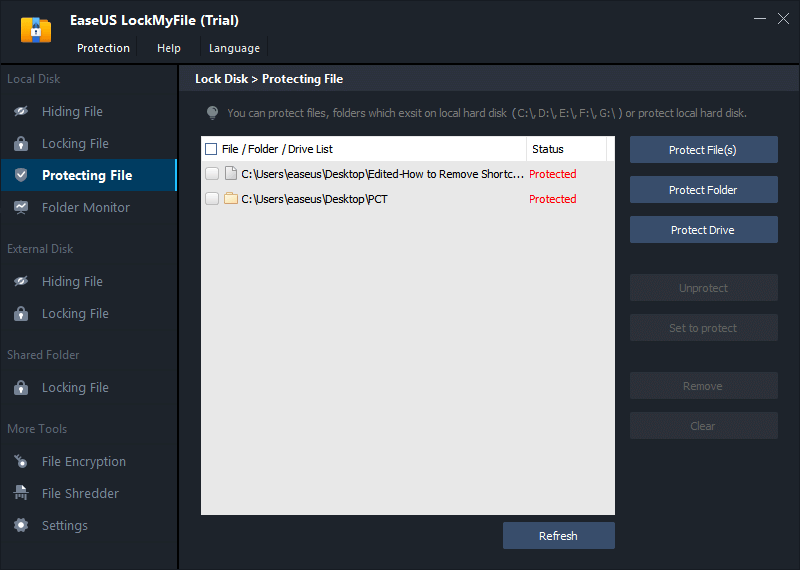
Step 2. Click Protecting File under the Local Disk. Select Protect File(s) ,Folder or drive from the right panel.
A. Add file(s) or folder from the specific location.
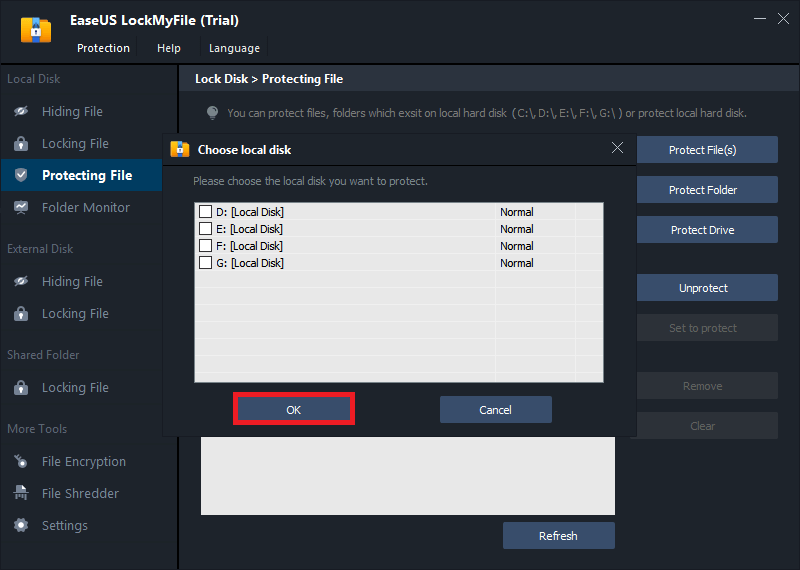
B. Click on the Protect Drive to add drive you want to protect. Select drive and click OK.
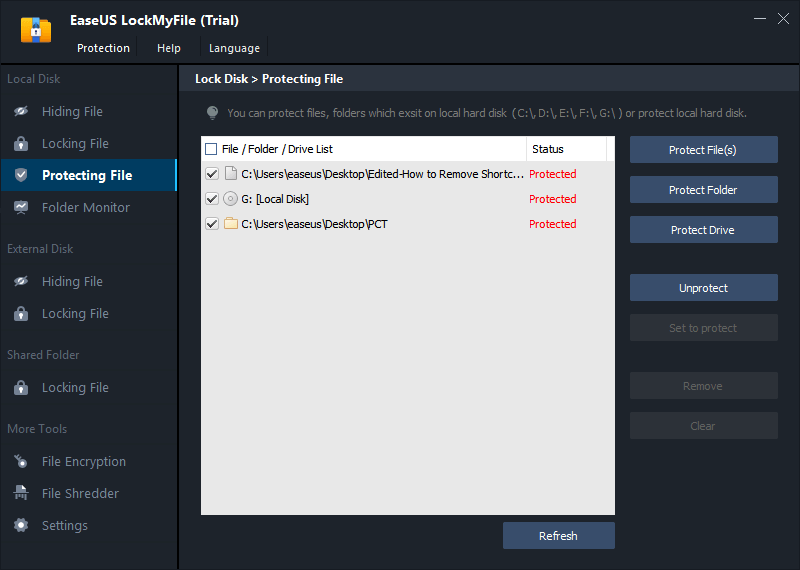
Step 3. Check and confirm the files, folder, and drive that you want to protect.
Notes:
If you want to unprotect the selected files, folder, or drive, tick the target data and click on the Unprotect button.
Download the software and follow the steps:
3 - Mark as Final
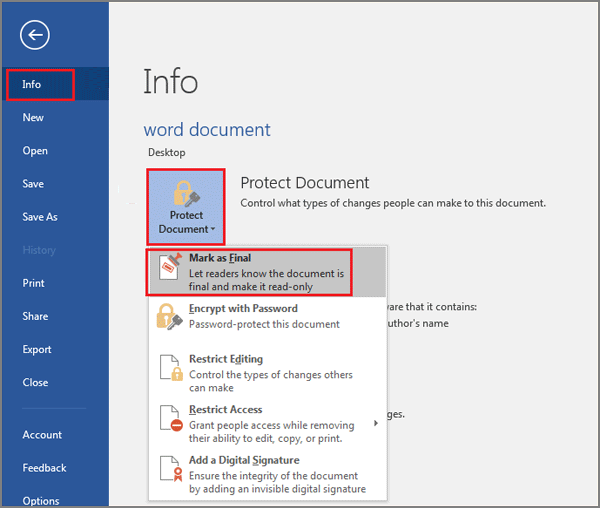
Step 1. Click File tab > Info.
Step 2. Click Protect Document and select Mark as Final.
4 - Enable Read-only Mode
Step 1. Open File tab > Info.
Step 2. Choose Protect Document and click Always Open Read-only.
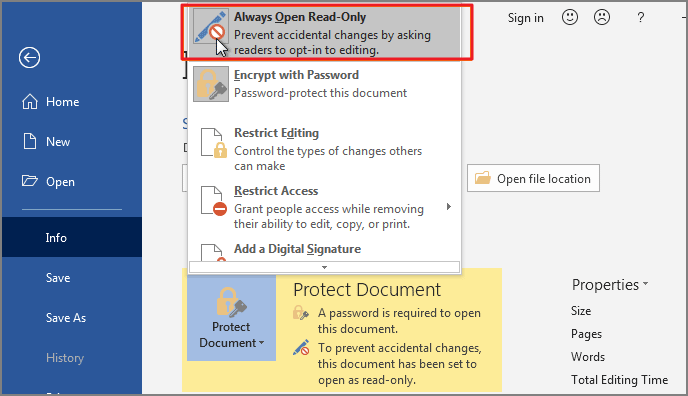
Step 3. Save the word file and re-open it again.
Note: To disable Read-only mode, open the file and click the File tab. Follow path: Info > Protect Document > Always Open Read-only.
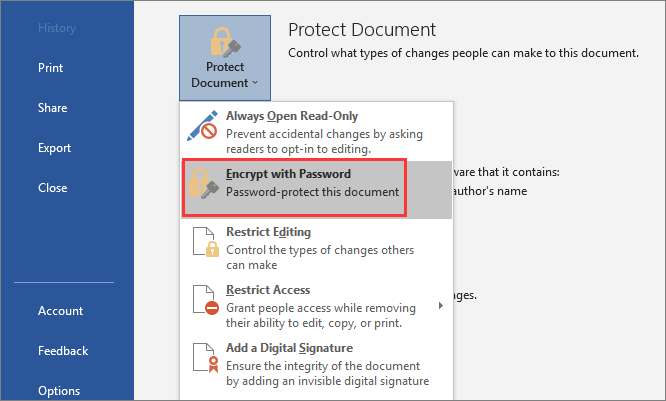
5 - Encrypt with Password
Step 1. Move to File tab > Info.
Step 2. Choose Protect Document and then click Encrypt with password from the options menu.
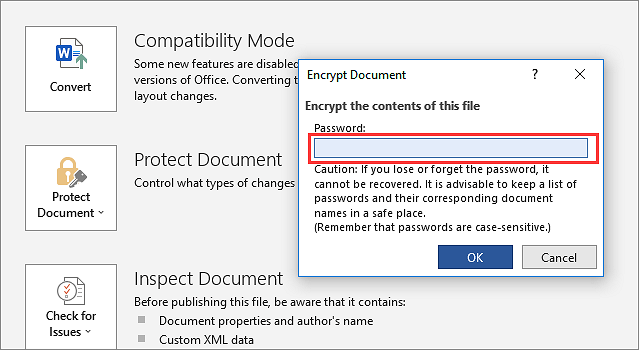
Step 3. Set your password and click OK.
How to Protect Word Document from Editing and Coping Mac
For Mac users, you can try 2 ways to limit the edit function.
1 - Click Always Open Read-Only Option
Step 1. Open the Microsoft Word for Mac and select the document you want to set Read-only mode.
Step 2. Click the File tab from the top menu bar.
Step 3. Choose Always Open Read-Only from the option list.
Step 4. Close the window and click Save in the pop-up window.
Open your word file again, your word file will be in Read-only mode.
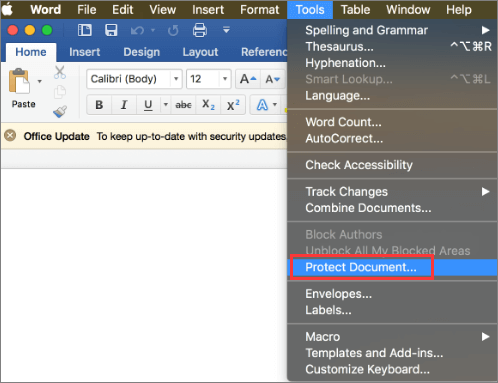
2 - Encrypt Word Document
Step 1. Open Word files for Mac.
Step 2. Go to the Review tab > Move to Protect > Choose Protect Document.
Step 3. In the Password Protection window, set a password to open or modify the document. (Use a password you can remember and save it in a safe location.)
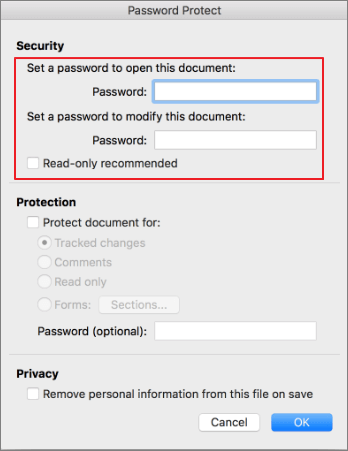
Step 4. Click OK.
Bonus Tip: How Do I Lock Certain Text in Word
What if you just want to lock a certain paragraph from being edited? Here the Restrict Editing function can allow you to set limited access for everyone.
1 - Restrict Formatting Style
Step 1. Click the File tab and choose Restrict Editing.
Step 2. Under Formatting restrictions, check Limit formatting to a selection of styles. And then click Settings.
Step 3. Select the styles you want to allow on your document. And click OK.
Step 4. Under Start enforcement, click Yes, Start Enforcing Protection.
Step 5. Enter the password and reenter the password to confirm.
2 - Use Editing Restrictions
Step 1. Open your file and click the Review tab, go to Editing restrictions.
Step 2. Check to Allow only this type of editing in the document and select No changes (Read-only).
Step 3. Choose the area (paragraph or page) that other users can edit. Check Everyone under the Exceptions (optional).
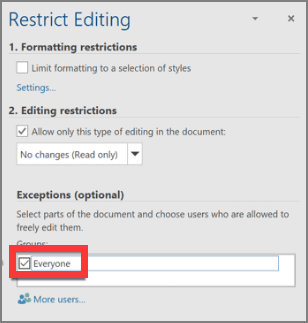
To confirm the Exceptions, click Yes, Start Enforcing Protection.
Step 4. Enter the password for protection.
Final Words
Have you finished text restriction on PC and Mac? Microsoft Word serves up several choices so that only you and specific people can change the whole part or certain section. Note: You’d better back up the sensitive text to another safe location. Double protection is good for your materials.
Related Articles - ALSO ON EaseUS SOFTWARE
-
How to Hide Files or Folders on Windows 10 and Mac
![Jean]() Jean/2025-04-15
Jean/2025-04-15
-
Calculator Lock - How to Hide Photos on Android, iPhone, and PC
![Jean]() Jean/2025-04-15
Jean/2025-04-15
-
How to Lock RAR File with Password in Windows 11/10
![Jean]() Jean/2025-04-15
Jean/2025-04-15
-
How Do I Protect Files from Being Deleted in Windows 11/10
![Jean]() Jean/2025-04-15
Jean/2025-04-15