
How Do I Protect Files from Being Deleted in Windows 11/10
Do you have certain files on your PC that you can't afford to lose? But unfortunately, you have hit the delete button and lost all your important files.
If this happens with you often, we can totally sympathize with you. It is very common for Windows users to mistakenly delete their vital documents, photos, or videos. Especially while deleting multiple files together, there's a big chance that you might delete your essential data.
However, you can protect your files from being deleted by securing them. Windows users can prevent files from being deleted in numerous ways. And below, the four easiest and fastest data securing methods are discussed. So, let's protect your files!
Why Do You Need to Protect Files from Being Deleted
I will be careful, so I don't need to protect my files from being deleted on Windows 10/11!
If this is going on in your mind, it is recommended to change your thoughts. That's because no matter how carefully you store, edit or transfer files on your Windows PC, there are various privacy and security threats lurking around to damage your files. For instance:
- Hackers and viruses: Hackers are always searching loopholes in your network settings so they can steal or corrupt your vital data. Thus, you need to secure your files on Windows 10/11 to prevent them from numerous cyber vulnerabilities.
- Compliance: Today, there are a number of laws and regulations that you have to follow to protect files from being deleted, copied, or stolen. Whether it's your personal or professional data, you need a file security system to meet all the digital compliances.
- Safeguard your hard work: If you don't want all your hard work to get deleted intentionally or unintentionally, you need to secure or lock your files in the right manner.
- Maintain your privacy: If you share your PC with your family members or colleagues, it is better for you to protect or hide your files so that no one else can delete them.
How to Protect Files from Being Deleted in Windows 11/10
You don't need to be a pro-Windows 11/10 user to protect your files from being deleted. If you are familiar with Windows basic stuff, you can easily prevent your files from being deleted or copied.
Here are the few easy and simple methods for novice Windows users to protect their files:
Method 1. Use EaseUS LockMyFile to Protect Files from Being Deleted
The simplest method to protect your files from being deleted, copied, or accessed by others is EaseUS LockMyFile. The software can enable people from modifying, editing, or deleting your files without their permission.
EaseUS LockMyFile has military-grade level encryption and password protection features that can protect your files from being deleted on Windows 11/10. Also, the software comes with various other files or folders protection features:
- It enables you to hide, lock or protect private files on your local as well as external disk files.
- The Invisible Mode completely hides your files or folders on your Windows PC.
- It can password protect all types of files stored on your system or external devices.
- The software only allows users to read the protected files, but nobody can delete or rename them without a password.
- LockMyFile monitors files constantly on your system and records when changes are made by the user.
- You can set a password for your files shared on the network to limit access to them.
- The AES encryption algorithm allows you to encrypt files into GFL and EXE formats.
- When you forget a password, you can revive it with your predefined email.
- You can use the Program Log anytime to view all history of your operations.
- It will temporarily block your files if someone enters the wrong password over five times.
EaseUS LockMyFile features list might be a bit lengthy, but it is super easy to protect your files from being deleted on Windows 11/10 with the program. You simply have to follow these steps:
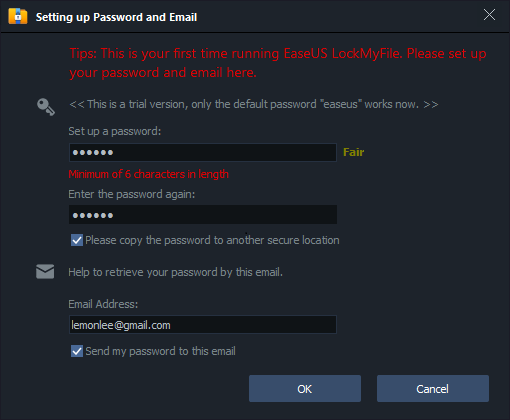
Step 1. Launch EaseUS LockMyFile, enter the valid email, and set password to register.
Step 2. Click Protecting File under the Local Disk. Select Protect File(s) ,Folder or drive from the right panel.
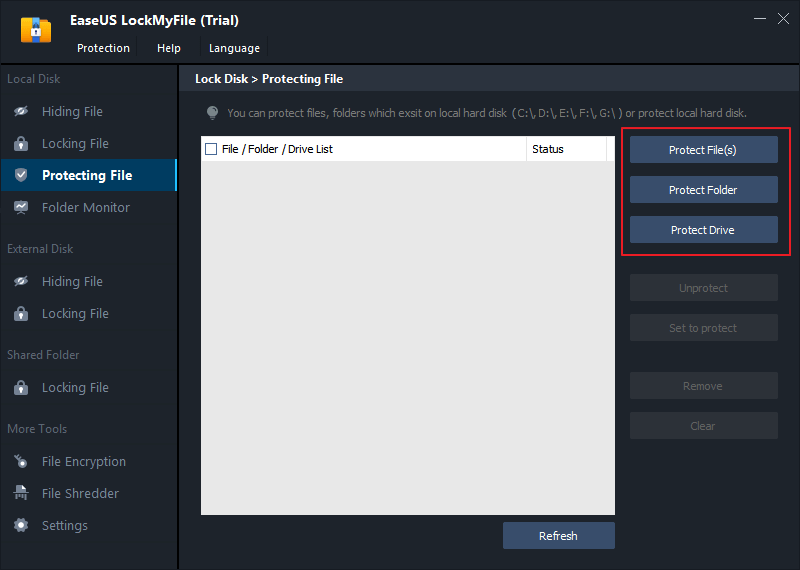
A. Add file(s) or folder from the specific location.
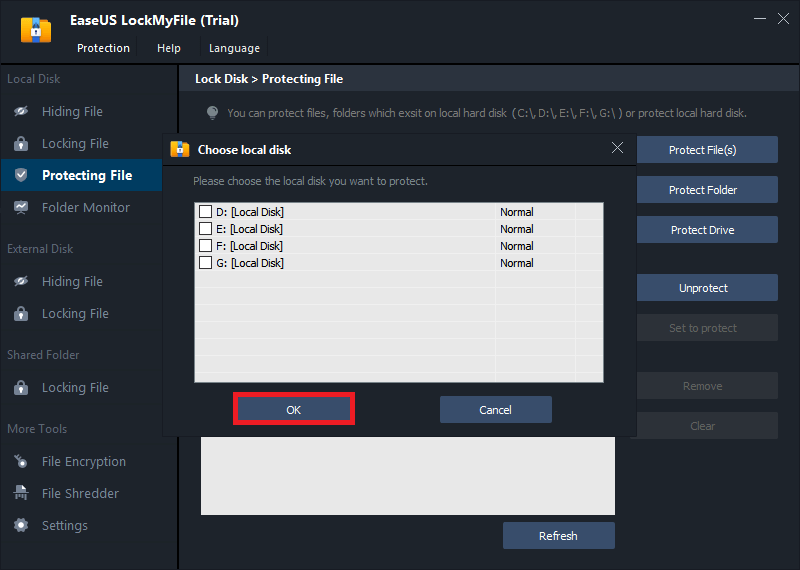
B. Click on the Protect Drive to add drive you want to protect. Select drive and click OK.
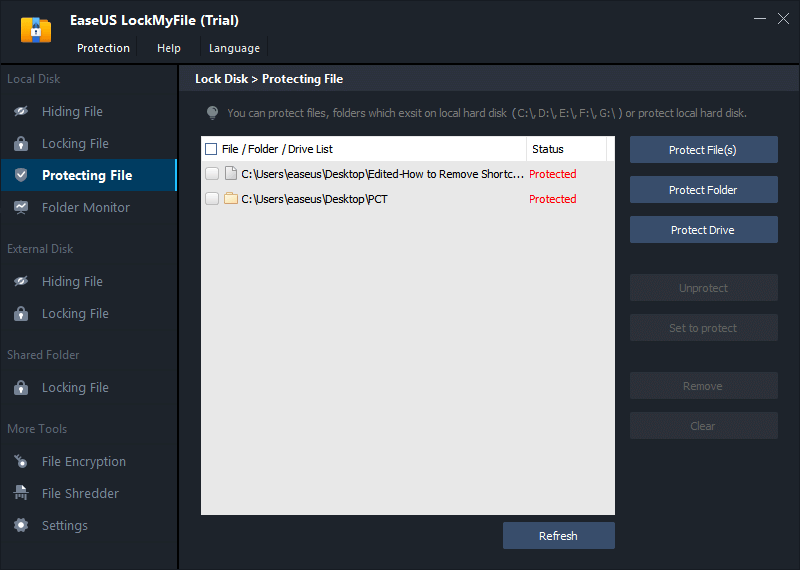
Step 3. Check and confirm the files, folder, and drive that you want to protect.
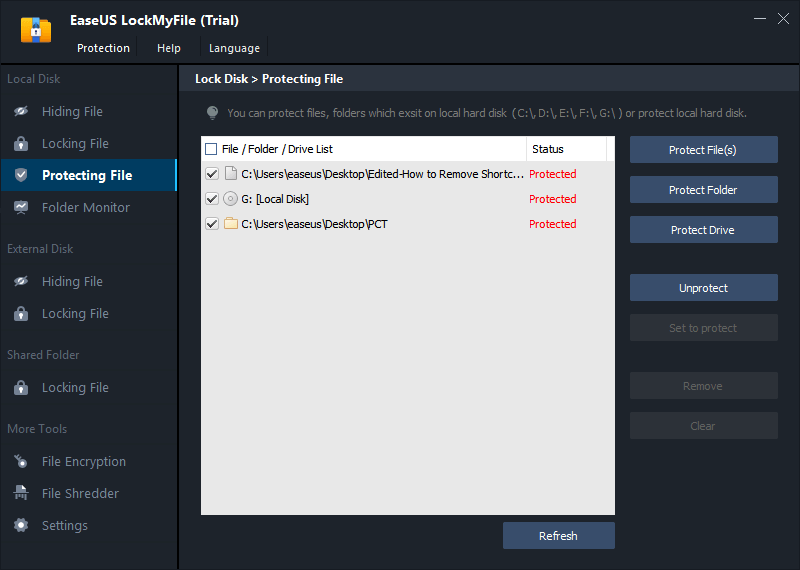
Notes:
If you want to unprotect the selected files, folder, or drive, tick the target data and click on the Unprotect button.
Method 2. Configure the Permissions Settings to Protect Files
Windows users can configure the permission settings to grant or deny file access to other users. This way, you can allow only trusted people to access your files and protect them from being deleted.
Here's how you can configure permission settings on your computer:
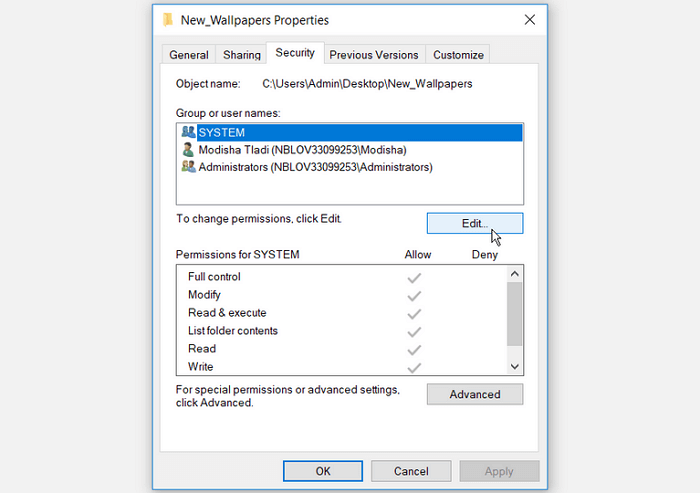
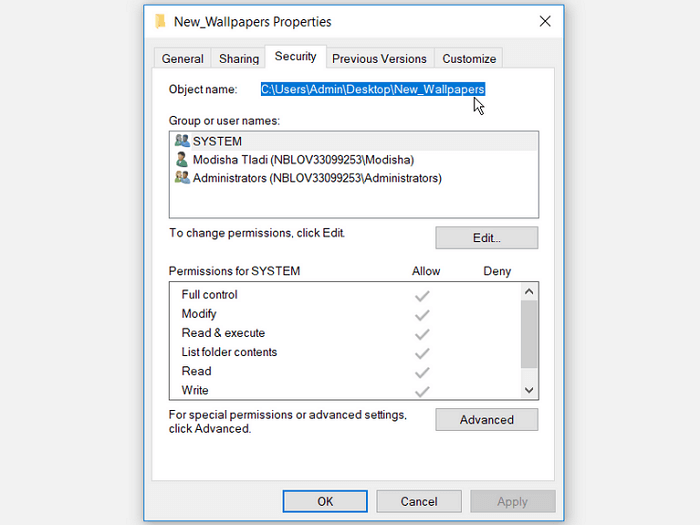
Step 1. Right-click on the file that you want to protect and select the Properties option.
Step 2. Select the Security tab and click on the Edit button to change the permissions.
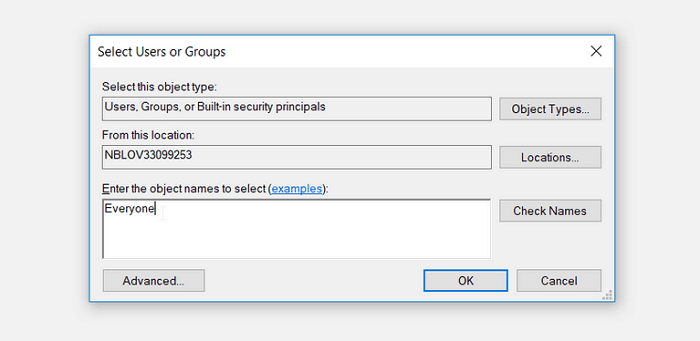
Step 3. On the Permissions window pop up, select the Add button.
Step 4. A new window named "Select Users or Groups" will pop up on your screen. Here type Everyone in the Enter the object names to the selected box and press "OK".
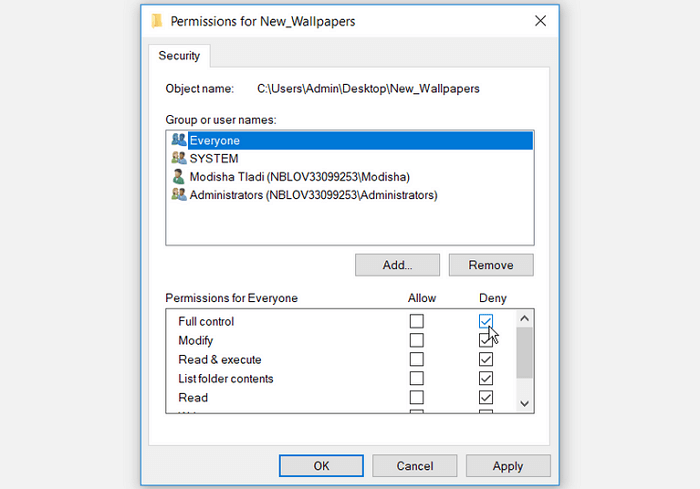
Step 5. On the same window, select the Everyone user name. Next, go to the Permissions for Everyone section and tick the box next to the Full Control option.
Step 6. Click on the Apply > OK, and your files will be secured now.
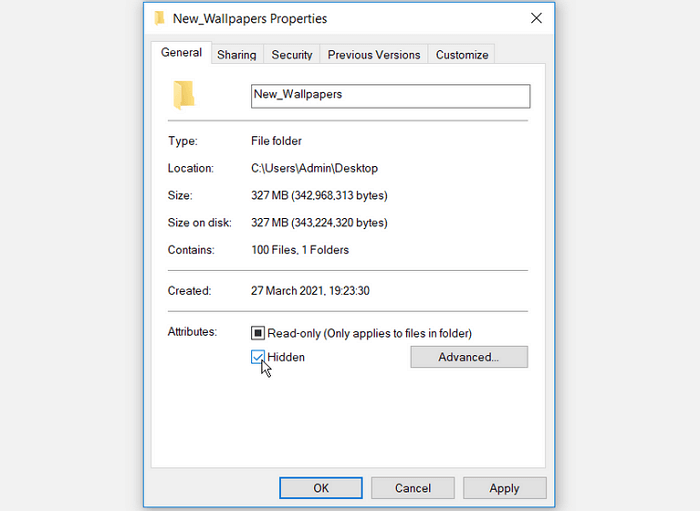
Method 3. Hide Files in Windows 11/10
Windows also allow its users to protect their files from being deleted by the simple hide option. Here you can hide your files on PC as follows:
- Right-click on the file you want to prevent it from being deleted.
- Select the Properties and go to the General tab.
- Check the Hidden box, and press the Apply > OK.
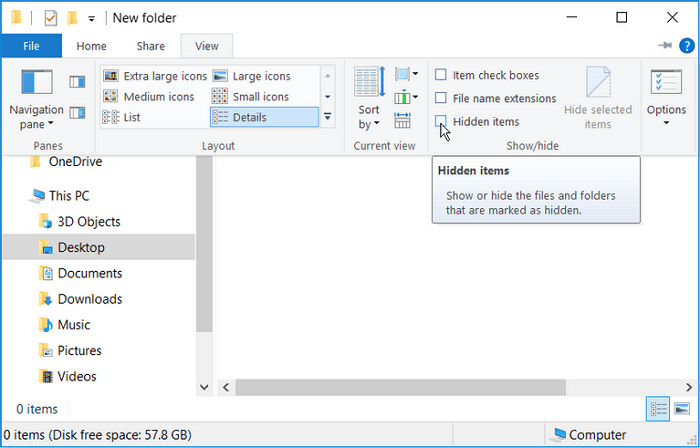
Now, no one can access or delete your files. Here to view your hidden files go to the Windows File Explorer > View tab > uncheck the Hidden items box.
Method 4. Use the Command Prompt to Protect Files from Being Deleted
If you are comfortable with the Command Prompt, you can secure your files using these steps:
- Press the Windows + R keys and type CMD in the command box.
- Press Ctrl + Shift + Enter to launch an elevated Command Prompt.
- Use this Command Prompt to lock your files or folders.
cacls File_or_Folder_Path /P everyone:n
Now, you need to replace the File_or_Folder_Path command with your file or folder path, such as:
- Go to the file that you want to protect from being deleted.
- Go to the Properties and then press the Security tab.
- Copy the file path and paste it into the relevant section of the command.
Here's how the command will look like:
cacls C:\Users\Admin\Desktop\New_Wallpapers /P everyone:n
Parting Thoughts
There you go, people! Now, you know the four easy methods to lock or hide your files on Windows 11/10. Once you protect your files, no one can edit, modify or delete them without your permission.
Here EaseUS LockMyFile is the fastest and secure option to password protect, hide and lock your files. Whereas configuring permission settings and hide options can easily protect your files from prying eyes. However, try the Command Prompt only if you are comfortable with this method.
All in all, no matter which method you use, just don't forget to secure your files to prevent them from being deleted on your computer.
Related Articles - ALSO ON EaseUS SOFTWARE
-
How to Protect Word File from Editing (Windows & Mac) | Restrict Editing on Word Documents
![Jean]() Jean/2025-04-15
Jean/2025-04-15
-
How to Hide Files or Folders on Windows 10 and Mac
![Jean]() Jean/2025-04-15
Jean/2025-04-15
-
How to Open a Lock in Windows 11/10/8/7 [Solved]
![Jean]() Jean/2025-04-15
Jean/2025-04-15
-
2 Ways to Password Protect an Internal/External Hard Drive in Windows 10
![Jean]() Jean/2025-04-15
Jean/2025-04-15