
How to Lock Videos in Windows 11/10 (3 Accessing Ways)
To protect your sensitive video content from watching by unwanted persons, follow the three ways to lock videos with a strong password. All three video locking methods are applicable to Windows 11/10 and previous OS versions.
Which Way Is the Safest and Easiest to Lock Videos on PC?
Together with photos, videos are the other type of files that you want to hide from others' eyes. Some videos can be used as valuable evidence in a court. For example, a dashcam video in a catastrophic car accident, a CCTV video recording that captures a theft or a murder. And, some videos are recording private events you don't want to share. No matter what kind of videos you want to seal them up, try to start with two things:
- Find a satisfying video locking method to lock videos
- Build up a strong & effective password and a backup
How to Lock Videos in Windows 11/10 Properties
If you're running a Windows computer and trying to encrypt the videos there, the default file encryption feature within Windows Properties can be an option. Though it's a simple and working solution to lock certain files and folders on a local drive, it's only for basic use. In short, Windows Properties should not be your ultimate option for large-scale or really sensitive data encryption due to the restricted development.
- Why Windows Explorer
- Videos are encrypted with a password/key that is tied down to your Windows user account. For people who use another user account or those who removed the hard drive, they can see nothing in the video but some meaningless garbled text.
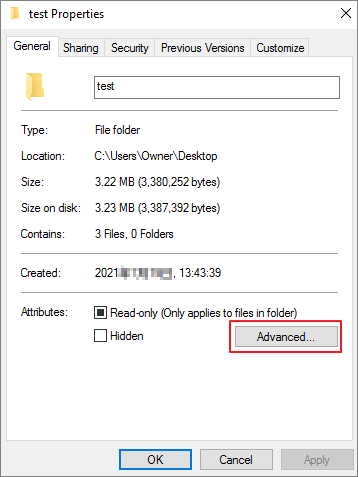
Step 1. Open File Explorer (Windows + E), right-click on the video or a folder that contains all the videos you want password protected, and choose "Properties".
Step 2. Under the General tab in the Attributes section, click "Advanced".
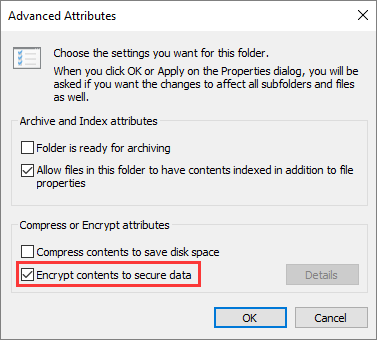
Step 3. Under the bottom of the Compress or Encrypt attributes section, tick the option "Encrypt contents to secure data" and click OK. After then you'll return to the main window, where you should click Apply and Windows will begin to encrypt your videos.
Step 4. When the encryption process completes, a prompt window will appear, asking you to back up your encryption key. Windows will recommend you make a copy of the password in case you forgot and lost access to the locked videos. So for the first setup, click Back up now (Recommended).

Step 5. Follow the backup wizard guide to make a safe backup for the password, key, and certificate you use.
How to Lock Videos with Windows 11/10 BitLocker Drive Encryption
BitLocker is a full-volume encryption feature in Microsoft Windows. Compared with Windows Properties to encrypt files and folders, BitLock works in a different way but provides more powerful encryption ability. BitLocker is designed to protect data by setting encryption to an entire disk drive, not for individual files. If you choose BitLocker to lock videos, you'll need to lock the whole drive where the videos are stored.
- Why Windows BitLocker
- Videos are encrypted together with its storage drive protected by BitLocker. BitLocker is available without TPM by using software-based encryption, but if your computer is enabled with TPM, using BitLocker will be 100% secure to protect your critical videos.
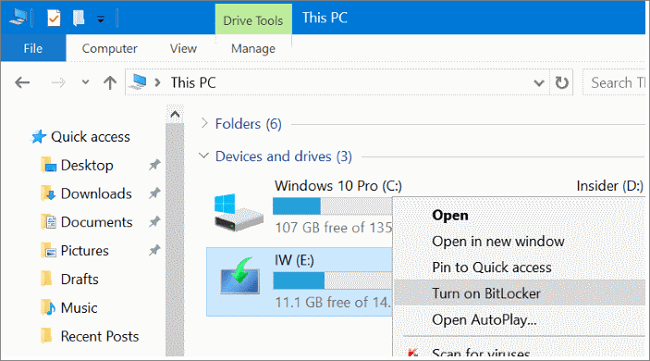
Step 1. In Windows 11 or 10, locate the drive where your videos are saved, right-click on it, and select "Turn on BitLocker".
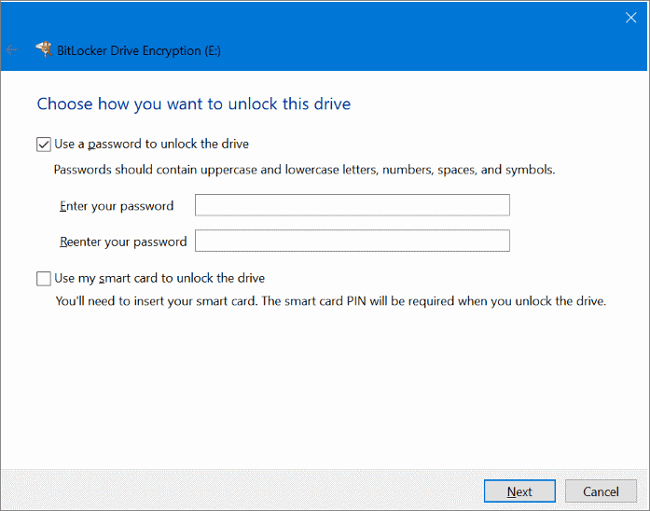
Step 2. You'll choose a way to how you want to manage a BitLocker drive. Here, click "Use a password to unlock the drive", and you need to enter your password and confirm it once (Passwords should contain uppercase and lowercase letters, numbers, spaces, and symbols). Click Next.
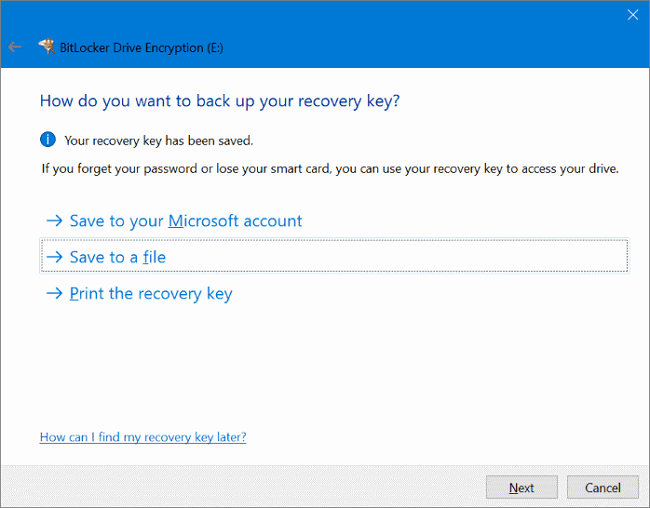
Step 3. Choose a way to back up your recovery key. This is important so make sure that you save the backup to a location that is handy for you.
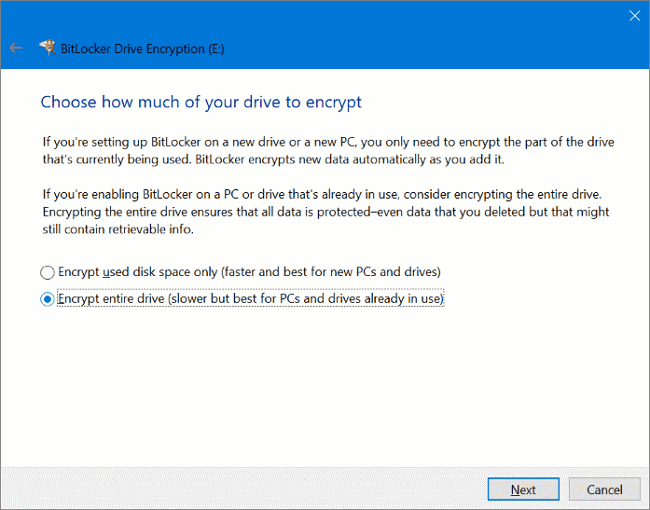
Step 4. Here, you can choose to encrypt the used space only or the entire drive. Make your decision and then click Next.
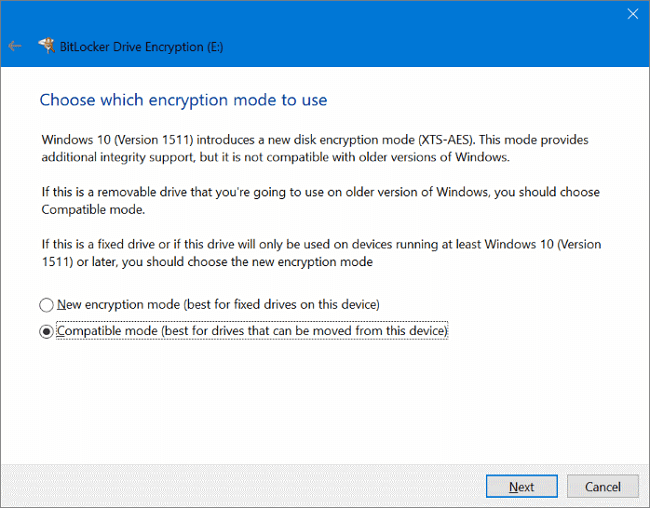
Step 5. When asking to choose which encryption mode to use, choose the compatible mode and click Next. The final step is to confirm all the selections at each step and get ready to encrypt this drive that stores the videos you want password protected. Click "Start encrypting" and get this whole drive encryption done.
How to Lock Videos Using EaseUS LockMyFile
EaseUS LockMyFile is third-party encryption software that provides users with a compromise solution when locking videos. It's third-party software so it requires you to download and install before you can use it. Once you get it on your computer, you'll realize the goal of using both Windows Properties and Windows BitLocker features together, in fact, with more enhanced security ability due to the in-house data encryption algorithm development.
- It can lock individual videos as well as all other file types, like images, music, documents, ect.
- It can lock a drive, including a local drive on PC, or external drive, flash drive, SD card, and network shared drive and cloud drive
- It can encrypt selected files, folders and drives, as well as to set them hidden, locked and protected
- Why EaseUS video locker software
- It's exactly a combination of both Windows Properties and Windows BitLocker in functionalities. What's more, the security mechanism can be a more powerful but simpler way to enable it.
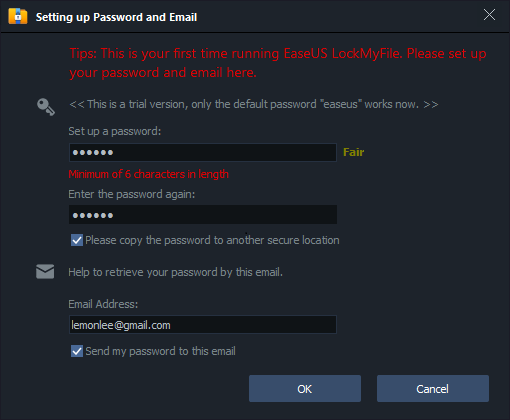
Step 1. Launch EaseUS LockMyFile, register with your email address and set a software protection password.
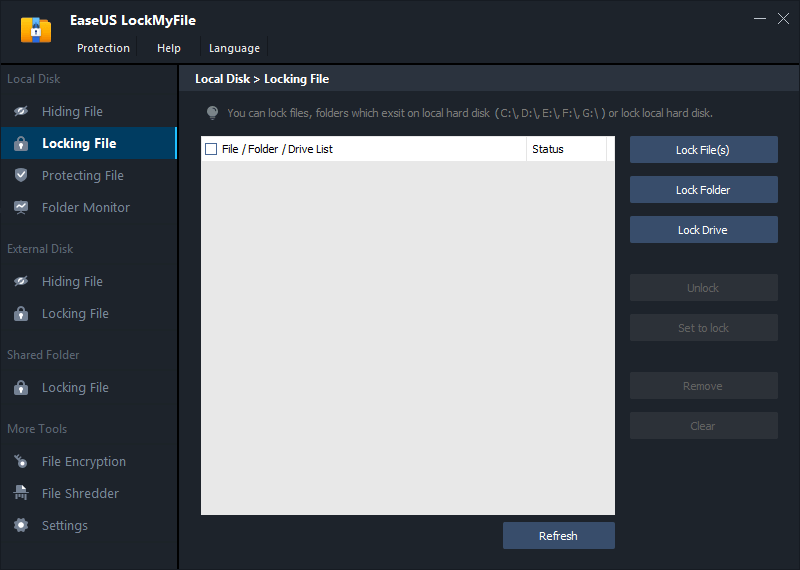
Step 2. Click Locking File on the right side. There are three options available: Lock Files, Lock Folder, and Lock Drive.
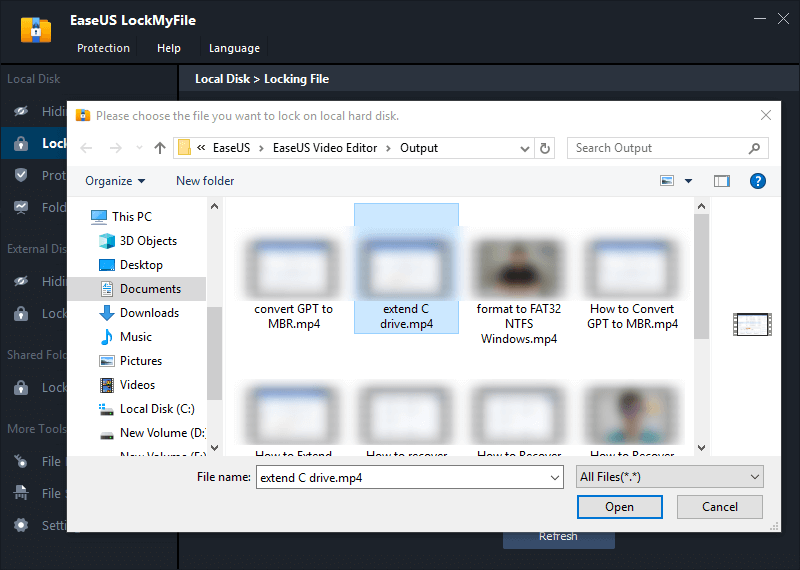
Step 3. Click Lock File(s), and choose the file you want to lock from your computer, and click Open to confirm.
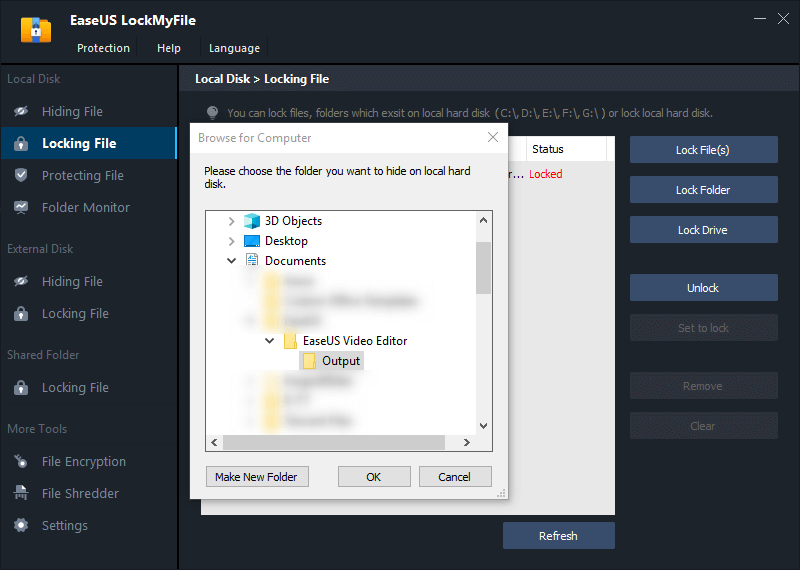
If you need to lock a folder, the operation is the same. Click Lock Folder, choose the target folder, and click OK to confirm.
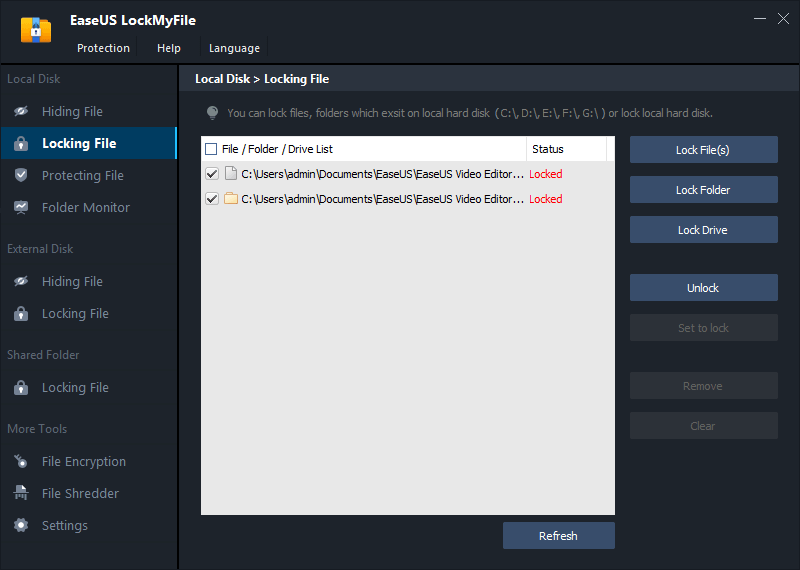
Step 4. You can check the status of your chosen files or folders now.
Related Articles - ALSO ON EaseUS SOFTWARE
-
How to Fix Photo Vault Forgotten Password on a PC and Mobile
![Jean]() Jean/2025-04-15
Jean/2025-04-15
-
How to Password Protect A Notepad Text File in Windows 11/10 with 3 Ways
![Jean]() Jean/2025-04-15
Jean/2025-04-15
-
Calculator Lock - How to Hide Photos on Android, iPhone, and PC
![Jean]() Jean/2025-04-15
Jean/2025-04-15
-
How to Encrypt USB Drive with or Without BitLocker Windows 10
![Jean]() Jean/2025-04-15
Jean/2025-04-15