
How to Protect A PowerPoint Presentation from Being Copied | Protect PowerPoint from Editing
How to protect a PowerPoint presentation from being copied? When you need to share the important files (includes a year-end summary, secret data sheet...) with others, you may think about such questions like how do I prevent PowerPoint presentations from being copied. To secure your PPT file, you can learn seven easy solutions here.
Method 1. Add Watermark to Copyright A PowerPoint Presentation
To protect a PowerPoint Presentation from being copied, you can add watermarks to copyright your slide. Using a watermark to indicate your individual logo or company logo.
Step 1. Open the PowerPoint Presentation that you want to add a watermark.
Step 2. Click the View tab on the ribbon, go to Slide Master.
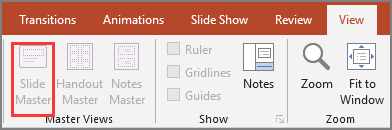
Step 3. If you want to insert a watermark on all slides, select the first parent master slide to start. If a single slide, skip the parent slide and choose the selected individual slide.
Step 4. Click the Insert tab from the ribbon.
Step 5. Click the Text Box of the Text section.
- Once a text box appears, fill in the watermark information.
- If you want to change the format of watermark shapes, go to the Format tab on the main PowerPoint ribbon.
- Head on over to the Format tab, click Send Backward, and then choose to Send to Back.
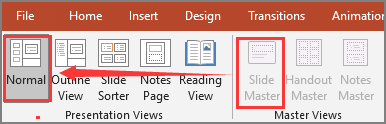
Step 6. Go to the View tab and click Normal to go back to the normal PowerPoint view.
Method 2. Protect Your PowerPoint Files with File Protection Software
Sometimes one file is easy to set restrictions manually, but it still needs to use many steps to set up. Is there a program with simple steps? Yes, EaseUS LockMyFile is a reliable software designed to lock, protect, hide files, folders from local disks and external disks. Download the file protection tool on the computer and click Protecting File button from the left side. Once you set protection on the PPT file, they can read the write-protected files, but nobody can rename, delete modify slides.
Other features of EaseUS LockMyFile:
- Use the AES (Advanced Encryption Standard) encryption algorithm to encrypt files to GFL or EXE format.
- Locking the LAN shared folder and restrict access.
- Make data unreachable or invisible with the “Hiding Files” function.
- Monitor file or folder modifying for data security.
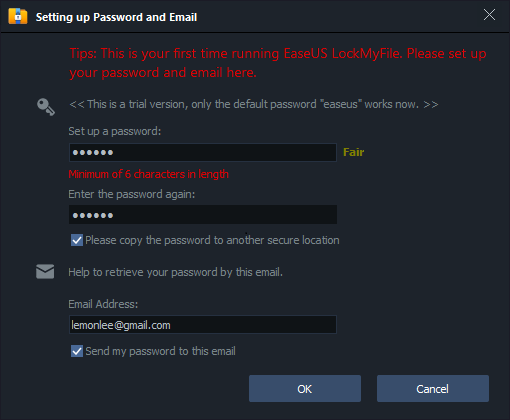
Step 1. Launch EaseUS LockMyFile, enter the valid email, and set password to register.
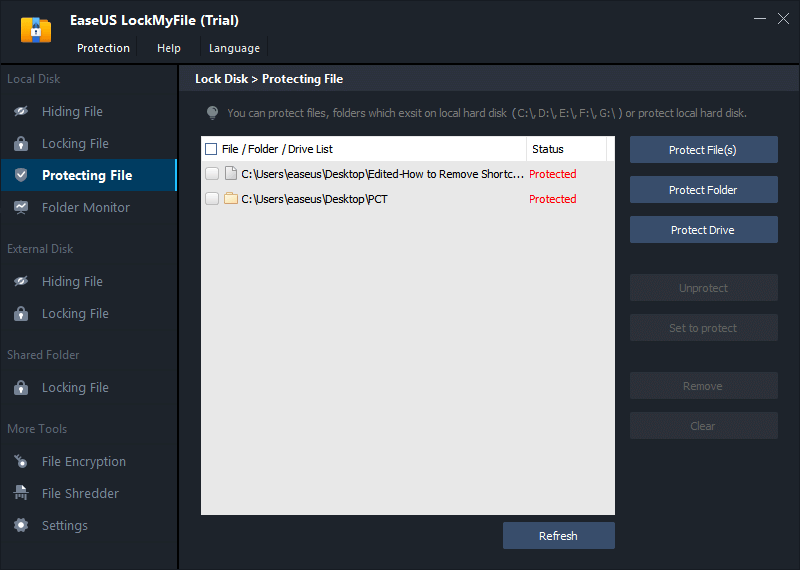
Step 2. Click Protecting File under the Local Disk. Select Protect File(s) ,Folder or drive from the right panel.
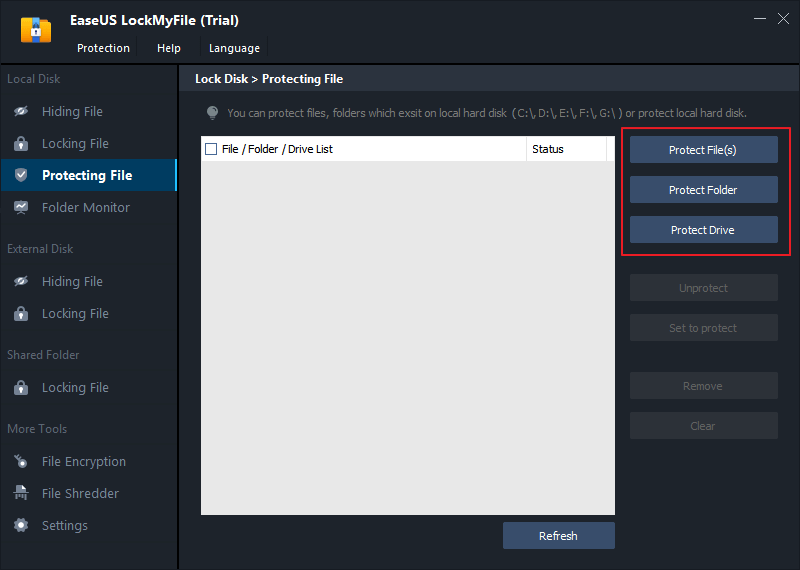
A. Add file(s) or folder from the specific location.
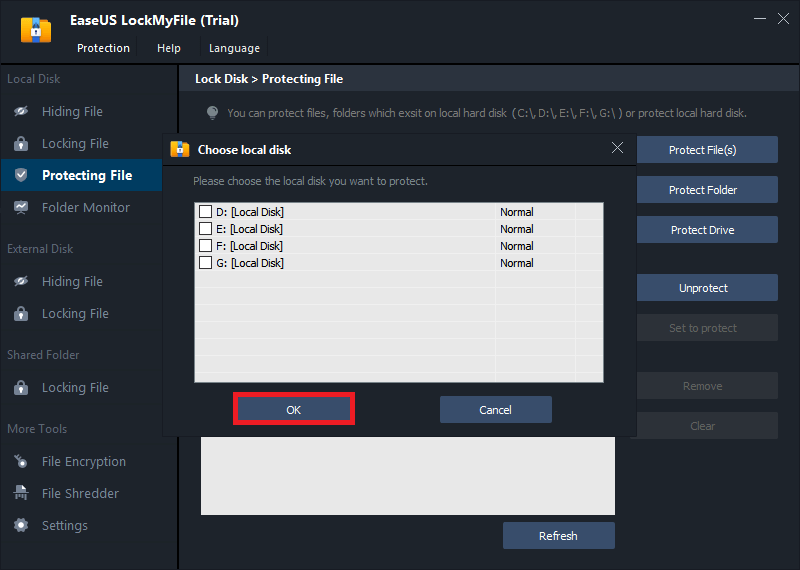
B. Click on the Protect Drive to add drive you want to protect. Select drive and click OK.
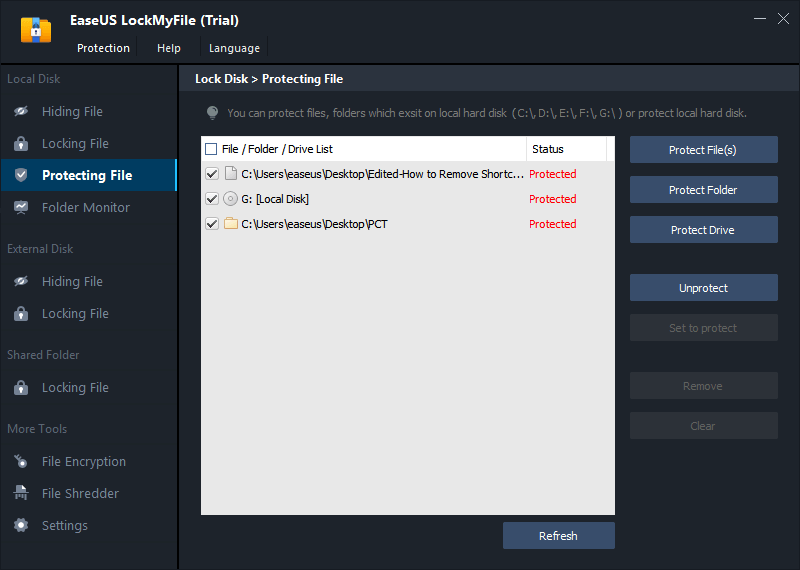
Step 3. Check and confirm the files, folder, and drive that you want to protect.
Notes:
If you want to unprotect the selected files, folder, or drive, tick the target data and click on the Unprotect button.
Method 3. PowerPoint Restrict Access
Another method to protect your data is to restrict PowerPoint access. No one can edit, copy, or print your file.
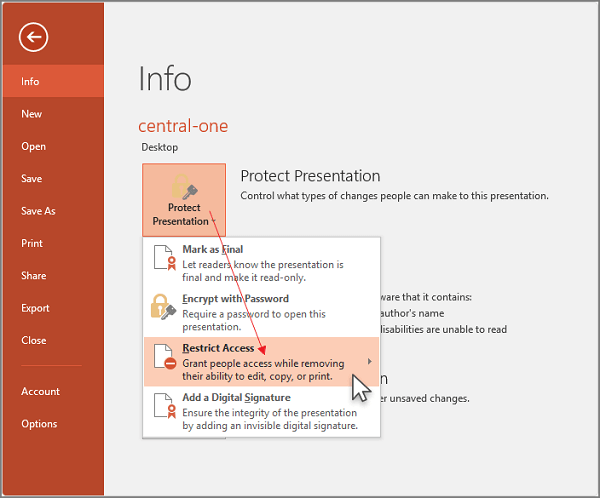
Step 1. Go to File tab > Info.
Step 2. Choose Protect Presentation and then click Restrict Access from the drop-down menu.
Method 4. Set A Password for PowerPoint File
You can also set a password on file. If anyone wants to view the slides, enter the password first.
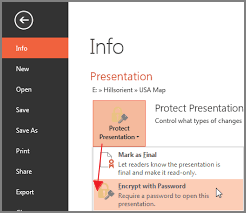
Step 1. Choose File tab > Info.
Step 2. Click Protection Presentation and then click Encrypt with Password.
Step 3. Type the password and click OK.
Step 4. Enter the password again to confirm.
Note: Password protection isn't available to ODP (Open Document Presentation) files.
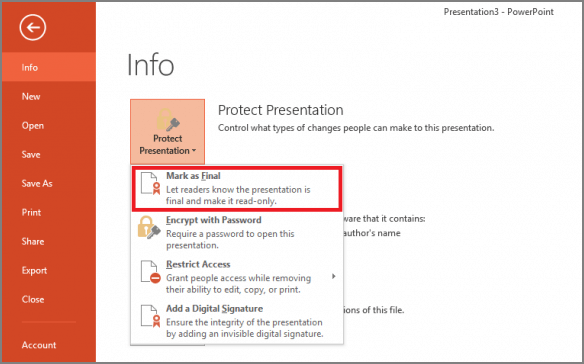
Method 5. Mark Presentation as Final and Make it Read-only
Speaking of preventing PPT files from editing, Mark as Final is a good option to mark the files as the final version and make it read-only.
Step 1. Click the File tab on the PowerPoint ribbon.
Step 2. Choose Info on the left panel, you can see the Protect Presentation part on the right side.
Step 3. Click Protect Presentation and choose Mark as Final.
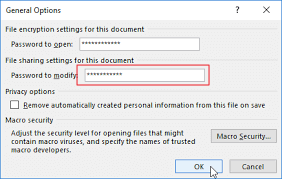
Method 6. Set Modify Password for Presentation
When you save a PPT file, you can choose to set the modified password. Without a password, you can only read the content and can not modify slides.
Step 1. Go to File > Save as.
Step 2. On the Save as window, click Tools on the bottom. Click General Options.

Step 3. On the General Options window, go to "File sharing settings for this document", type your password for modifying.
Method 7. Make My PowerPoint Uneditable Permanently
How to make PPT uneditable permanently? The quick protection method is to convert PPT as an image.
Step 1. Open the File tab and select Save as on the left corner.
Step 2. Click Save as type box and choose PNG or JPEG format from the menu. Click the Save button.
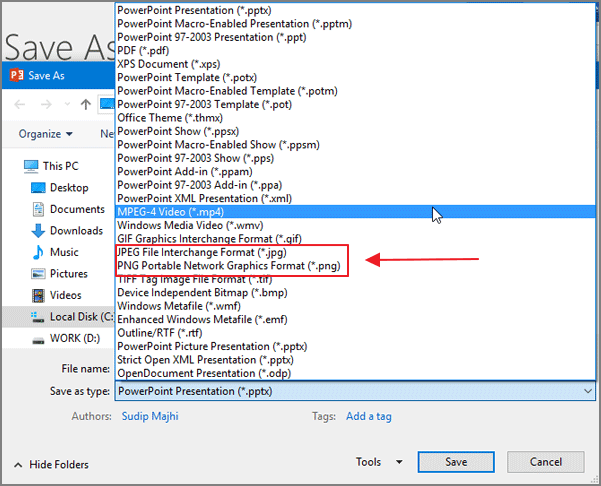
Step 3. Microsoft PowerPoint will ask you whether you want to export all slides or the current slide. Choose Every Slide and click OK.

Final Words
In this article, we have listed 6 solutions to protect PowerPoint presentations from being copied or edited. Most of the methods are the built-in features of PowerPoint, so you can protect your files easily. And the straightforward software - EaseUS LockMyFile can do much more than protect files from being copied or edited.
Related Articles - ALSO ON EaseUS SOFTWARE
-
How to Lock Videos in Windows 11/10 (3 Accessing Ways)
![Jean]() Jean/2025-04-15
Jean/2025-04-15
-
How to Encrypt USB Drive with or Without BitLocker Windows 10
![Jean]() Jean/2025-04-15
Jean/2025-04-15
-
How to Send Secure Email with Attachments in Outlook, Gmail, and Yahoo
![Jean]() Jean/2025-04-15
Jean/2025-04-15
-
Can I Lock Contacts? Yes, You Get Effective Ways to Make It
![Jean]() Jean/2025-04-15
Jean/2025-04-15