5 Ways | How to Create a Password Protected Folder in Windows
While sharing the computer with your friends, families, and colleagues, you may have some important or confidential files that you don't want them to view. So how to avoid this? Yes, hiding the files is a good way to go.
Here on this page, we are about to discuss another way to help. It is to create a password protected folder and save confidential files inside, keeping prying eyes away. Let's get started to learn how to do so by following the complete guide here.
#1. Create a New Folder in Windows Computer
So what's your first move? Yes, it is to create a new folder. So what's the difference?
The way to create a new folder is with no difference. But here are two tips that you can follow while creating the folder:
- Create the folder in a deep directory on the computer, for example, D: / Document/ Files/. Don't directly create it on the desktop.
- Give the folder a normal name. Don't use a special name to make the SECRET folder standing out.
Let's create the new folder now:
Step 1. Open the directory where you tend to create a new folder.
Step 2. Right-click an empty area directly and select New > Folder.
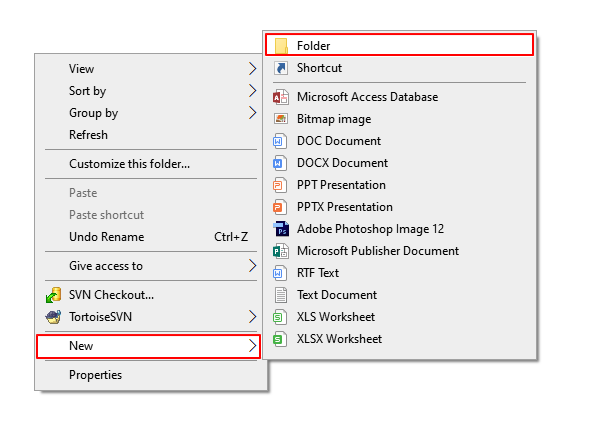
Step 3. Type a new name for the folder.
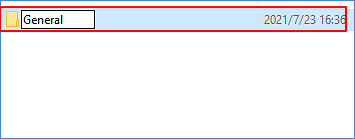
#2. Save Essential Files into the New Folder
Now, you can save essential files into the new folder.
Step 1. Locate essential files, right-click and select Cut.
The reason why we use cut is to thoroughly move the target file into the new folder.
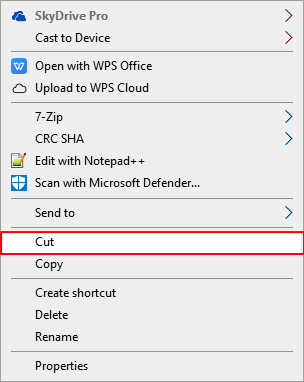
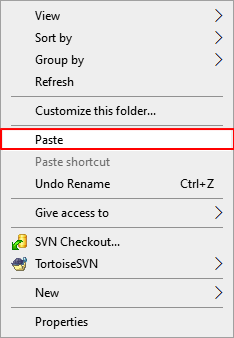
Step 2. Open the new folder, right-click an empty area, select Paste.
Repeat the process several times to save all confidential files to the new folder.
#3. Add Password to Protect the New Folder in Windows
Now, it's time to set a password to secure all files in your folder. Here we collect 5 reliable tools to help you flexibly lock a folder with a password in Windows 11/10/8/7 on your own:
The listed solutions were put in an easy to hard sequence. Follow the respective solution to password protects your folder on Windows computer now.
You May Also Be Interested In:
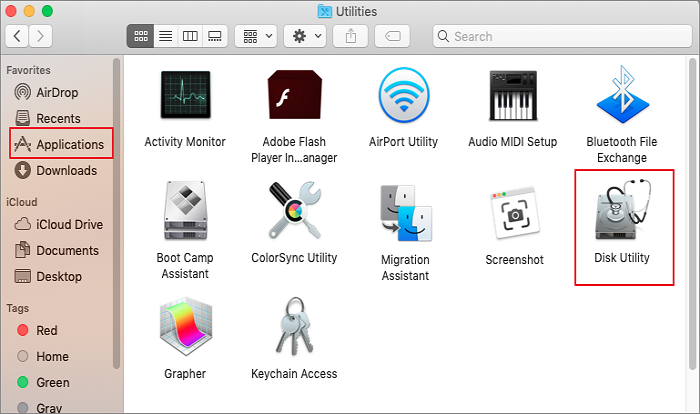
How to Password Protect Folder on Mac?
If you are looking for a guide to add a password to a folder on Mac computer, follow the respective guide on this page for help.
Method 1. Add Password to Folder using Folder Properties Setting
Folder Properties Setting with its Encrypt content to secure data option works directly to secure a folder.
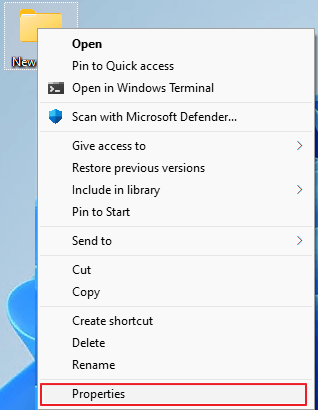
Step 1. Right-click on the new folder, and select Properties.
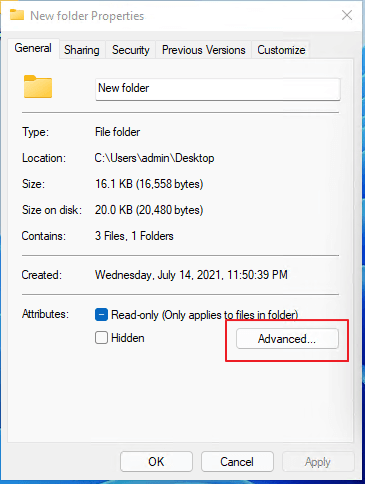
Step 2. Go to General > Click Advanced...
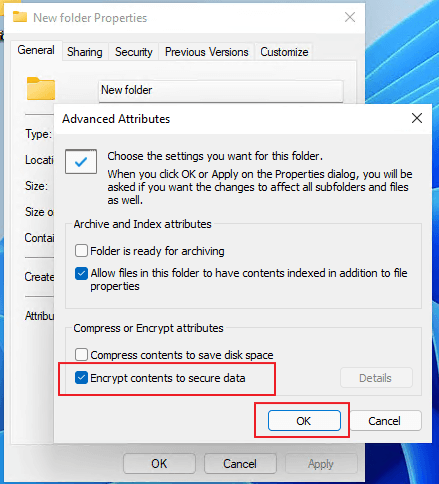
Step 3. Check Encrypt contents to secure data > OK.
Step 4. Click Apply > OK.
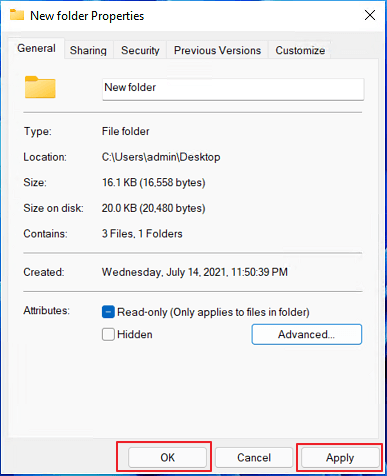
Step 5. Select Backup now when a notification window pops up, telling you to back up the encryption key.
Save the key into a safe location and wait for the process to complete.
Method 2. Add Password to Folder using EaseUS LockMyFile
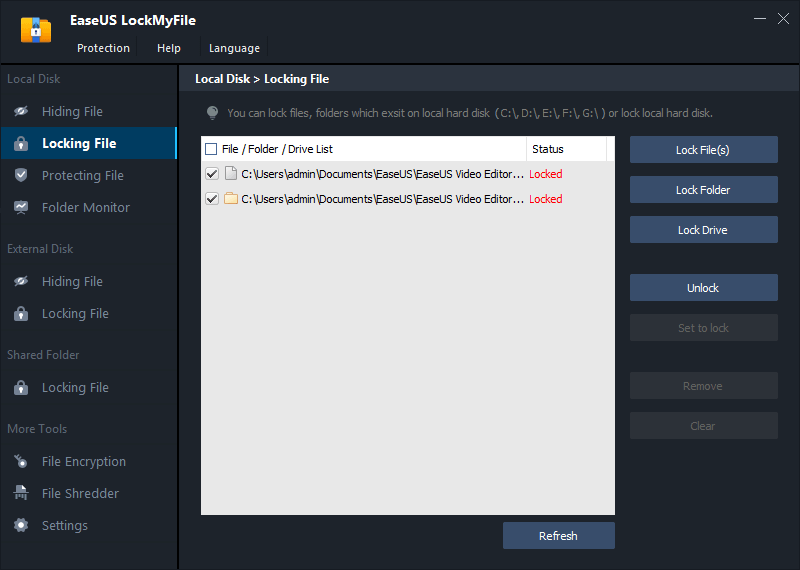
EaseUS LockMyFile enables all Windows users to add password protection to their folders and files in a local disk, an external drive, even a network shared drive. Let's move to add a password to your folder with essential files here:
Step 1. Launch EaseUS LockMyFile, register with your email address and set a software protection password.

Step 2. Click Locking File on the right side. There are three options available: Lock Files, Lock Folder, and Lock Drive.
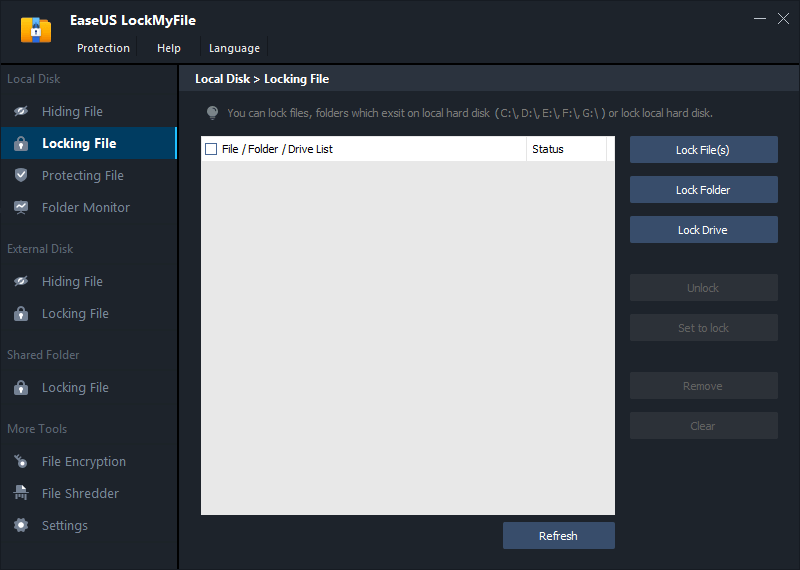
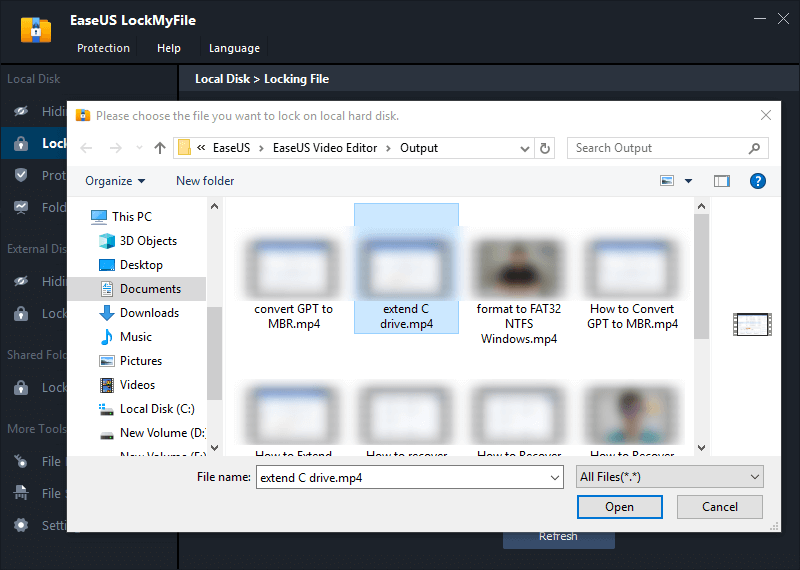
Step 3. Click Lock File(s), and choose the file you want to lock from your computer, and click Open to confirm.
If you need to lock a folder, the operation is the same. Click Lock Folder, choose the target folder, and click OK to confirm.
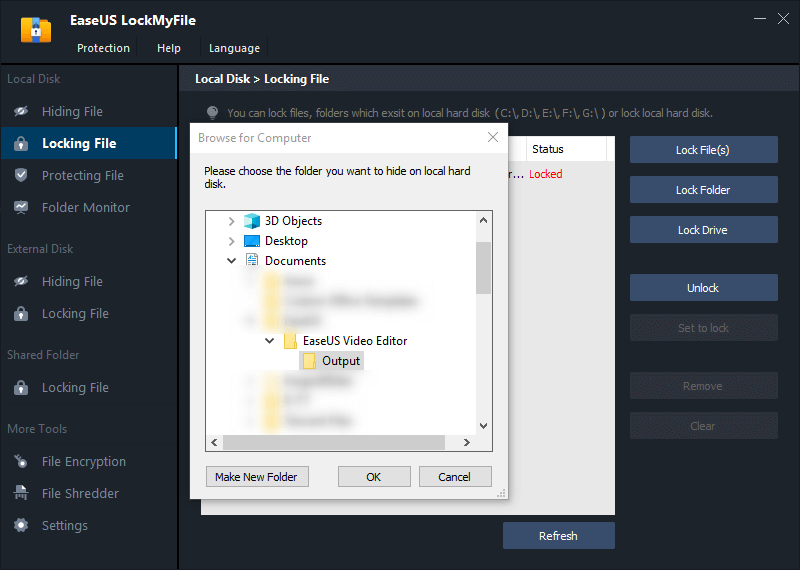
Step 4. You can check the status of your chosen files or folders now.
Method 3. Add Password to New Folder Using FolderLock
Folder Lock is another third-party software that works to adding a password to protect a folder. It mainly offers solutions to protect files, backup files, and even protect external USB on Windows computers.
Step 1. Launch Folder Lock and enter a Master password, click OK.
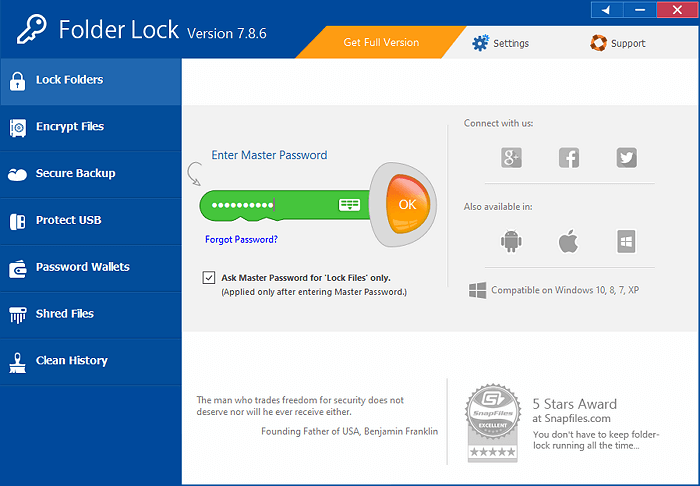
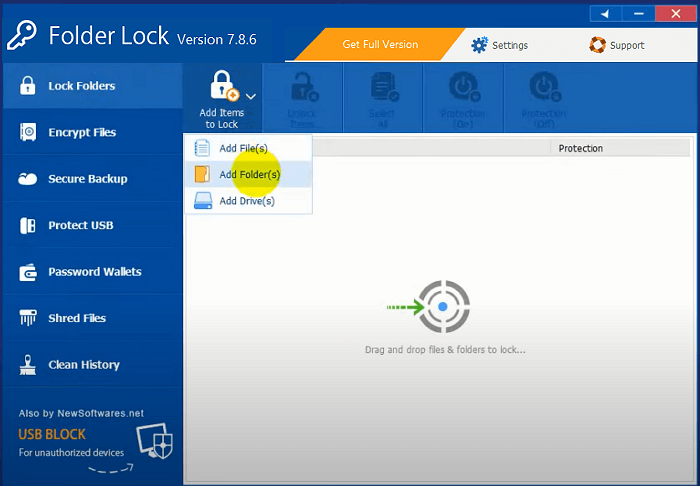
Step 2. Click Lock Folders > Add Items to Lock > Add Folders.
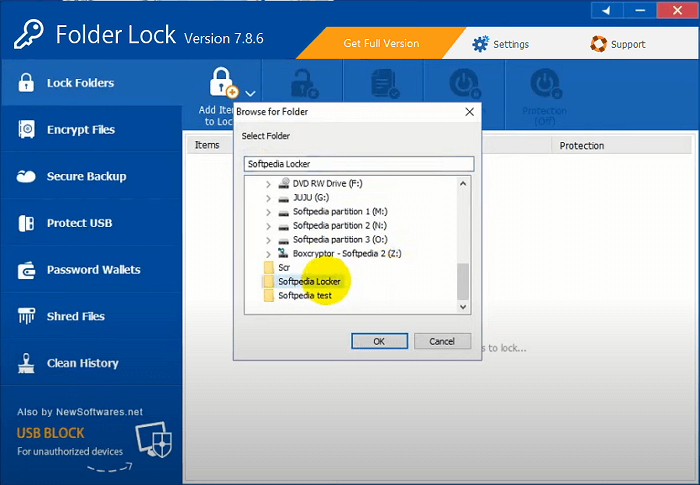
Step 3. Browse to select a folder to lock, and click OK to confirm.
Method 4. Password Protect Folder with 7-Zip
7-Zip is a professional file and folder compression tool. It works to compress huge files into a small size with a password.
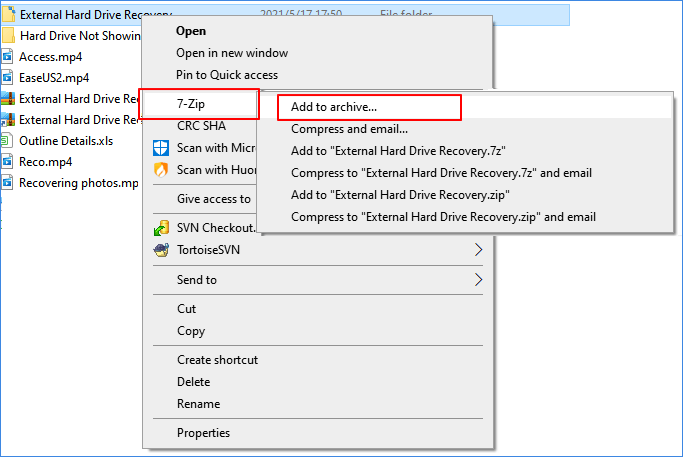
Step 1. Install 7-Zip, right-click on the new folder, select 7-Zip > Add to Archive.
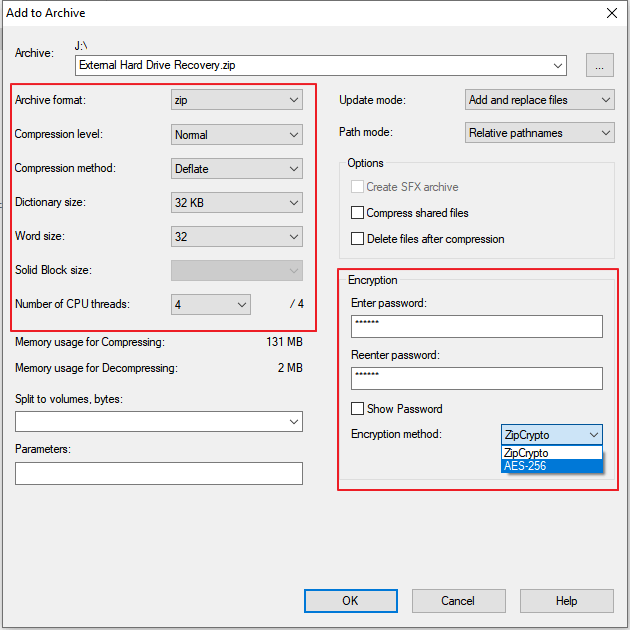
Step 2. Set the encryption settings, including format, compression level, etc.
Step 3. And enter the Encryption password and Encryption method.
Step 4. Check Encryption file names if you want to. Click OK to confirm.
Note that only the 7z and zip format can be encrypted.
Method 5. Password Protect Folder via Text Batch File
This method is a bit tricky that you need to be very careful while following this method. And as a matter of fact, you'll need to know a bit of command prompt operating skills.
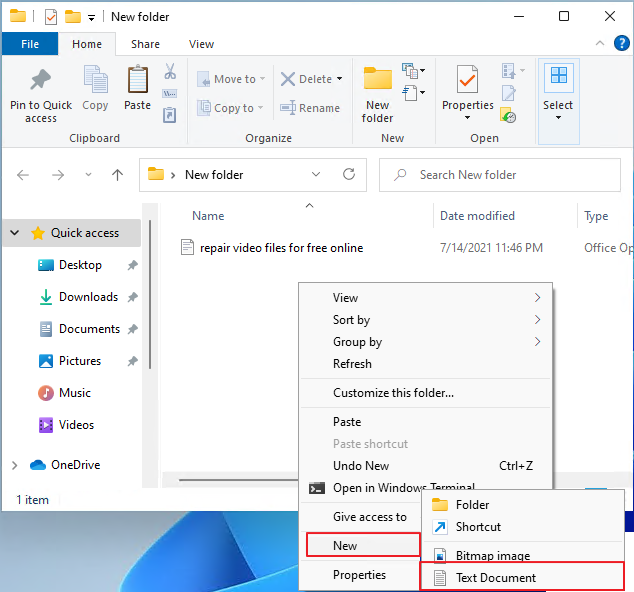
Step 1. Open the target folder, right-click an empty area and select New.
Step 2. Select Text Document and open the file.
Step 3. Paste the following text into the new text document:
- Notice:
-
cls
@ECHO OFF
title Folder Locker
Advertisement
if EXIST "Control Panel.{21EC2020-3AEA-1069-A2DD-08002B30309D}" goto UNLOCK
if NOT EXIST Locker goto MDLOCKER
:CONFIRM
echo Are you sure u want to Lock the folder(Y/N)
set/p "cho=>"
if %cho%==Y goto LOCK
if %cho%==y goto LOCK
if %cho%==n goto END
if %cho%==N goto END
echo Invalid choice.
goto CONFIRM
:LOCK
ren Locker "Control Panel.{21EC2020-3AEA-1069-A2DD-08002B30309D}"
attrib +h +s "Control Panel.{21EC2020-3AEA-1069-A2DD-08002B30309D}
echo Folder locked
goto End
:UNLOCK
echo Enter password to Unlock folder
set/p "pass=>"
if NOT %pass%==Your-Password-Here goto FAIL
attrib -h -s "Control Panel.{21EC2020-3AEA-1069-A2DD-08002B30309D}"
ren "Control Panel.{21EC2020-3AEA-1069-A2DD-08002B30309D}" Locker
echo Folder Unlocked successfully
goto End
:FAIL
echo Invalid password
goto end
:MDLOCKER
md Locker
echo Locker created successfully
goto End
:End
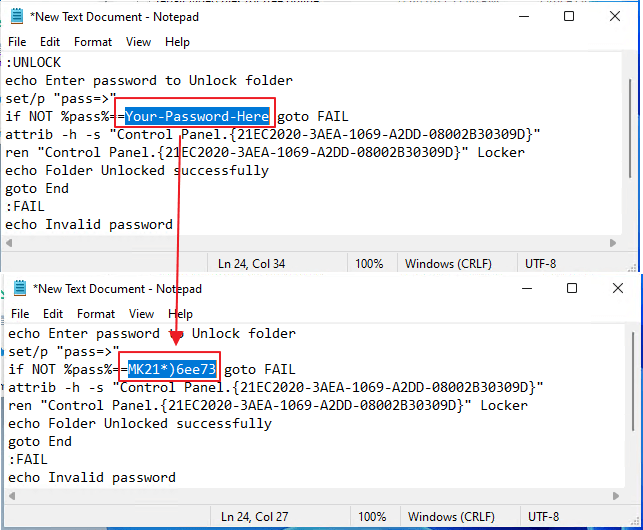
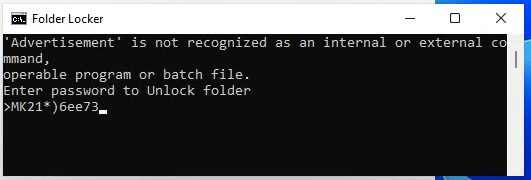
Step 4. Find Your-Password-Here and replace it with the password that you want to lock the folder with. For example: MK21*)6ee73
Step 5. Click File > Save As > Select All Files at the Save as type section.
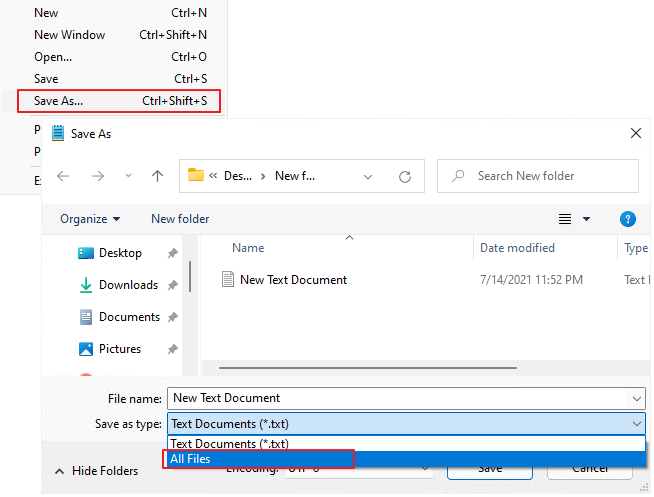
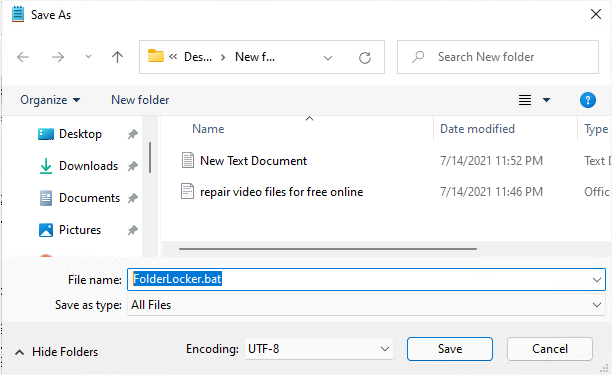
Step 6. Name the file as FolderLocker.bat and click Save.
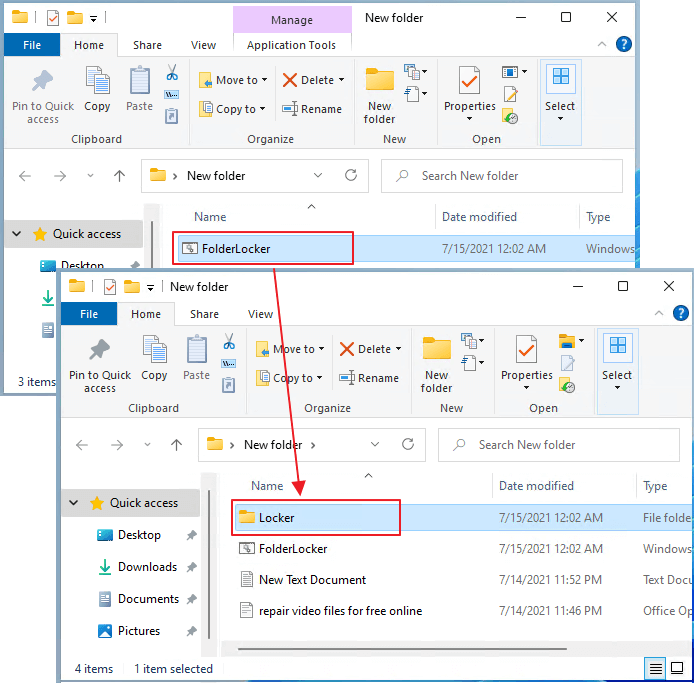
Step 7. Double-click the FolderLocker file to generate a Locker folder.
Step 8. Drag or move all the files that you need to protect into the Locker folder.
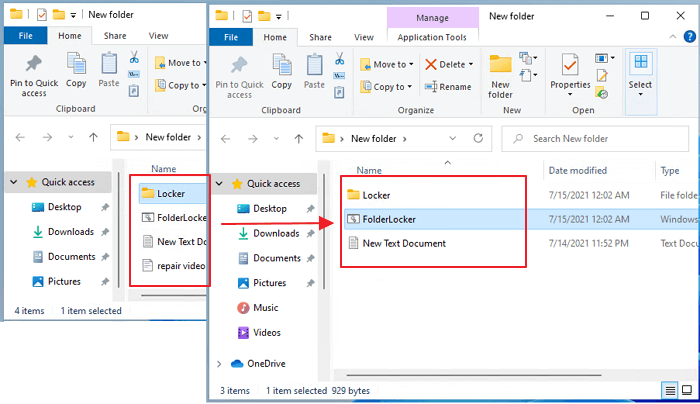
Step 9. Click the FolderLocker file again, type Y in the command prompt window, and hit Enter to confirm that you want to lock the folder.
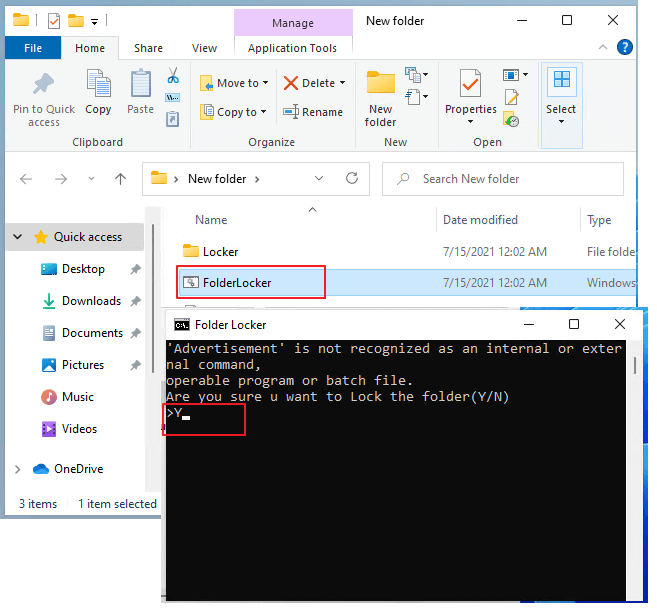
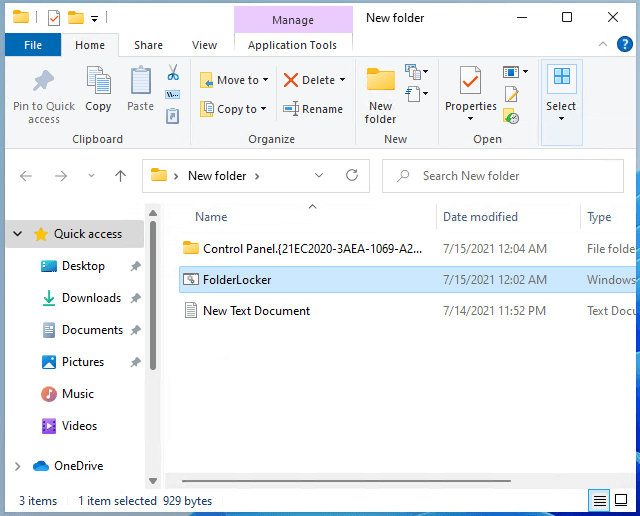
Step 10. Now the folder is locked and you can barely see it in its original location.
To unlock the folder, click the FolderLocker file, enter your password in the command prompt window, and hit Enter.
#4. Shred or Permanently Delete the Old Folder
Now, you've complete adding a password to your folder. It's time to delete the original folder. As some of the methods were encryption tools that will generate a new encrypted file, so you'll need to remove the old source file permanently.
Here you have two options:
1. Select the old folder, press the Shit+Delete keys to permanently delete the folder.
2. Shred the folder with a reliable file shredding tool.
Creating a Password Protect Folder to Secure Files Is Not Complex
On this page, we collect 5 methods and offer a complete guide to help you create a password protected folder to secure all confidential items on your computer.
As your files are essential, go and follow one method shown above to secure your files on the computer now.
Related Articles - ALSO ON EaseUS SOFTWARE
-
How to Send Secure Email with Attachments in Outlook, Gmail, and Yahoo
![Jean]() Jean/2025-04-15
Jean/2025-04-15
-
How to Password Protect a Folder Without Software in Windows 11/10
![Jean]() Jean/2025-04-15
Jean/2025-04-15
-
Shred Files to Delete Files Permanently on Windows 10/11
![Jean]() Jean/2025-04-15
Jean/2025-04-15
-
How to Write Protect A USB Flash Drive
![Jean]() Jean/2025-04-15
Jean/2025-04-15

