- Store
-
Support CenterGuides, License, ContactDownloadDownload installerChat SupportChat with a TechnicianPre-Sales InquiryChat with a Sales Rep
Can disk utility format NTFS on Mac? Here are ways and step-by-step- to format NTFS on Mac.
Table of Contents
Do you want to use NTFS on your Mac but can't figure out how? By the end of this article, you'll know how to use the NTFS disk utilities on a Mac. It will also explain how to format NTFS Drivers in different methods. Window NTFS is a Windows file system format. NTFS support was previously unavailable on Mac. Windows is widely used, and you must plug in the device, which will operate wonderfully. Previously, to run NTFS on Mac, you needed a license. EaseUS will teach you how to format NTFS drives on Mac using Disk Utility, NTFS For Mac, and Terminal in this guideline.
Share this article with precious solutions for NTFS drive formatting on Mac with users on social media:
Using an external hard drive is the easiest way to expand storage to your Mac. External hard drives will give your machine the necessary storage space. Filing a drive with the Mac's Disk Utility program is easy and convenient. It's even capable of creating multiple partitions.
You can format NTFS on a disc via the steps listed below.
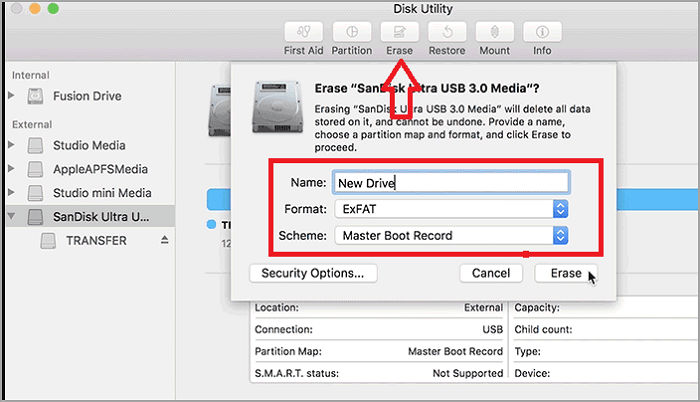
Step 1. Open 'Disk Utility' app on your mac
Step 2. Internal and external drives are listed on the left panel. Choose the 'view' option. A drop-down menu "show all devices" will appear.
Step 3. Select the external storage devices from the sidebar. Make sure you are choosing the device.
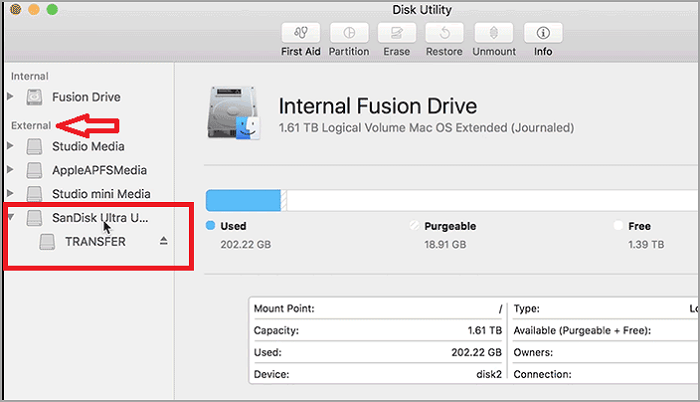
Step 4. Click erase on the toolbar. Type the disk name you want. Here you have to select the Format and Partition Scheme as per your preference.
macOS is now exclusively built to read the NTFS file system. It is unable to write on them. You can just look at the document or copy the data from NTFS to your Mac. You cannot copy your data from Mac to NTFS. This article will take you through using NTFS on a Mac.
Format 1TB/2TB NTFS Drive on Mac
Below are the two alternatives you can adopt to format your NTFS drive on Mac:
1. Run EaseUS NTFS For Mac
NTFS For Mac is the easiest professional software that enables you to have full read and write permission on NTFS hard drives on Mac. Furthermore, users can format their NTFS hard disks to multiple file systems, including exFAT, FAT32, HFS+, and APFS, using its "Erase" function.
Follow the step-by-step instructions to format NTFS drives with NTFS For Mac:
Step 1. Launch EaseUS NTFS for Mac on Mac computer, click "I already have a license" to activate this software.
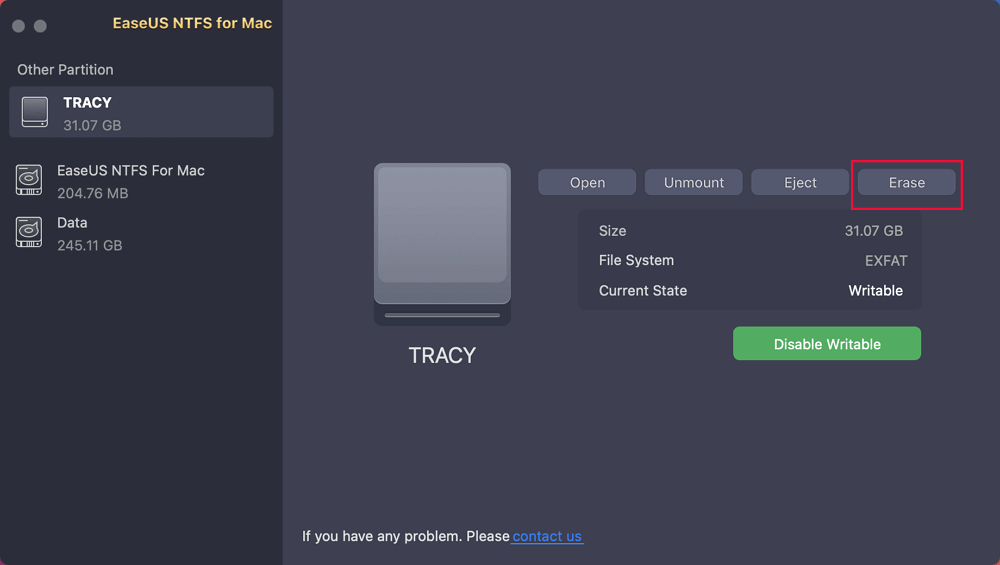
Step 2. Select target disk drive or removable device you want to erase, and click "Erase."
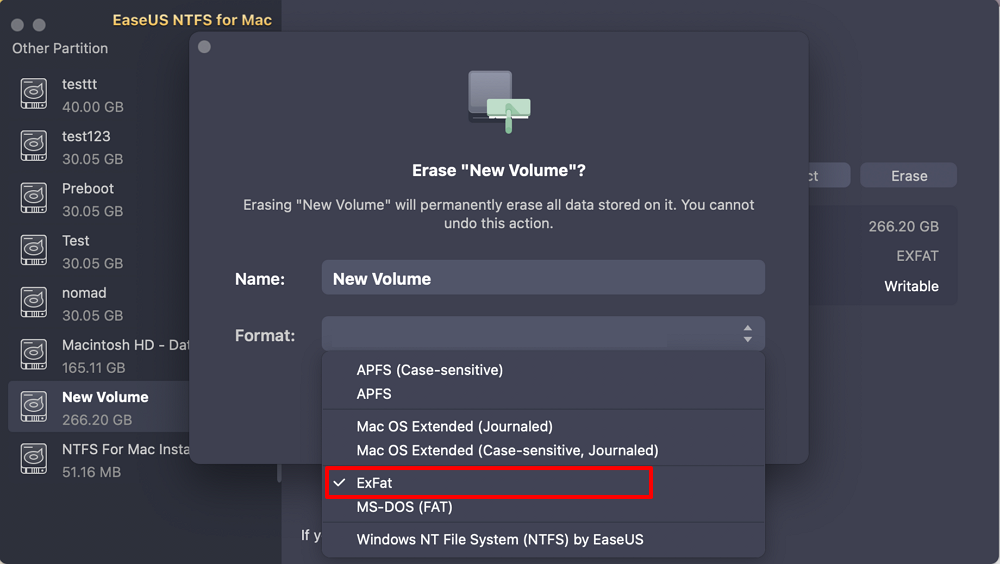
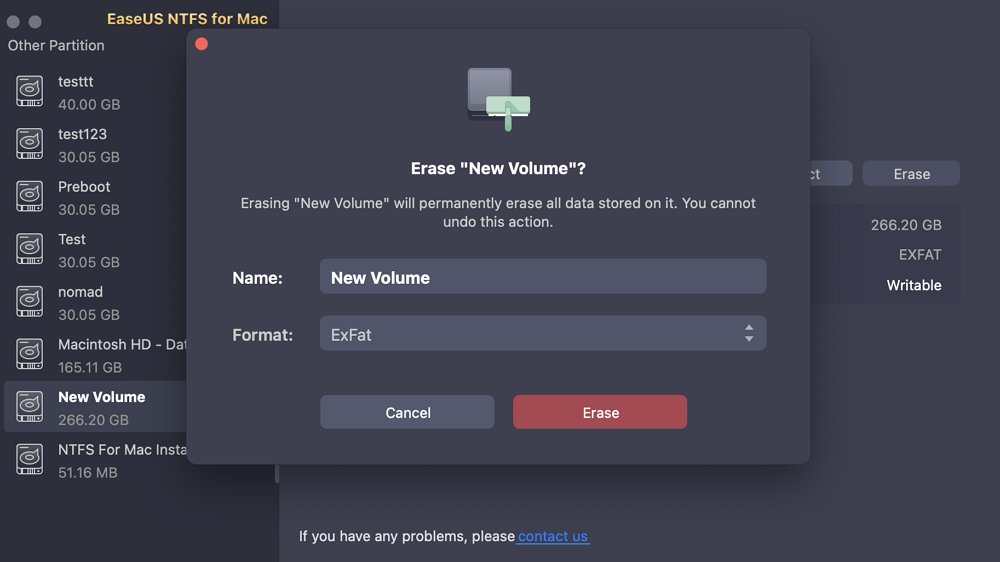
Step 3. In the Format section, select ExFAT as your target file system from the drop-down box.
Step 4. Click the "Erase" button to confirm the format process and erase all data stored on the external storage device.
Some notable features of EaseUS NTFS for Mac are listed below.
Install this software and start making your operations on Mac more simple:
2. Format NTFS on Mac Terminal
If the first option does not work, you can try formatting NTFS on your Mac terminal. This procedure may result in data loss. Therefore, make a backup of your data first.
NTFS on a Mac Terminal provides the advantage of being quick and not requiring third-party software. Remember that because this feature is still in testing, your files may become corrupt at any time. Proceed with caution during the procedure.
Here is a step-by-step guide on how to use NTFS on a Mac terminal.
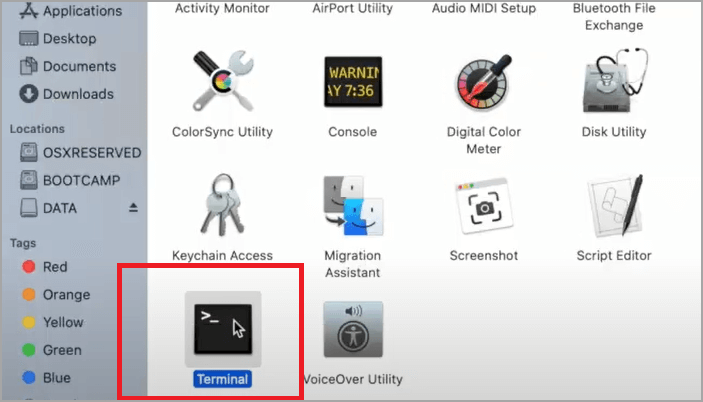
Step 1. To start the process, go to the spotlight corner of your screen and enter 'Terminal'
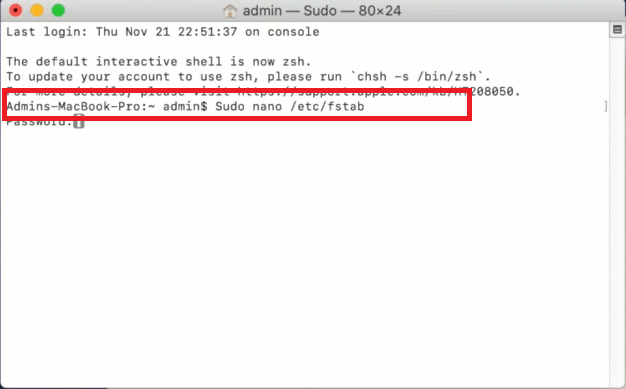
Step 2. After connecting your NTFS drive with mac enter the following command:
sudo nano /etc/fstab
It will ask the Administration password.
Step 3. Add the second command LABEL=NAME none ntfs rw,auto,nobrowseLABEL=NAME none ntfs rw,auto,nobrowse
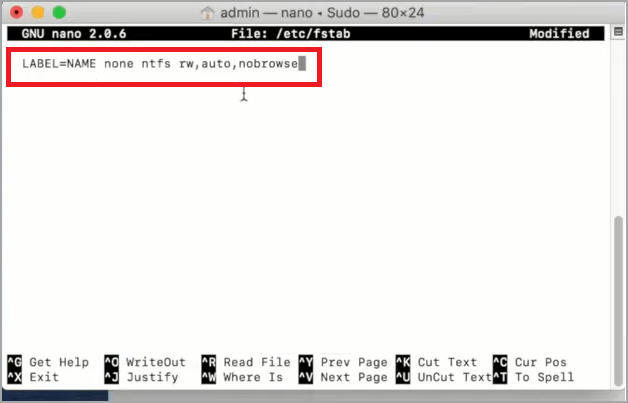
Step 4. Here you will replace the name of your NTFS with its actual name. Write the name in this command.

Step 5. To save the list press Ctrl+O and then press Ctrl+X to exit. Now connect your windows drive to Mac.
Step 6. Open finder on your mac and go to the folder.
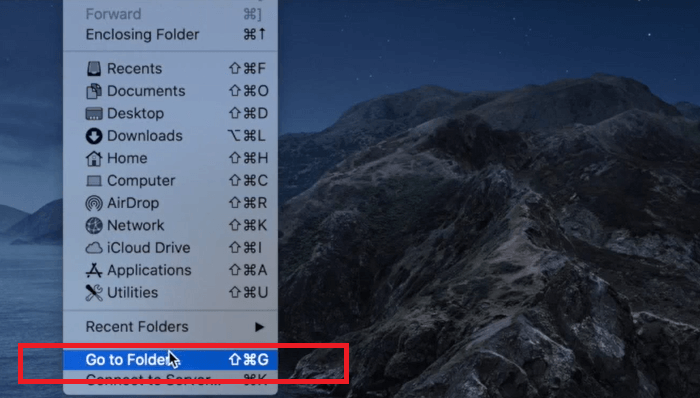
Step 7. Type '/Volumes/NAME' where 'NAME' is the name of your NTFS drive. Select "Go" to access the window disk.

Step 8. Now you can edit the existing files and copy the new ones, too.
We can provide you with a free and straightforward method of using NTFS without the hassle of formatting. The EaseUS NTFS for Mac is a third-party driver.EaseUS NTFS for Mac is a third-party driver. The M1 compatible computer accommodates drives being written, mounted, unmounted, and ejected safely. The program enables quick and easy access to the formatting and organization of your files. It is not necessary to use a terminal command to create a partition of your files. EaseUS does that for you automatically.
To use EaseUS NTFS for Mac, all you have to do is download it to your computer and connect it to your device. This utility will automatically detect the disc and provide you with the choice to enable writing on it. You will be able to write and copy files. This simple tool allows you to write without having to format it.
Step 1. Launch and activate EaseUS NTFS for Mac. Click "I already have a license" to unlock this software.
Step 2. Connect an NTFS drive to Mac, EaseUS NTFS for Mac will automatically detect the device. Select your drive and you'll see it's now marked as 'Read-only". Click "Enable Writable" to add read and write rights to the drive.
Step 3. When the state of NTFS drives turns into "Writable".
Step 4. EaseUS NTFS for Mac will pops up a window to help Mac get access to the NTFS drive:
Step 5. When EaseUS NTFS for Mac restarts, you can then open to check, read, write, and even modify saved data on the NTFS device.
We have now shown you how to use the Apple format disc utility. Though it may seem complex or complicated, EaseUS NTFS for Mac has simplified the procedure. This tool enables you to download, attach the drive, and write to it. You can also use the methods indicated above if they are convenient for you. We propose EaseUS NTFS for Mac because it is a quick and easy option.
Related Articles - ALSO ON EaseUS SOFTWARE
Can A Mac Read NTFS | Can Mac Read and Write NTFS (2025 Fixed)
![]() Banu/2025-06-26
Banu/2025-06-26
How to Mount BOOTCAMP NTFS Partition with Read-Write Access
![]() Sherly/2025-06-26
Sherly/2025-06-26
How to Change Permissions on USB Drive Mac [Ultimate Guideline]
![]() Cici/2025-07-07
Cici/2025-07-07
Fixes to Unable to Copy Files to External Hard Drive Mac
![]() Cici/2025-07-07
Cici/2025-07-07
Copyright © 2004 - 2023 EaseUS. All rights reserved.