- Products
- Store
- Partner
-
Support
Support CenterGuides, License, ContactDownloadDownload installerChat SupportChat with a TechnicianPre-Sales InquiryChat with a Sales Rep
Table of Contents
High Sierra is the fourteenth version of the macOS series for Macintosh computers. It was launched in 2017 by Apple, and it contains some of the high-tech computer features.
But unfortunately, like all other MacOS series, it supports NTFS drives partially. Yep, Mac users can still only read NTFS volumes but can't write them.
Apple has restricted the NTFS write support for Mac by default. However, they are testing NTFS read-write support for macOS, but nothing is yet stable.
If we answer straight away, the answer is no. High Sierra cannot write to NTFS drive. But there are plenty of other ways to make High Sierra macOS open NTFS files in read-write mode.
Want to know those solutions to write NTFS on Mac? Then, let's scroll down.
| Workable Solutions | Step-by-step Troubleshooting |
|---|---|
| Fix 1. EaseUS NTFS for Mac | Step 1. Launch and activate EaseUS NTFS for Mac. Click "I already have a license"...Full steps |
| Fix 2. Run Terminal | Step 1. Connect an NTFS formatted drive to a Mac device...Full steps |
| Fix 3. Add NTFS Drivers | Many third-party NTFS drivers are available that can allow Mac users to read and write on NTFS drives...Full steps |
The answer is yes. Wait a minute, but we said no before.
Well, there's no need to get confused. If you try to directly write NTFS files on Mac, it isn't possible. Since Apple has NTFS writable support for Mac, it is just not activated by default.
Thus, if you activate those settings, writing NTFS files on Mac High Sierra is possible. But that could be a bit of a technical and risky process because Apple's NTFS format writable support is not yet stable.
Considering this problem, many great NTFS drives for Mac and robust tools to mount NTFS external drives on Mac are available today. These solutions can make it possible to write NTFS files on Macs.
So, in a nutshell, High Sierra can write for NTFS drives.
There's no direct write to NTFS drives support available for any Mac device, not even M1. Therefore, Mac users have to use these three methods to write NTFS files on High Sierra or other MacOS versions:
EaseUS NTFS for Mac is an excellent solution to mount and unmount NTFS external drives in reading/writing mode from Mac's status bar. It is a fast program to save, copy or write NTFS files on Mac.
This is a comprehensive NTFS software for Mac that can solve several issues. Whether it's an NTFS read-only error or an unmount hard drive to Mac problem, this software can help you with everything.
EaseUS NTFS for Mac has several great features to support NTFS write, such as:
Here's how EaseUS NTFS for Mac can mount NTFS in writable format on High Sierra macOS:
Step 1. Launch and activate EaseUS NTFS for Mac. Click "I already have a license" to unlock this software.
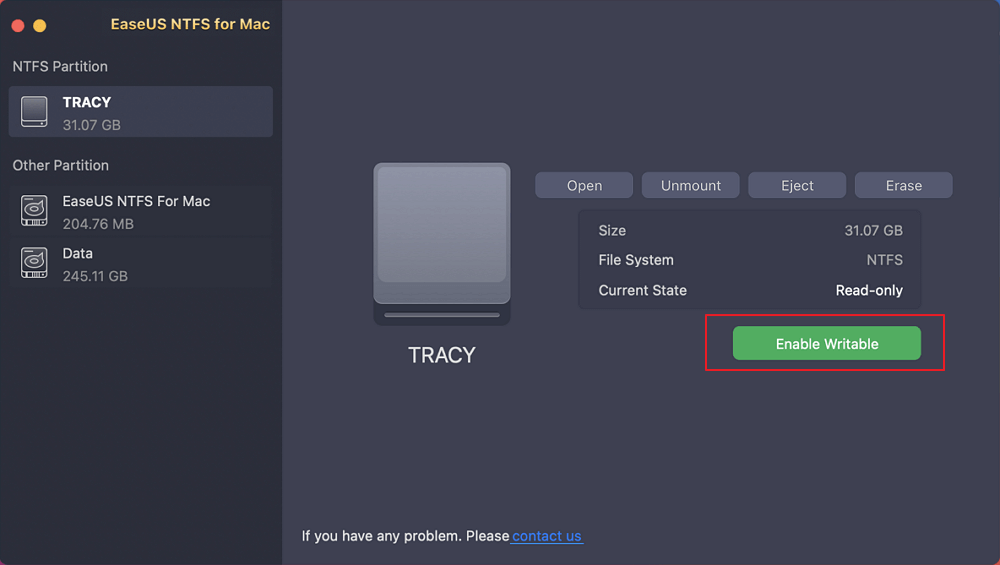
Step 2. Connect an NTFS drive to Mac, EaseUS NTFS for Mac will automatically detect the device. Select your drive and you'll see it's now marked as 'Read-only". Click "Enable Writable" to add read and write rights to the drive.
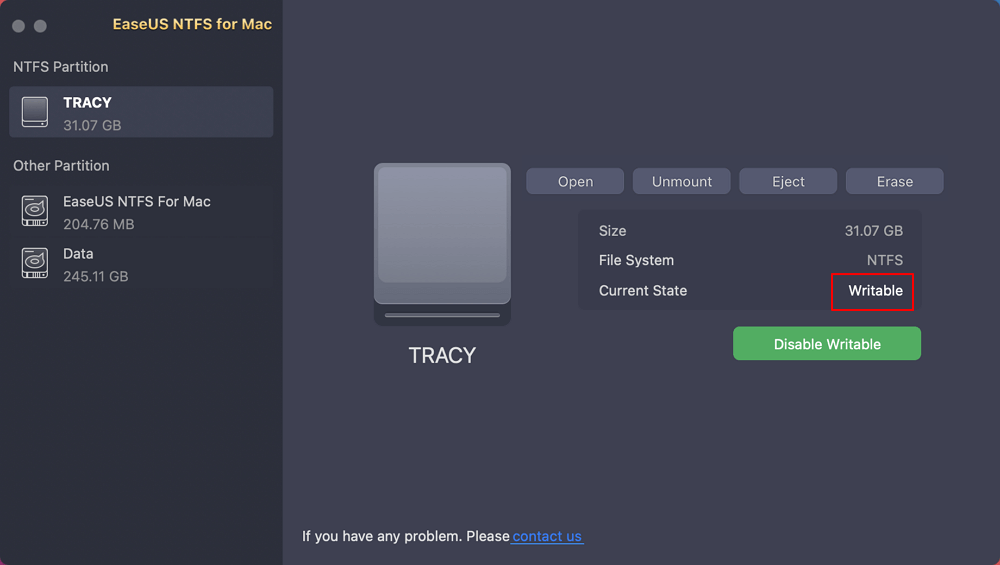
Step 3. When the state of NTFS drives turns into "Writable".
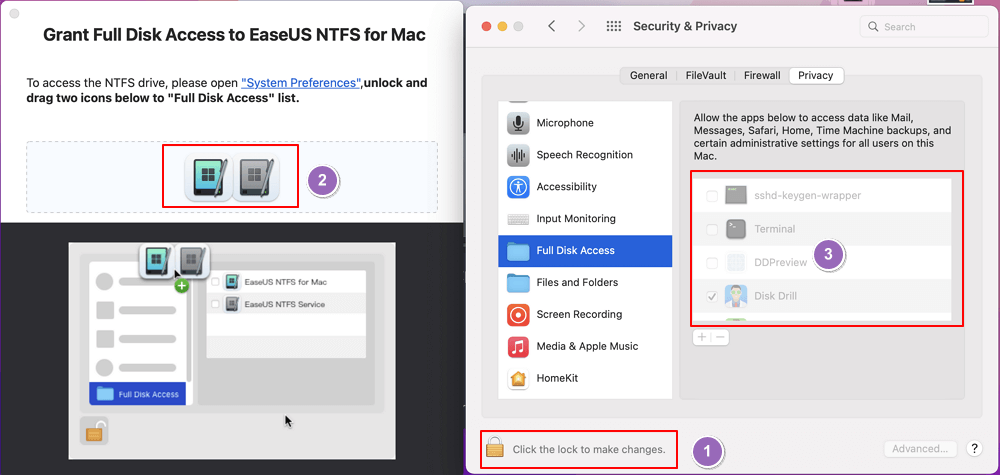
Step 4. EaseUS NTFS for Mac will pops up a window to help Mac get access to the NTFS drive:
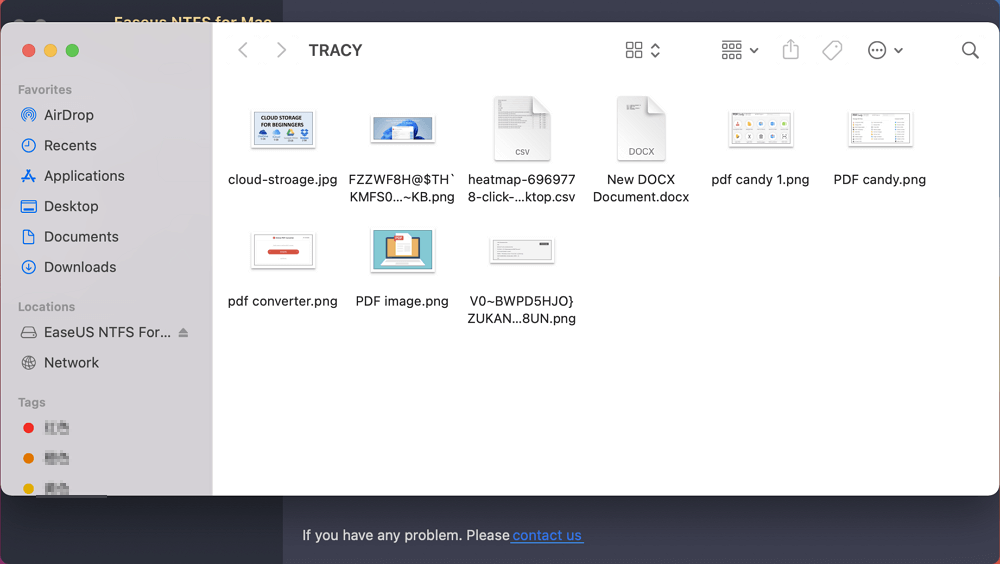
Step 5. When EaseUS NTFS for Mac restarts, you can then open to check, read, write, and even modify saved data on the NTFS device.
NTFS write access for High Sierra macOS can be enabled using Apple's native driver. Remember, this solution is highly technical and unsupported. So, run Terminal to write NTFS drives at your own risk. With this in mind, let's begin:
Step 1. Connect an NTFS formatted drive to a Mac device.
Step 2. Open Terminal window and enter the sudo nano /etc/fstab. When the admin password is prompted, type in your Mac's password.

Step 3. The blank fstab file will open. On the screen, add the NTFS volume name along with this command - LABEL=VOLUME_NAME none ntfs rw,auto,nobrowse.
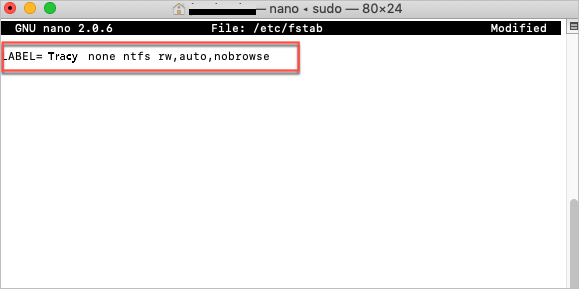
Step 4. Press Ctrl + O keys to write information to the file.
Step 5. Press Ctrl + X now to close the window.
Step 6. Finally, safely eject the drive and remount them to open NTFS in writable mode.
Apple's native driver is unstable and complex to use. Thus, many third-party NTFS drivers are available that can allow Mac users to read and write on NTFS drives. Here are a few popular NTFS drivers for Mac:
Paragon NTFS is the fast and powerful NTFS driver to read and write external drives. The software allows users to read and write large NTFS files on all macOS versions, including High Sierra.
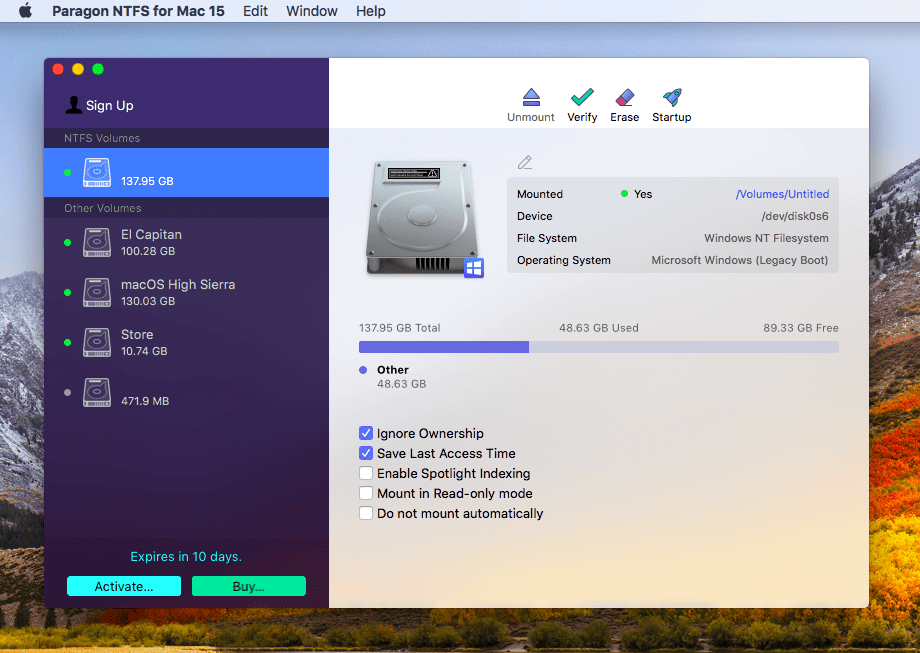
It works with all the leading external drives such as low-quality NTFS drives, high-capacity SSDs, etc. Paragon NTFS has a simple and clean user interface that beginners can even use.
Price: $19.95
Pros:
Cons:
Tuxera is another Mac-compatible NTFS driver to read and write NTFS drives on Mac. It is compatible with all the macOS versions, including High Sierra, Catalina, or older.
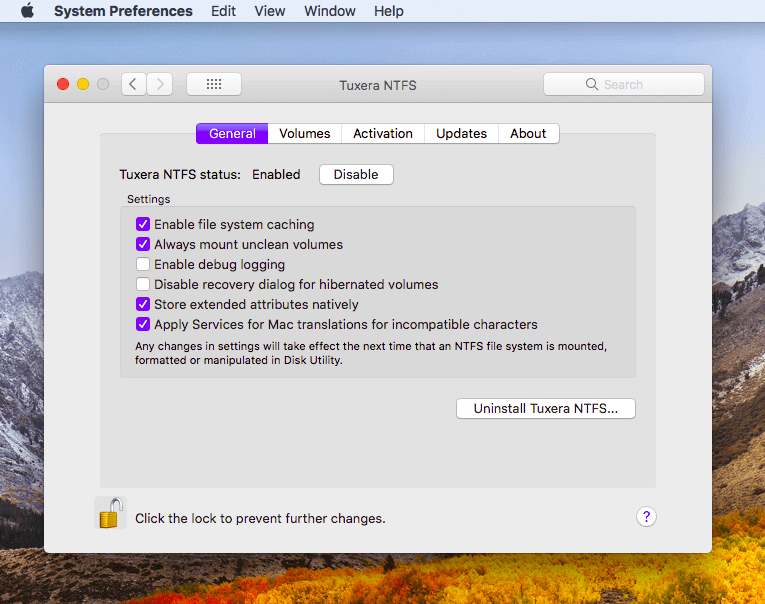
The program enables users to delete, add, and rename files to NTFS formatted drives on Mac. Tuxera also comes with a caching layer that can protect all the data in the external drive.
Price: $31
Pros:
Cons:
Mounty is a free NTFS drive for Mac to read and write NTFS file content. The program allows users to easily manage and sort NTFS files on external devices.
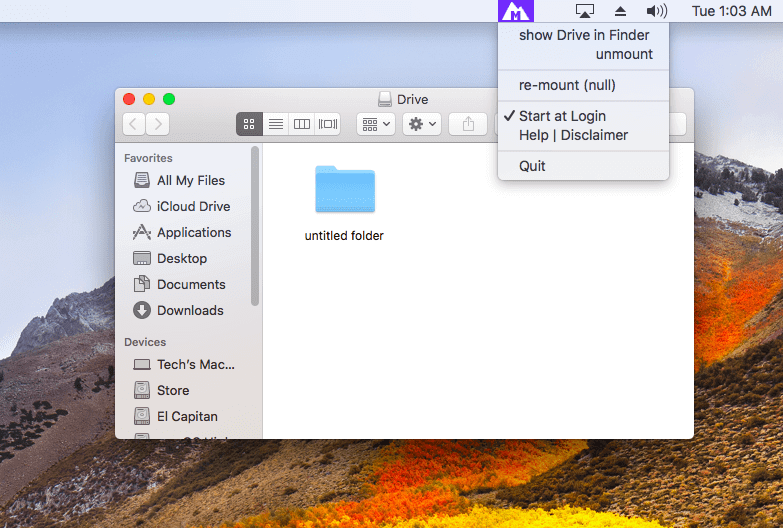
Remember, the software is free, so don't expect extra security or NTFS drive management features.
Price: Free
Pros
Cons
You know the answer by now. But the main question is now which method is the best to write NTFS files on MacOSX High Sierra?
Let's go through all three methods step by step again to find the answer.
So, according to our analysis EaseUS NTFS is the easiest tool to read-write NTFS external drives on Mac. The software might be paid, but its simplicity and robust features are worth every penny.
Rest we leave the choice in your hands!
Related Articles - ALSO ON EaseUS SOFTWARE
Fixed: Can't Add Files to Seagate Hard Drive on Mac
![]() Cici/2025-07-07
Cici/2025-07-07
How to Fix Can't Delete Files from Seagate Exteranl Hard Drive Error on Mac
![]() Daisy/2025-06-26
Daisy/2025-06-26
How to Delete Files from WD Elements on Mac
![]() Banu/2025-06-26
Banu/2025-06-26
How to Format NTFS on Mac [2025 New Guide]
![]() Banu/2025-06-26
Banu/2025-06-26

