
3 Ways | How to Password Protect Word Document in Windows 10/Mac
Microsoft Office Word is the most popular Word processor of all time. It provides a number of easy-to-use document creation tools, as well as a rich set of features for creating complex documents.
We use Word to process all of this information - financial, educational, living, working, etc. Word documents often contain sensitive and private information that can't be viewed by unauthorized persons. Therefore, how to ensure the security of a Word document is extremely important and password protects it is an effective solution.
Here's how you can password protect a Word document and encrypt it on Windows 10 and Mac.
How to Password Protect Word Document with MS Office's File Encryption Tool
Do you want to add a password to your Microsoft Word documents to keep the content safe from prying eyes? In this part, we'll walk you through the detailed steps and show you how to password protect Word documents with Microsoft Office's file encryption feature.
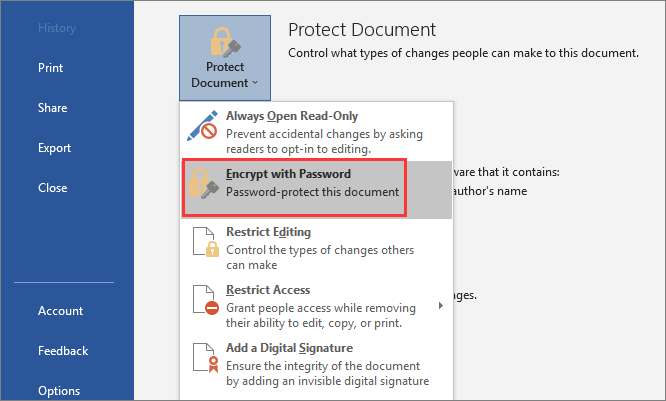
Step 1. Open the Word document you want to put a password to. Go to "File > Info". Under Protect Document, select "Encrypt with Password".
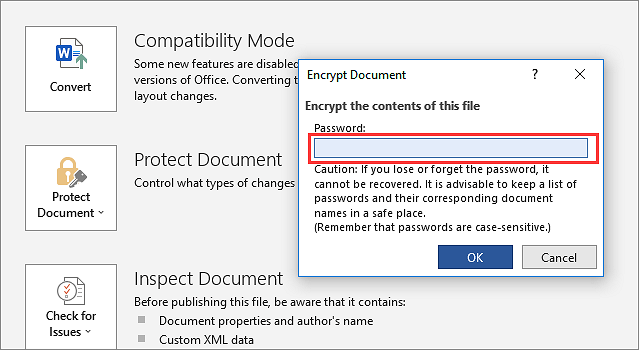
Step 2. Enter a password and confirm it. Then, click "OK" to keep the change.
- Notice:
-
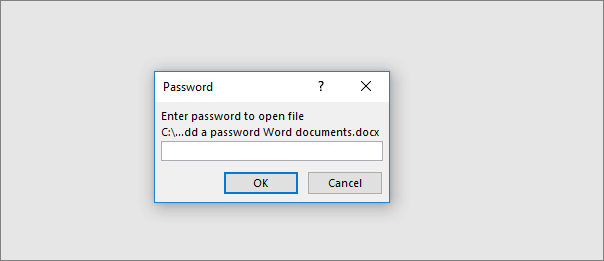
1. Once the file is encrypted, each time the document is opened, you are prompted for a password to access its contents.
2. You can use this method to encrypt other MS Office documents, including Excel and PowerPoint.
3. Be sure to remember the password. It's almost impossible to open a document without a password, so make sure you keep it somewhere safe.
How to Remove a Password from Word Document
If you want to remove the password of your Word documents, use these steps:
Step 1. Open the Word document.
Step 2. Type the password you've set to access the file as required. Click the "OK" button.
Step 3. Click on "File" then click "Info".
Step 4. On the right side, click the "Protect Document" menu.
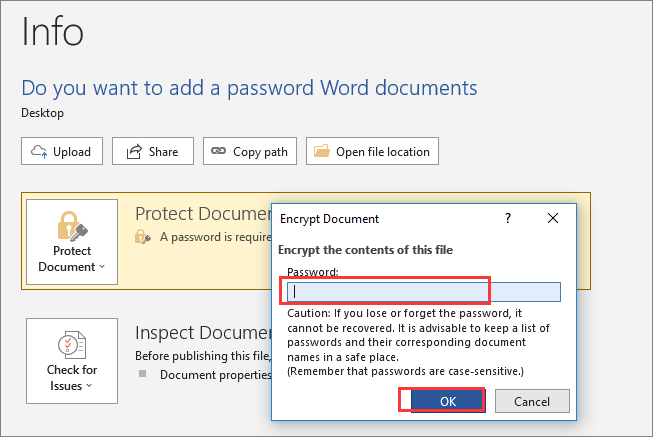
Step 5. Select the "Encrypt with Password" option.

Step 6. Clear the current password and click "OK".
After completing the steps, anyone without a password will be not able to open and edit the Office document.
How to Password Protect Word Document with a File Lock Tool
Another simple way to password protect a Word document is applying a professional file lock tool - EaseUS LockMyFile. It can hide files, password protect a folder, or encrypt any files with Advanced Encryption Standard (AES) 256-bit keys to keep your data safe.
With EaseUS LockMyFile, you can easily password protect all the common files in Windows 10/8/7.
- Hide your important files/folders on a local drive, USB drive, or LAN network.
- Protect files, folders, drives from being edited or deleted with the read-only option.
- Password protection. When you forget your password, you can find it through the pre-defined email.
Free download this file lock and encryption tool to password protect Word documents without limits in simple steps.
Step 1. Enter "easeus" to launch EaseUS LockMyFile, register with a valid email and a license code.
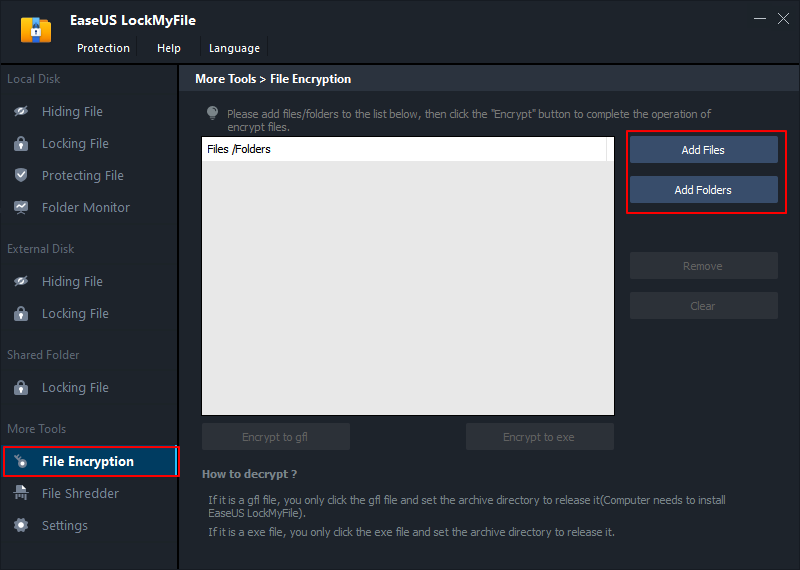
Step 2. Click File Encryption under More Tools > Click Add Files or Add Folders.
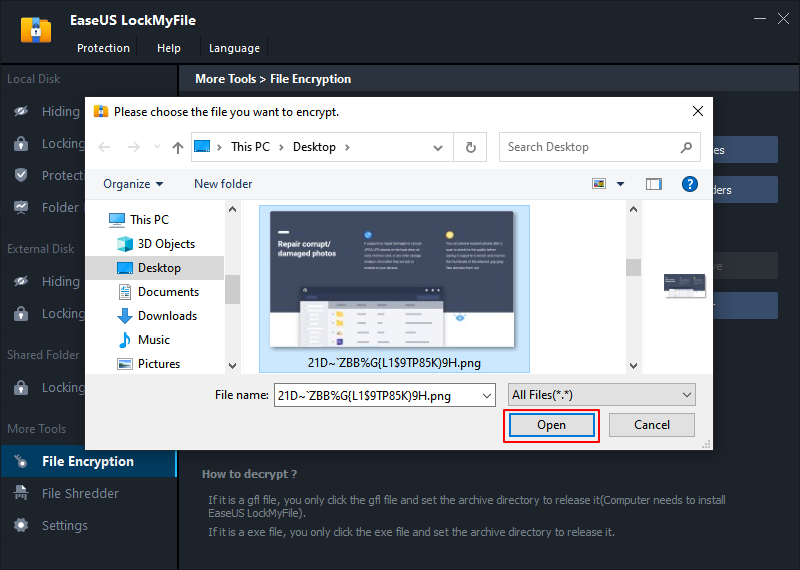
Step 3. Select important files or folders that you need to encrypt, and click Open.
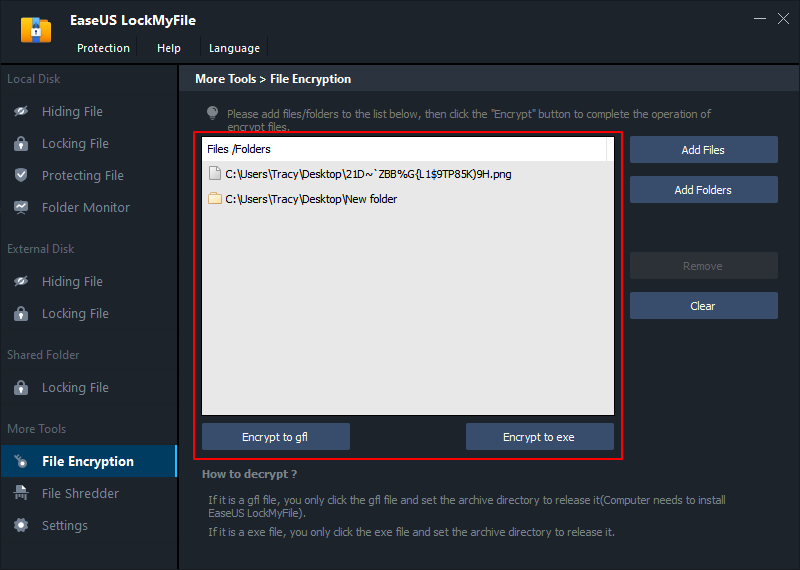
Step 4. Select the encryption mode: Encrypt to gfl or Encrypt to exe.
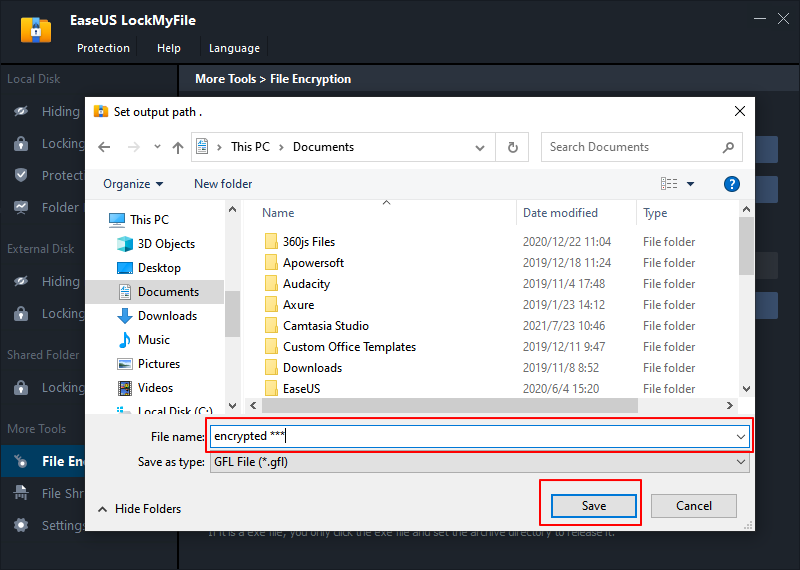
Step 5. Browse a safe location on your PC, rename the encrypted file or folder, and click Save to save the encrypted files/folders.
How to Password Protect a Word Document on Mac
You can easily password protect a document on a Mac using Microsoft Word.
Caution: If you lose or forget your password, you cannot recover it. Without a password, encrypted data cannot be restored.
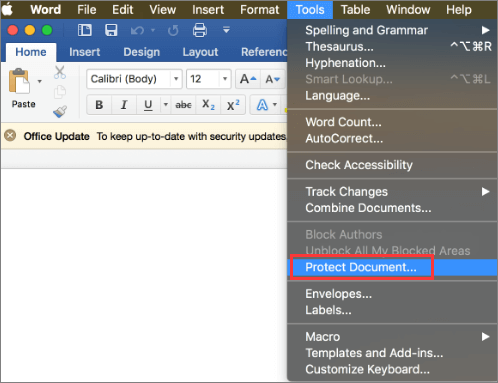
Step 1. Open the document you want to add a password in Word. Then click "Tools". From the drop-down menu, select "Protect Document".
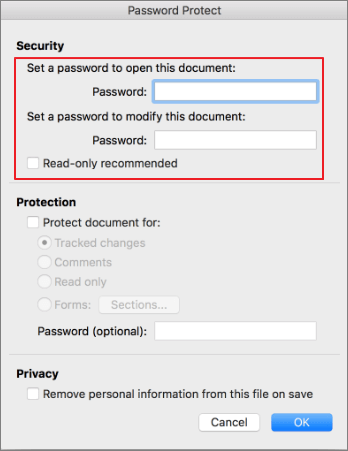
Step 2. On the Password Protect Window, under Security, set a password to open and modify this document. When you're finished making your selections, click "OK".
You can check the box for Read-only recommended making your Word document in read-only status to avoid content change without your permission.
Bonus Tip: How to Make a Word Document Read-Only
If you don't want someone to accidentally modify your Word document, you can set it to read-only before sending it for review. Making a document read-only means that the document can be read or copied, but not modified or edited. If others try to make changes to a read-only file, the changes can only be saved by specifying a new name for the document or by saving it to a new location.
You can make your Word documents in read-only status in two ways.
Method 1. Use Restrict Editing in Word
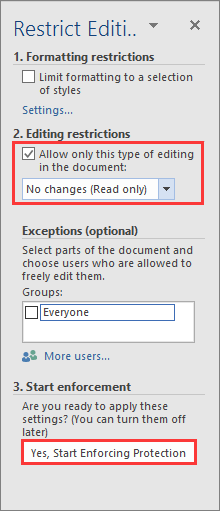
Step 1. Open your Word document, on the top toolbar, click "Review > Restrict Editing".

Step 2. Under Editing restrictions, check "Allow only this type of editing in the document", and make sure the list says "No changes (Read only)".
Step 3. Next, click "Yes, Start Enforcing Protection".
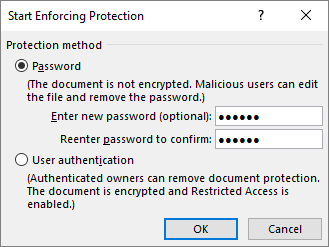
Step 4. In the next pop-up box, type and confirm a password as required. This step is optional. But if you don't add a password, anyone can click Stop Protection and edit the document.
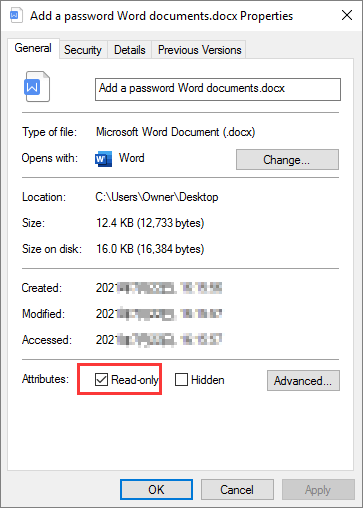
Method 2. Use the Properties Option
Step 1. Find the Word document. Right-click it and choose "Properties".
Step 2. Click the General tab.
Step 3. Click the "Read-only" checkbox. Click "OK".
Next time, you or anyone who try to edit the document needs to save the Word as another file. Otherwise, the Wor document won't be saved.
Related Articles - ALSO ON EaseUS SOFTWARE
-
How to Remove File is Write Protected on Windows 10
![Jean]() Jean/2023-09-22
Jean/2023-09-22
-
How to Encrypt USB Drive with or Without BitLocker Windows 10
![Jean]() Jean/2023-09-22
Jean/2023-09-22
-
Password Protect Excel File | How to Lock Excel File (Windows & Mac)
![Jean]() Jean/2023-09-22
Jean/2023-09-22
-
How to Password Protect an External Hard Drive Without Encryption on Windows 10 and Mac
![Jean]() Jean/2023-09-22
Jean/2023-09-22