
(Windows 11 Available) Hard Drive Set to Read Only Windows 10, 8, 7
Why do You want to Set A Local Disk As Read-Only?
The common reasons to enable a read-only on your hard disk are to protect sensitive information from prying eyes or prevent the local disk from being formatted. So how to change the hard drive as read-only? Here are 3 straightforward methods you can choose. Follow the in-depth tutorial to make your internal disk invisible.
1 - Using EaseUS LockMyFile to Make Hard Drive Read Only
Once you want to set a restriction on your internal hard drive, you can always seek help with the file protection software, EaseUS LockMyFile, which can hide, lock, protect, monitor files, folders, and drives. Once you click the Protect File function, what you need to do next is to select the drive you want to make it as read-only. Nobody can modify, delete and rename your hard disk.
Check more features (Available on Windows 11, 10, 8, 7):
- Make your files, folder, and drives invisible from prying eyes.
- Lock your files, folder, drives and limit access to another user. Without a password, they cannot see your private files.
- Encrypt your files and folder with the AES encryption algorithm.
Free download the software and follow the steps to protect your local disk:
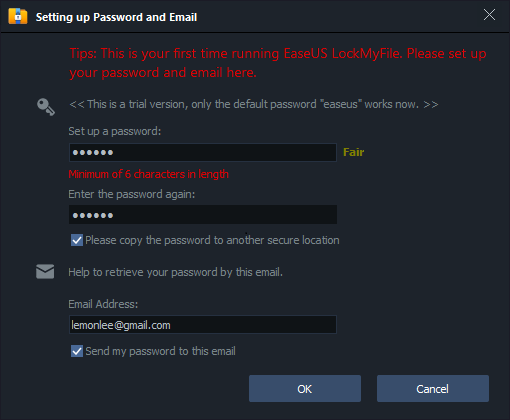
Step 1. Launch EaseUS LockMyFile, enter the valid email, and set password to register.
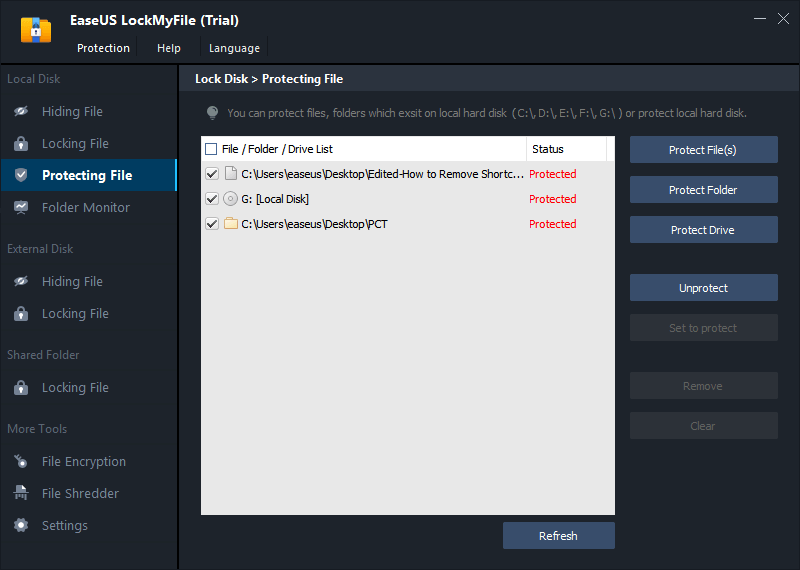
Step 2. Click Protecting File under the Local Disk. Select Protect File(s) ,Folder or drive from the right panel.
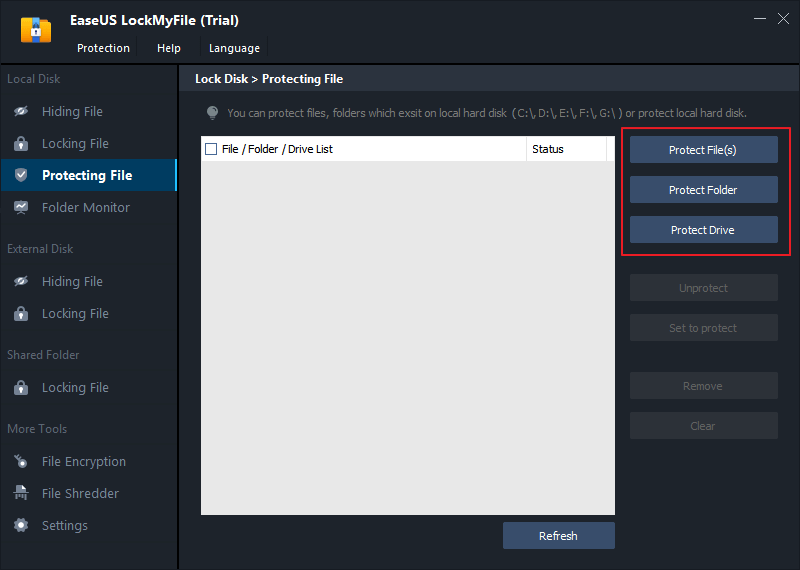
A. Add file(s) or folder from the specific location.
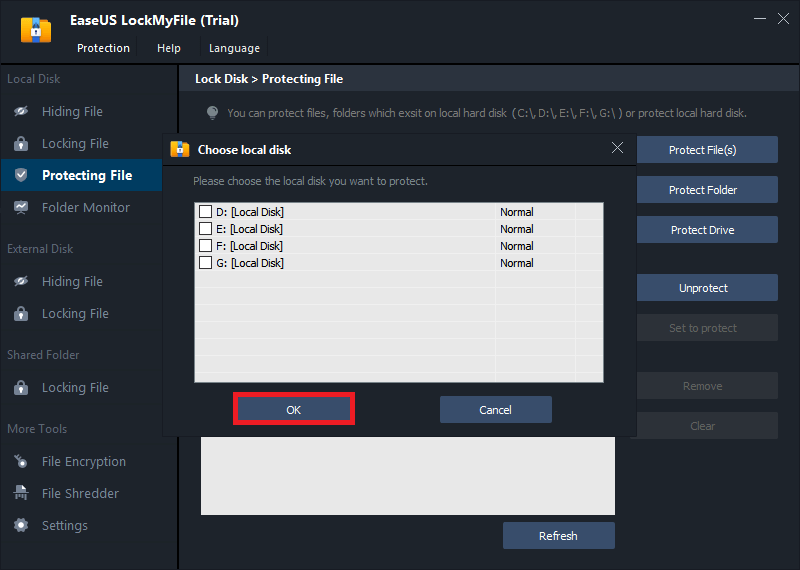
B. Click on the Protect Drive to add drive you want to protect. Select drive and click OK.
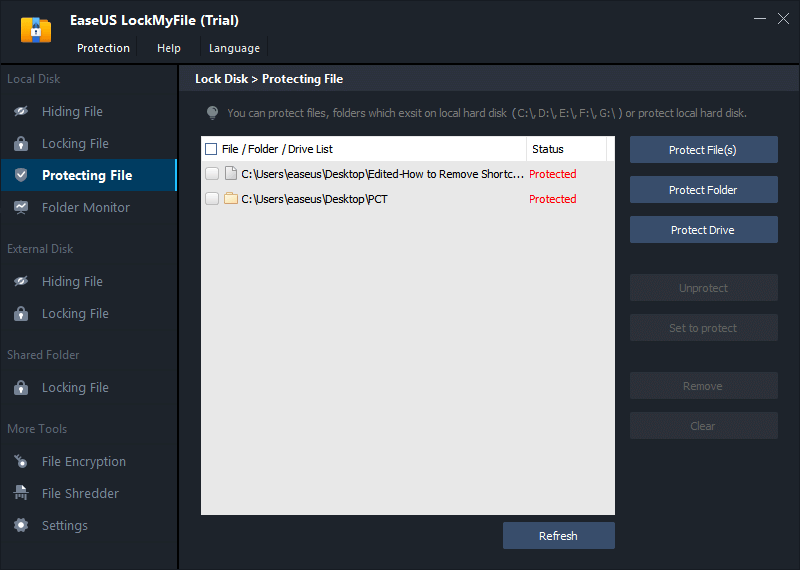
Step 3. Check and confirm the files, folder, and drive that you want to protect.
Notes:
If you want to unprotect the selected files, folder, or drive, tick the target data and click on the Unprotect button.
2 - How to Set Disk or Volume Read-Only with Command Prompt
The command line support to use the different command line on the entire disk or partitions. Enter the correct command-line one by one.
1 - Hard Drive Set to Read Only
See how to make the entire hard drive read-only:
Step 1. Type Command Prompt on the search box and right-click it choose as Run as administrator. Start to run the Command Prompt.
Step 2. Type "diskpart" press Enter.
Step 3. Type each command line and press Enter.
List disk
Select disk * (* stands the number of the disk you are going to set it as read-only.)
Attributes disk set readonly
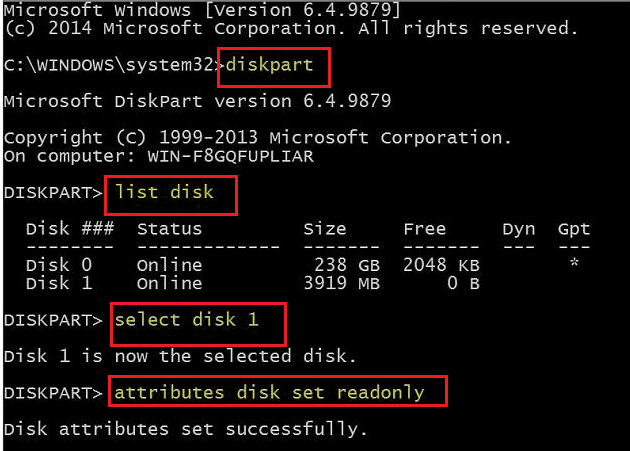
Your entire disk has been set to read only and nobody can modify the data on it.
2 - Set a Volume Read Only
Step 1: Press the Windows + R shortcut key to open the Run dialog box.
Step 2. Type cmd and press Enter to open the Command Prompt.
Step 3. Type "diskpart" and press Enter.
Step 4. Input each command line and press Enter.
list volume
Select volume * (* stands the volume number you want to protect it as read-only.)
Attributes volume set readonly
Step 5. Now an error window will pop up like “The disk is write-protected”. So you can not modify the data on the write-protected volume.
3 - Set Disk Drive Read Only in My Computer
If you don’t trust the extra software and command line that you never use before. Don’t be frustrated. Properties settings allow you to make the hard drive read-only. But this method can easily remove the mode you set it by another user. So we recommended using the file protect tool or CMD. Take the ways by your needs. Check the step by step tutorial:
Step 1. Open File Explorer and select "This PC or My Computer" from the Quick Access section.
Step 2. Right-click the drive you want to set as Read-only and select Properties from the option list.
Step 3. Go to the Security tab and then click Edit next to "To change permissions, click Edit."
Step 4. Only check the Read box and then click the OK button.
Bonus Tip: How to Make Hard Drive Writable in Windows
1. Clear Read-Only with Diskpart
Step 1. Search cmd in the search box. Click Command Prompt to access.
Step 2. Type the command line and hit Enter key.
list disk
select disk * (* stands the read-only drive)
attributes disk clear readonly
Step 3. Type exit and hit Enter.
2. Apply EaseUS LockMyFile to Unprotect Hard Drive
If you have to use the drive protection software, things go easy to remove the read-only mode. Open the software and hover over the “Protect File” button on the left panel, select the protected disk and click Unprotect on the right panel.
Check more fixes on the related articles.
Read also: How to Fix Read-Only File System to Read Write and Format
Final Thoughts
How were these solutions work on your internal hard drive? If you are confused about which methods you want to choose, you can check the comparison table for more info:
| Comparison |
EaseUS LockMyFile |
Command Prompt |
File Explorer |
|---|---|---|---|
|
Automatic or manual |
Automatic |
Manual |
Manual |
|
Easy-to-use |
Easy |
Medium |
Easy |
|
Keep Disk Safe |
YES |
YES |
NOT |
Related Articles - ALSO ON EaseUS SOFTWARE
-
How to Secure Thumb Drive in Windows 11/10/8/7
![Jean]() Jean/2023-09-22
Jean/2023-09-22
-
How to Hide Files or Folders on Windows 10 and Mac
![Jean]() Jean/2023-09-22
Jean/2023-09-22
-
Top 5 Best Windows Log Viewers to Monitor Log Files
![Jean]() Jean/2023-09-22
Jean/2023-09-22
-
Three Ways to Lock a Folder in Windows 7 Without Sofware
![Jean]() Jean/2023-09-22
Jean/2023-09-22