
Table of Contents
Key Takeaways of USB 3.0 Won't Work:
Don't panic! While it can be frustrating when your USB 3.0 ports aren't working, there are usually straightforward solutions to the problem. By staying calm and following the steps outlined in our guide, you can get your USB ports up and running again in no time.
Understanding the potential causes of USB 3.0 not working is key to finding a solution. From outdated drivers to hardware issues, there are a variety of factors that can cause USB 3.0 to malfunction. By learning about these causes and how to troubleshoot them, you can quickly and easily get your USB 3.0 ports working normally again.
USB 3.0 Won't Work, What Should I Do?
Are you disappointed because your Windows computer's USB 3.0 port isn't working? Don't panic! Stay calm and stop using the USB 3.0 port immediately to avoid any potential damage to your device or data. Recognize the possible causes of why your USB 3.0 port isn't working. Some of the common causes include:
- Compatibility issue: The USB 3.0 device may be connected to a USB 2.0 port, which may not support the higher speed of the USB 3.0 device.
- USB drivers: The USB port driver may be outdated or not installed correctly.
- Device error: The USB 3.0 device may be locked or write-protected, preventing it from being accessed.
- Virus infection: Your computer or the USB 3.0 device may be infected with a virus or malware, which can cause the port to malfunction.
Once you have identified the causes, try the appropriate fixes, and let's dive into some easy-to-follow troubleshooting steps to get your USB 3.0 port back in working order. For example, you may need to update your USB port driver, connect the USB 3.0 device to a compatible port, remove the write protection, or run an anti-virus scan to remove any viruses or malware.
Follow the simple and easy methods below to easily troubleshoot and fix your USB 3.0 port issue and get back to using your devices easily!
How Do I Fix USB 3.0 Won't Work Issue on Windows PC?
Are you tired of dealing with a non-functional USB 3.0 port on your Windows PC? Don't fret! We've got some practical solutions to fix this problem.
Get your USB 3.0 working again by trying the following methods:
1. Change USB Port or Reconnect USB 3.0 to New PC
You can try to change the USB port or connect USB 3.0 to a new PC to determine whether it's a fault in your PC or USB.
Here's a step-by-step guide:
Step 1. Remove the USB 3.0 device from the current port or computer.
Step 2. Connect the device to a different USB 3.0 port on the same computer or a USB 3.0 on another PC if you have more PCs.
Step 3. Wait a few moments to see if the computer recognizes the device and resolves the issue.
Step 4. If the device is still not working, try restarting the computer and reconnecting the USB 3.0 device to a different port.
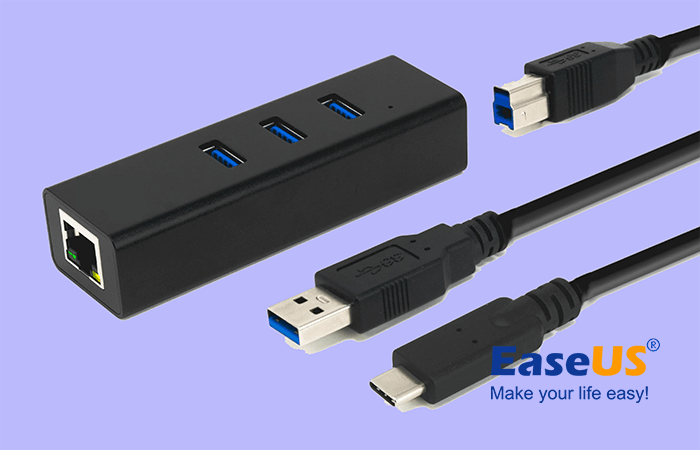
2. Change USB 3.0 Drive Connection Cable (for External USB 3.0 Drive Only)
Changing the USB 3.0 Drive Connection Cable (for External USB 3.0 Drive Only) can fix this issue.
To change the USB 3.0 drive connection cable for an external USB 3.0 drive, you can follow these steps:
Step 1. Buy a new USB 3.0 cable that's compatible with your external drive. Ensure the cable is the appropriate length and has the correct connectors for your drive.
Step 2. Power off your computer and disconnect the existing USB cable from your external drive.
Step 3. Connect the new USB 3.0 cable to your external drive, and ensure it is securely connected.
Step 4. Connect the other end of the new USB 3.0 cable to a USB port on your computer.
Step 5. Power on your computer and wait for it to recognize the external drive.
Step 6. Check that the external drive is visible in your computer's file explorer or disk management utility.
Step 7. If the drive is not visible, restart your PC or check the connection between the new cable and the external drive.
Step 8. Once the drive is visible and working properly, you can start using it.
Remember, when handling any electronic device, it's important to exercise caution to avoid damaging it. If you don't have any technical knowledge or experience, you should avoid this method, or you can consult an expert computer technician.
3. Update USB Driver
Outdated USB drivers may also cause several issues, so possibly, if your USB 3.0 won't work on your Windows PC, this problem may occur due to outdated USB drivers. If so, you need to update drivers, which is tricky. Finding the most relevant and updated drivers may be problematic and take time. But through a reliable tool EaseUS DriverHandy, now it's easy to automatically install the most relevant and appropriate drivers for all PC components and devices.
EaseUS DriverHandy comes with an automated system, so you don't have to spend your precious time in researching and finding updated and relevant drivers. You can leave this job on EaseUS DriverHandy and let it be done. It'll perform automatically on its own and provide you with the updated drivers for your PC's components/devices, whether it's USB 3.0 or something else.
Here's how:
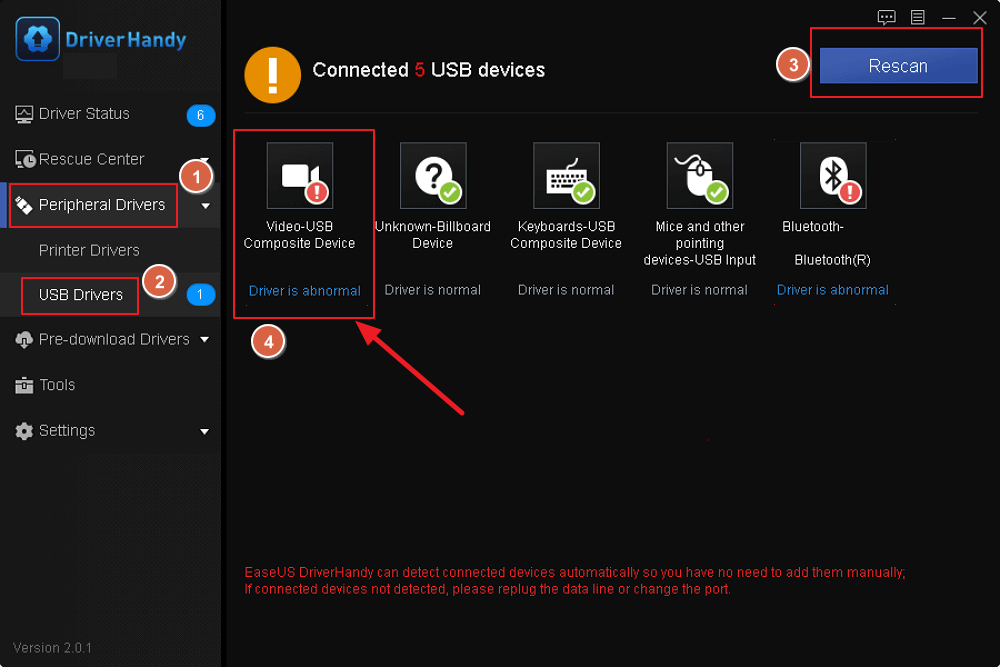
Step 1. Launch EaseUS DriverHandy on your PC and click "Scan" button.
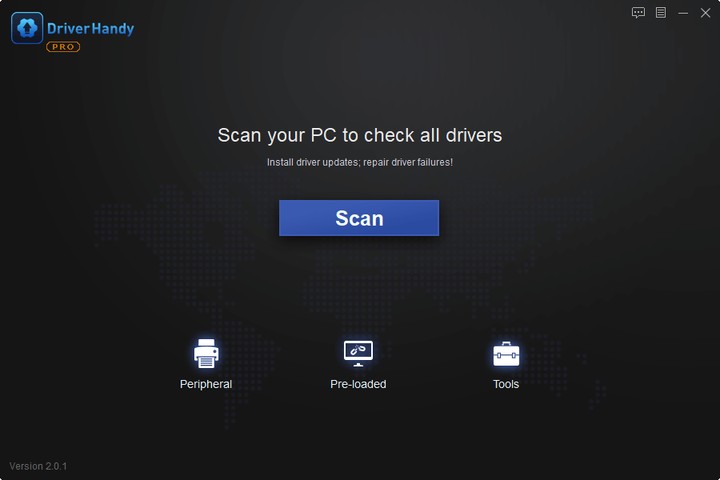
Step 2. Choose "USB Drivers" under the "Peripheral Drivers," and click "Rescan."
Step 3. If there is anything abnormal, navigate to the Driver Statuas and update it by updating the corresponding driver.
4. Unlock USB or Remove Write Protection from USB 3.0 Drive
Possibly your USB 3.0 is locked or write-protected, so that's why it won't work. If it's locked, you need to unlock it or remove write protection from your USB 3.0 drive. There are many manual and automated ways to unlock your USB 3.0. We'll discuss both and provide you with the complete operational steps. If we talk about manual ways, we'll do it through DiskPart. However, there are several other manual ways. But if you want to avoid lengthy manual processes and enjoy a hassle-free experience, you can use EaseUS Partition Master. It comes with its remove write protection feature, and you can try to remove write protection in no time without following lengthy manual processes.
Note: To terminate write protection from your USB drive, check if it has a small switch on its body. This switch activates write protect mode and can be accidentally turned on while carrying the drive in your pocket or backpack. Simply flip the switch to the "off" position, and you'll be able to read and write files to the drive. It's worth noting that newer USB drives may not have write protection switches, so be sure to check before assuming that this method will work.
Method 1: Unlock USB or Remove Write Protection from USB 3.0 Through EaseUS Partition Master
How to Remove Write Protection from USB Pen Drive
Is your USB or pen drive write-protected? This page shows you how to remove write protection from USB pen drive by using reliable write protection removal software, changing the properties settings or using Regedit.exe.
Method 2. Manually Remove Write Protection from USB 3.0 Through DiskPart
Enabling or disabling read-only mode on a USB flash drive is possible using the Windows DiskPart command-line utility. Here's how:
Step 1. Open the "Run box"; simply press Windows + R to open it, type "diskpart", and hit the "Enter" button.

Step 2. If prompted by User Account Control, click "Yes".
Step 3. At the DISKPART> prompt, type "list disk" and hit the "Enter" button.
Step 4. Check the disk size to determine which one is your USB flash drive. For example, if your flash drive size is 14 GB, then Disk 1 is most likely your USB flash drive.
Step 5. Choose your USB flash drive with the "select disk" command. For instance, if your flash drive is Disk 1, then the command is "select disk 1".
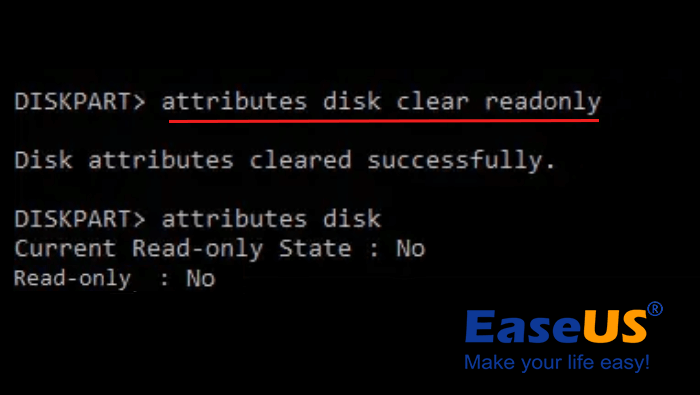
Step 6. You can see the attributes of the disk by using the "attributes disk" command.
Step 7. To remove the read-only attribute, allowing the disk to be writable, use the "attributes disk clear readonly" command.
Step 8. Once you're finished, type "exit" to close the program.
By following these steps, you can easily enable or disable read-only mode on your USB flash drive using the Windows DiskPart command-line utility.
5. Clean Virus and Malware
Cleaning viruses and malware is a good practice, and it can work for fixing the USB 3.0 won't work issue. Malware and viruses can damage your system files and drivers, leading to compatibility issues with USB 3.0 devices. In this case, removing the malware and viruses can restore the proper functioning of USB 3.0. You can use a reliable antivirus or antimalware software to clean viruses and malware. Alternatively, you can use Windows built-in feature (Virus and threat protection) if you don't have or don't want to use any third-party software to clean viruses. You'll find this feature in Windows 10/11 or maybe some other versions.
I'm using this Windows built-in feature to scan and clean viruses. Here's how:
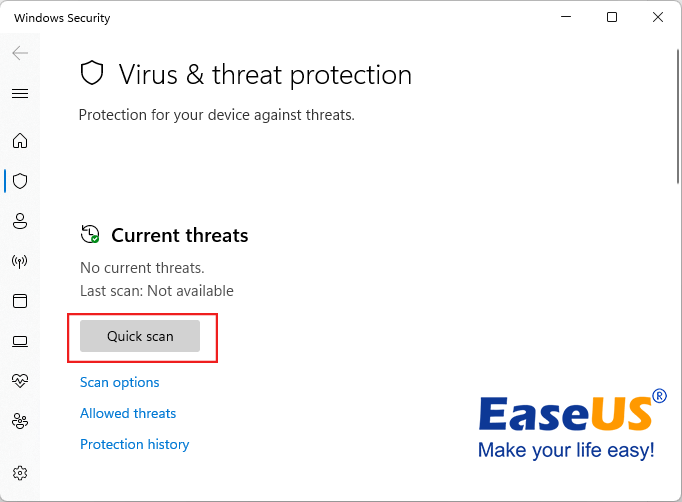
Step 1. Type "Virus & threat protection" in the taskbar's search box. Once it appears, click on it to open it.

Step 2. Click on "Quick scan", and wait a few minutes until scanning is completed.
Tips to Keep USB 3.0 Work and Function Properly
USB (Universal Serial Bus) 3.0 is a widely-used interface for connecting external devices to computers, offering faster data transfer rates and improved power management capabilities compared to its predecessors. However, like any technology, USB 3.0 can sometimes experience issues that can affect its performance. To help Windows users keep their USB 3.0 devices working properly, here are some tips to consider:
- ✅Disable USB Selective Suspend: Windows has a power-saving feature called USB Selective Suspend, which can sometimes interfere with the performance of USB devices.
- ✅Connect USB 3.0 to a compatible USB port: Connect the USB 3.0 drive to PC via USB 3.0 port.
- ✅Use a high-quality USB cable: Poor-quality USB cables can cause connection issues and slow transfer speeds. Use a USB 3.0 cable with good shielding and connectors to avoid such issues.
- ✅Remove USB devices safely: Always use Windows's "Safely Remove Hardware" option to safely disconnect USB devices. Removing them without safely ejecting them can cause data loss or corruption.
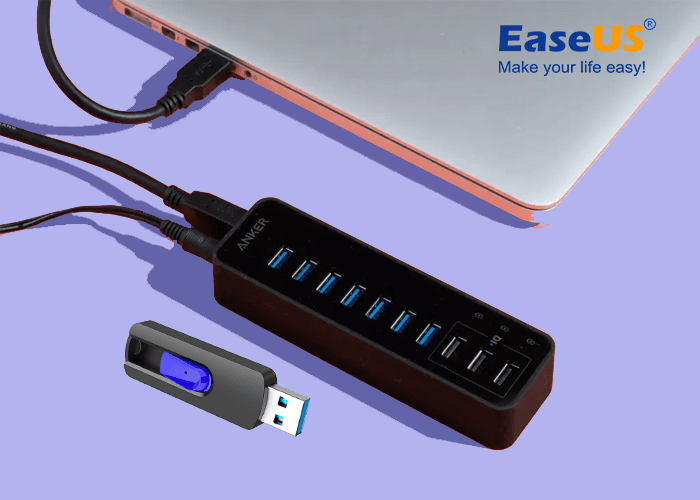
- ✅Avoid using USB hubs: Connecting multiple USB devices through a USB hub can cause bandwidth issues and result in slower transfer speeds. Connect USB 3.0 devices directly to the computer's USB 3.0 port if possible.
- ✅Update BIOS and chipset drivers: The computer's BIOS and chipset drivers can affect USB performance. Ensure that both are up-to-date and that any relevant settings in the BIOS are configured correctly.
- ✅Scan for hardware changes: If a USB device is not working, try scanning for hardware changes in Device Manager. This can sometimes help to re-detect and re-install the necessary drivers.
- ✅Check for conflicts: If multiple USB devices are not working correctly, they may have a conflict. In Device Manager, check for any conflicts by looking for yellow exclamation marks or red X's next to USB devices. Resolve any conflicts by uninstalling and reinstalling drivers or by disconnecting conflicting devices.
- ✅Clean viruses and malware regularly: Cleaning viruses and malware from your computer is important in ensuring that your USB 3.0 devices work properly on Windows. Viruses and malware can interfere with USB performance in a number of ways, such as by corrupting device drivers, causing data loss or corruption, or even disabling USB ports altogether.
Final Verdict
The USB 3.0 won't work issue can be caused by various reasons, such as compatibility issues, outdated USB drivers, device errors, viruses infections, etc. It is crucial to identify the cause of the problem to solve it effectively. We discussed the above five useful methods to fix this issue.
First, change the USB port or cable for the external USB 3.0 drive only. This can be a quick and straightforward solution. If the problem still exists, then try other above-discussed methods.
Updating the USB driver is also an essential step to solving the problem. Outdated drivers can cause compatibility issues that prevent USB 3.0 from working correctly. For beginners who are not familiar with updating drivers manually, EaseUS DriverHandy is a great tool to update the USB driver automatically.
By taking these simple steps, you can resolve the USB 3.0 won't work issue and enjoy the benefits of the USB 3.0 technology. It is essential to keep your system up to date and compatible with the latest technologies for optimal performance and efficiency.
FAQs About USB 3.0 Won't Work Issue
If you are still encountering issues with your USB 3.0 devices not working or want to learn more about it, it may be helpful to follow up and find answers to the following FAQs:
1. Why is my USB 3.0 not working?
USB 3.0 devices not working can be caused by several factors, such as compatibility issues when connecting the device to a USB 2.0 port, outdated or incorrectly installed USB drivers, locked or write-protected devices, and virus or malware infections on your computer or the USB device.
2. Why is my USB 3.0 not showing up?
There are several reasons why a USB 3.0 device may not show up on your computer. Firstly, check if your computer supports USB 3.0 and the port functions correctly. Outdated or incorrectly installed USB drivers, corrupted or missing files, physical damage, malware or virus infection, and power supply issues can also cause the problem. Check the device on another computer to see if it's a problem with the device or your computer. By identifying the specific issue causing the USB 3.0 device not to show up, you can take the essential steps to fix the problem.
3. How to enable USB 3.0 in BIOS
To enable USB 3.0 in BIOS, follow these operational steps:
- Turn on your computer and press the key to access the BIOS setup utility. This key varies depending on your computer manufacturer and model but is typically displayed on the boot screen.
- Navigate to the "Advanced" or "Integrated Peripherals" section of the BIOS menu using the arrow keys.
- Look for an option called "USB 3.0 Controller" or "xHCI Controller" and enable it. Make sure to save your changes before exiting the BIOS.
- Restart your computer and check if the USB 3.0 ports are now working. If they are still not working, ensure your USB 3.0 drivers are installed and up to date.
Enabling USB 3.0 in BIOS may vary slightly depending on your computer's version and the manufacturer.
Was This Page Helpful?
Related Articles
-
USB 2.0 Ethernet Adapter Driver Update Tutorial in 2026 [Beginners' Guide]
![author icon]() Banu/2026-06-16
Banu/2026-06-16 -
USB Not Connected to Laptop or Device? Here Are Fixes [Step-by-Step Guide]
![author icon]() Sherly/2026-06-16
Sherly/2026-06-16 -
Update Network Drivers in Windows 10 [2026 Fresh Guide]
![author icon]() Banu/2026-06-16
Banu/2026-06-16 -
How to Update Your CPU Driver and Boost Your Computer's Performance
![author icon]() Banu/2026-06-16
Banu/2026-06-16