- Store
-
Support CenterGuides, License, ContactDownloadDownload installerChat SupportChat with a TechnicianPre-Sales InquiryChat with a Sales Rep
This article examine how to securely erase an SSD disk in Windows and Mac.

Table of Contents
You can completely clear the data in your solid-state drive (SSD) through a relatively straightforward procedure that is done using the right software. Your SSD is an essential component of your computer, so it's crucial you understand the effect of this process, else you risk losing important information or, worse, damaging your drive.
There are numerous reasons why people wish to erase the information on their SSD drive. However, the primary reason includes:
The way you erase an SSD is dependent on the type of drive. However, to avoid damaging the drive, you must apply secure methods to wipe your disk. There are two basic methods to consider: manually erasing an SSD with Disk Management or using third-party software.
In this article, we will examine how to securely erase an SSD in Windows and Mac using the methods mentioned above.
| Workable Solutions | Step-by-step Troubleshooting |
|---|---|
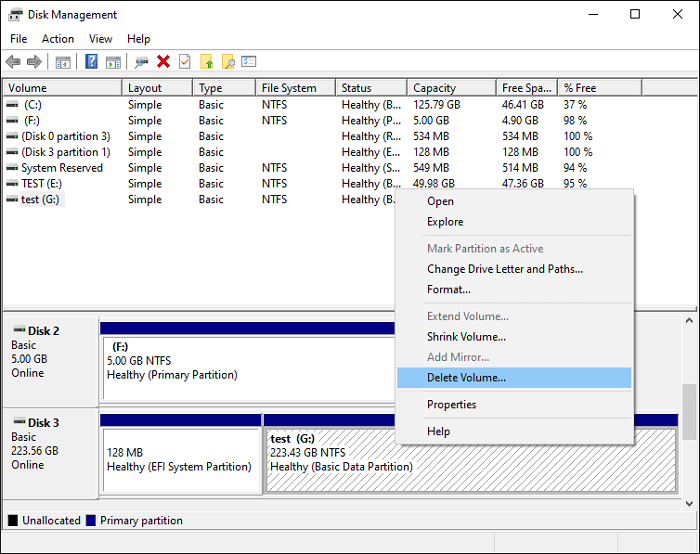
| Method 1: Manually Erase an SSD Disk – Disk Management | Open Disk Management > Delete volume...Full steps |
| Method 2: Use a Third-Party Software – EaseUS BitWiper | Run software and click "Wipe Disk"...Full steps |
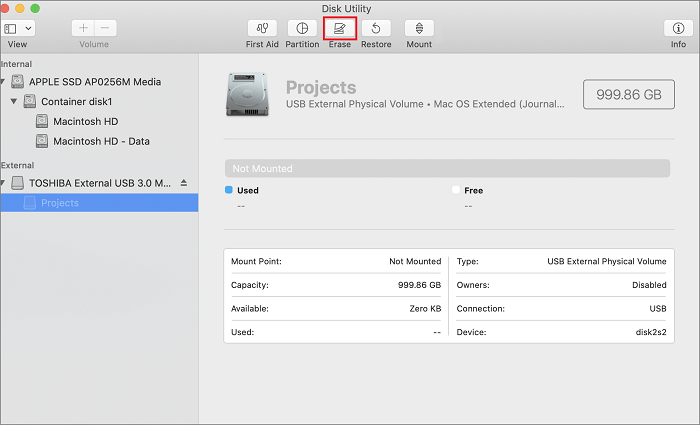
| More: How to Erase SSD Disk on Mac | Run Disk Utility > select "Erase"...Full steps |
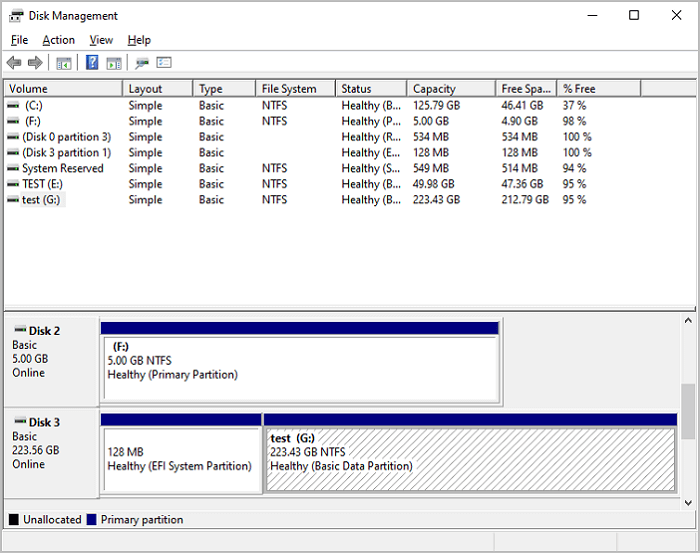
You can manually erase your SSD disk using Disk Management in Windows. Disk management is a Windows built-in tool for managing disk partitions in your computer. To erase partitions in Windows 7 and higher versions using Disk Management, follow the outline steps below:
All information in the selected disk will be wiped entirely after this point. So it's essential you backup all important data before commencing the procedure.
Much third-party software is accessible to wipe your hard drive, but the prominent among them all is the EaseUS Bitwiper. As the name suggests, EaseUS Bitwiper is a professionally designed data wipe software to specifically wipe disk, partition, and even shredded files such as images, audio, documents, etc., or folders.
Unlike some software that doesn't erase external drives, the EaseUS Bitwiper wipes HDD, SSD, OS drive, external hard drive, SD card, and USB drive. It is also equipped with many usable wiping methods such as Secure Erase, One Pass Zeros, One Pass Random, Russian Gost P50739-95, etc., to suit your preference.
Windows users who wish to wipe their hard drive with no traces left behind are entirely advised to download the EaseUS Bitwiper for an effective and efficient hard drive wipe. Furthermore, it supports Windows 7, 8, 8.1, 10, 11, and server 2012 - 2022.
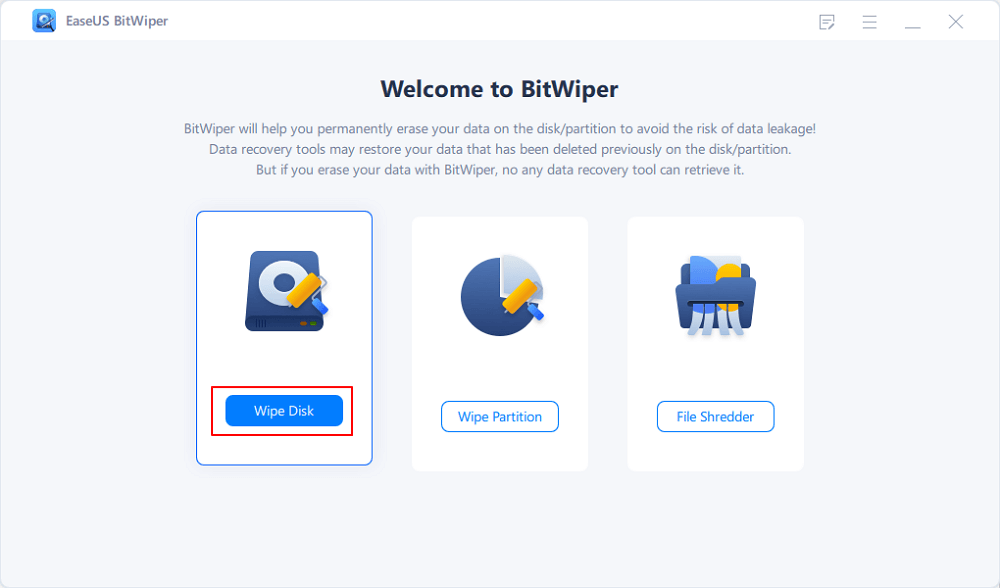
Step 1. Run EaseUS BitWiper. Click the "Wipe Disk" tab.
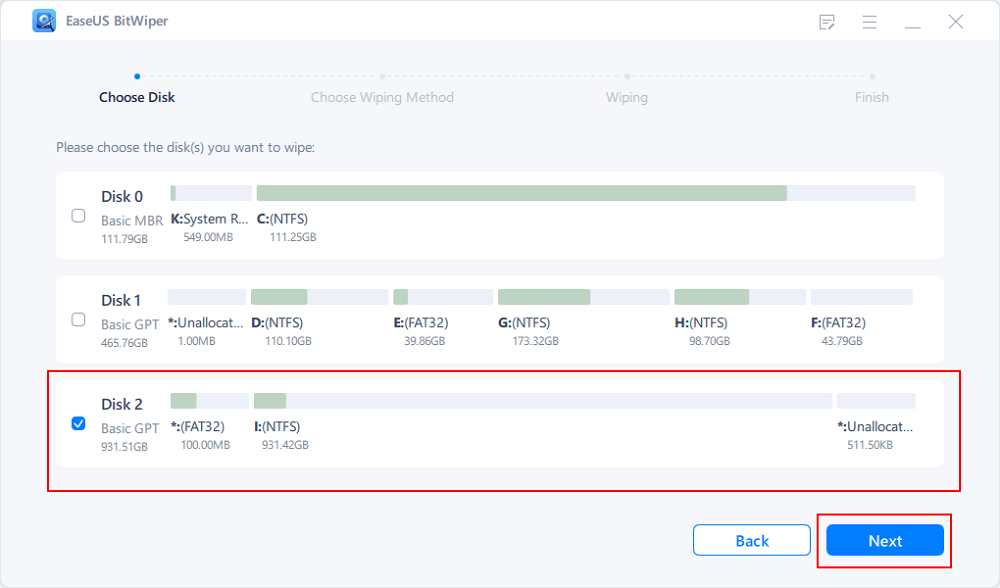
Step 2. Select the targeted HDD or SSD to wipe.
Notice: Please make sure you have chosen the correct HDD or SSD. Once the wiping starts, your data is irrecoverable.
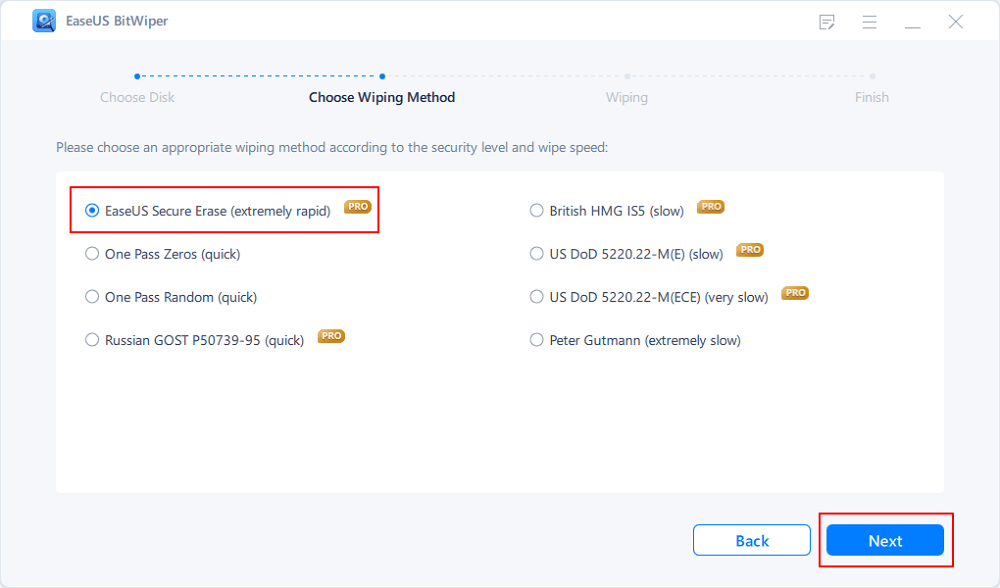
Step 3. Choose Wiping Method and click "Next."
Choose a suitable wiping method. Recommend EaseUS Secure Erase!
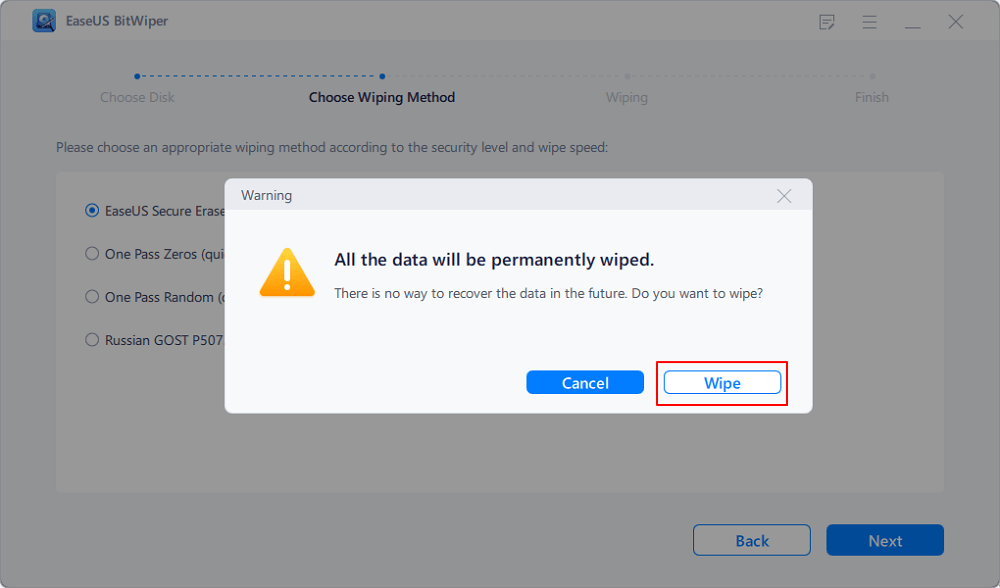
Step 4. Check the warning message and click "Wipe" to confirm.
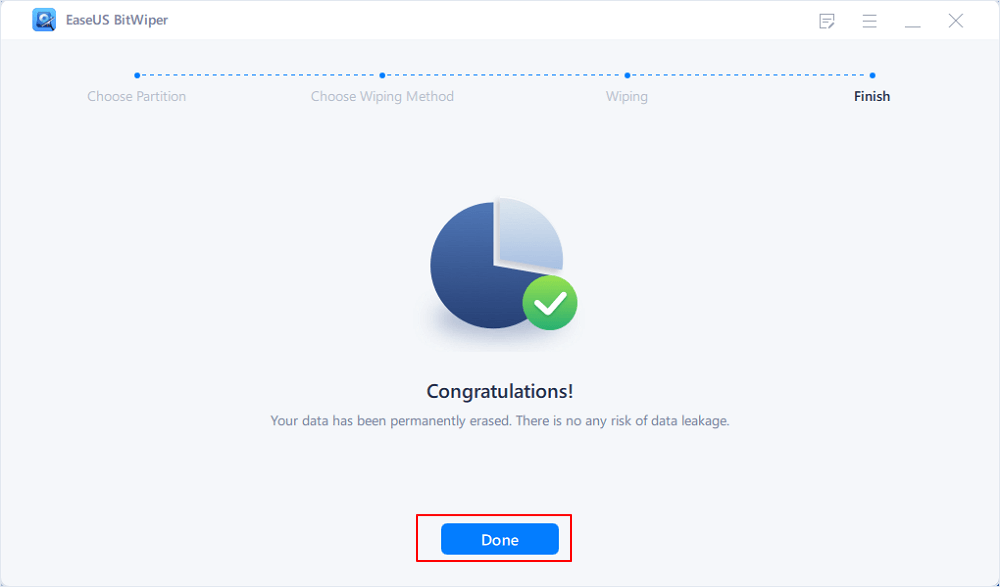
Step 5. Wait for wiping finish and click "Done."
The EaseUs BitWiper is equipped with unique features that make it stand out among other third-party software. Here's why you should choose The EaseUS BitWiper:
The free version supports zero-fill and random fill wiping and can only shred five files. On the other hand, the pro version supports zero-fill and random fill wiping, SSD high-speed wiping, and shreds unlimited files. It cost $29.95 monthly.
macOS users can wipe the data on their SSD disk using the built-in Disk Utility app. Follow these steps to erase partitions on your SSD disk.
Secure erase of your SSD disk is best done with third-party wipe software to ensure that you don't damage the SSD disk using Windows built-in disk management tools. For a secure and easy wipe of the SSD, we recommend downloading and installing the EaseUS BitWiper. We hope you find this guide instructive and able to serve your need.
Related Articles - ALSO ON EaseUS SOFTWARE
How to Clear a Pen Drive in 2025 [3 Easy Methods]
![]() Banu/2025-04-15
Banu/2025-04-15
How to Reset a Hard Drive in Windows 11/10 [2025 New Guide]
![]() Banu/2025-04-15
Banu/2025-04-15
How to Clean a Disk Using CMD [2025 New Guide]
![]() Banu/2025-04-15
Banu/2025-04-15
How to Factory Reset Windows 7 in 2025
![]() Banu/2025-04-15
Banu/2025-04-15
Copyright © 2004 - 2023 EaseUS. All rights reserved.