
Remove Write-Protection - How to Delete Write-Protected Files
Sometimes, when users are going to delete files, they might fail to execute the process. And the Windows system would inform that the reason why you can't delete the target file is that it is write-protected. It means you must disable the write-protection first, and then try to delete the file. And this is also the topic of this article, how to delete write-protected files, or we can say, how to remove write protection.
Method 1. Remove Write Protection with Properties
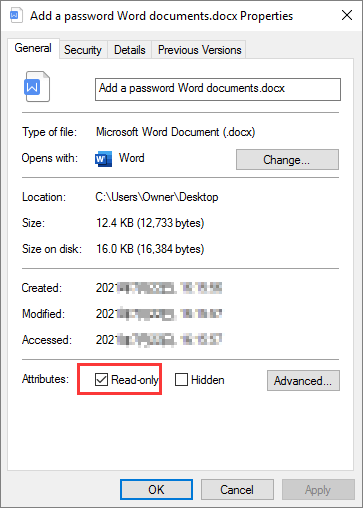
If the file you want to delete is stored on your local disk, you could check the file status in Properties first, and disable the read-only protection. Here is the detailed guide.
Step 1. Open File Explorer, find the file you want to delete.
Step 2. Right-click the target file, and choose Properties.
Step 3. Under the General tab, there is an "Attributes" option. If the Read-only option is checked, that's maybe the reason why you failed to delete this file.
Step 4. Uncheck the Read-only option, click OK to save your change. Then try once again to see if you can delete the file now.
Method 2. Remove Write Protection Using Command Prompt
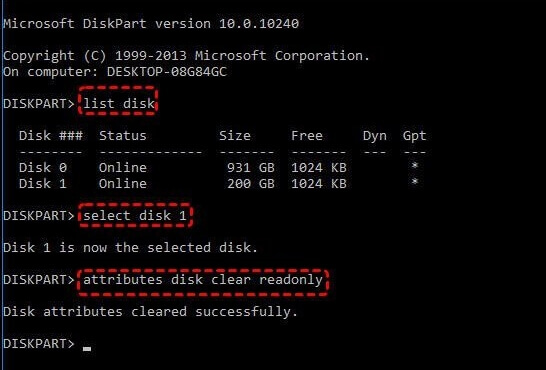
Another cause of a write-protected file is that the whole disk is actually write-protected. To disable the disk write protection, you can use the Windows Command Prompt. Don't worry if you haven't used Command Prompt before. Just follow our guide step-by-step, you can do it on your own.
Step 1. Press Windows + R keys at the same time to open the Run box. Then type cmd to open the Command Prompt.
Step 2. Type the following command lines one by one. Hit the Enter key after each command.
Diskpart
List disk
Select disk X (X is the number of your write-protected disk)
Attributes Disk clear Readonly
Step 3. When the process is finished, close the command prompt window, and try to delete the file again.
Method 3. Remove USB Flash Drive Write Protection
When your USB flash drive is write-protected, you can't move or delete the files in it, either. To solve the problem, you need to disable the USB's write protection first.
First of all, you can simply check if there's a write-protection lock on the side of your flash drive. If it is, turn off the lock switch and see if you can manage the files in your USB flash drive now.
If your flash drive does not have a protection lock, then you can follow the steps below to disable the write protection.
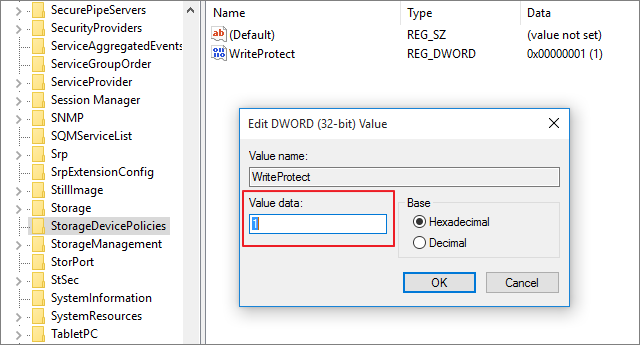
Step 1. Press Windows + R keys at the same time to bring out the Run box. Enter regedit and click OK.
Step 2. Navigate to the following folder:
Computer\HKEY_LOCAL_MACHINE\SYSTEM\CurrentControlSet\Control\StorageDevicePolicies
If the StorageDevicePolicies folder is missing on your computer, you can create one with yourself. Right-click on the Control folder. Go to New > Key. This step will create a new subfolder under Control. Name it "StorageDevicePolicies".
Step 3. Then right-click the StorageDevicePolicies folder, choose DWORD (32-bit) value, go to WriteProtect, and change the Value data from 1 to 0.
If the StorageDevicePolicies folder is newly created, then you need also to create the WriteOProtect yourself. Right-click StorageDevicePolicies, go to New and hit DWORD (32-bit) Value. Name the new entry "WriteProtect" without quotes.
Step 4. Click OK to close the Registry Editor. Restart your computer and see if you can delete the USB files now.
More To Know: What Other Ways You Can Apply To Protect Your Files
In this article, we mainly talked about write protection. When a file or a USB flash drive is write-protected, users can view the content only but cannot edit or delete the file or the file content. In most cases, write protection works as a method to protect data. Actually, you have many other choices to protect files, for example, lock your files with a password, hide the target files.
No matter which method you prefer, choosing a proper tool is of vital importance. Here we recommend you to choose EaseUS LockMyFile. This tool supports users locking, hiding, and encrypting files, folders, and drives. Both local drive and external drive are available for this tool. The biggest advantage of this tool is that the user can use the registered email address to recover the password, but the built-in encryption function of Windows cannot do this.
If you are interested in EaseUS LockMyFile, download this tool from the button below, and check our guide to see how to use this tool.
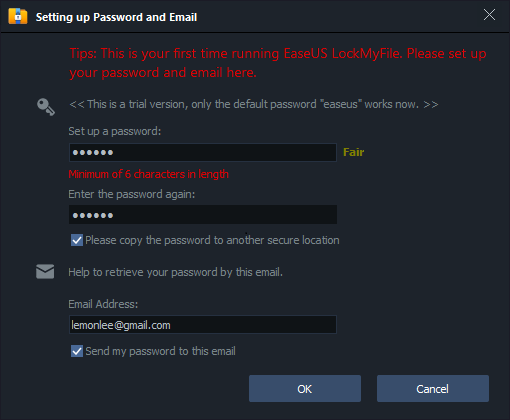
Step 1. Launch EaseUS LockMyFile, register with your email address and set a software protection password.
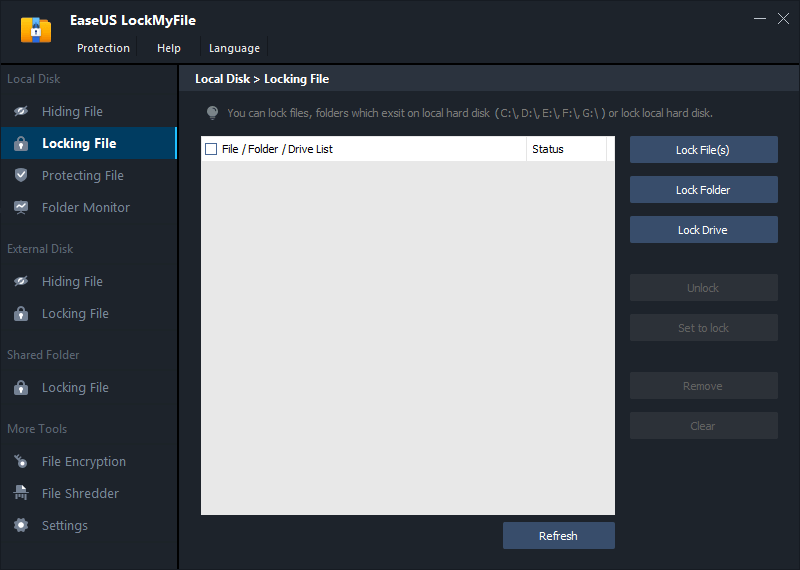
Step 2. Click Locking File on the right side. There are three options available: Lock Files, Lock Folder, and Lock Drive.
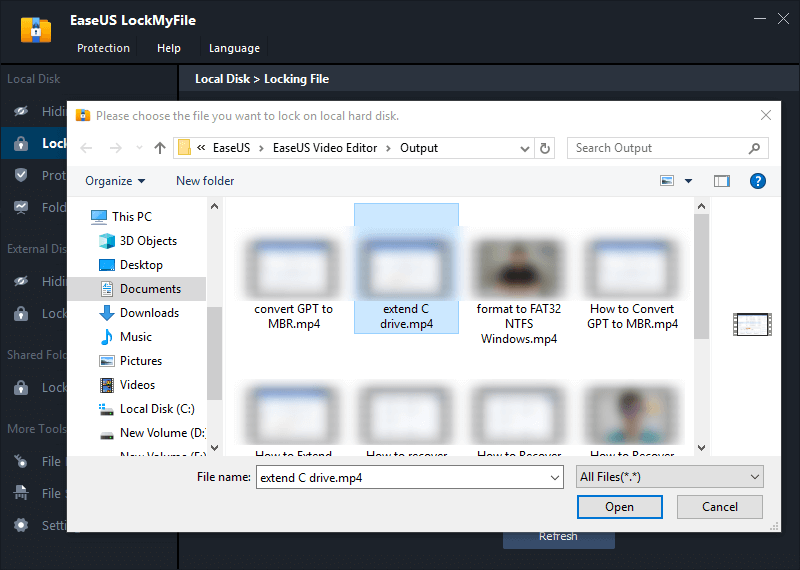
Step 3. Click Lock File(s), and choose the file you want to lock from your computer, and click Open to confirm.
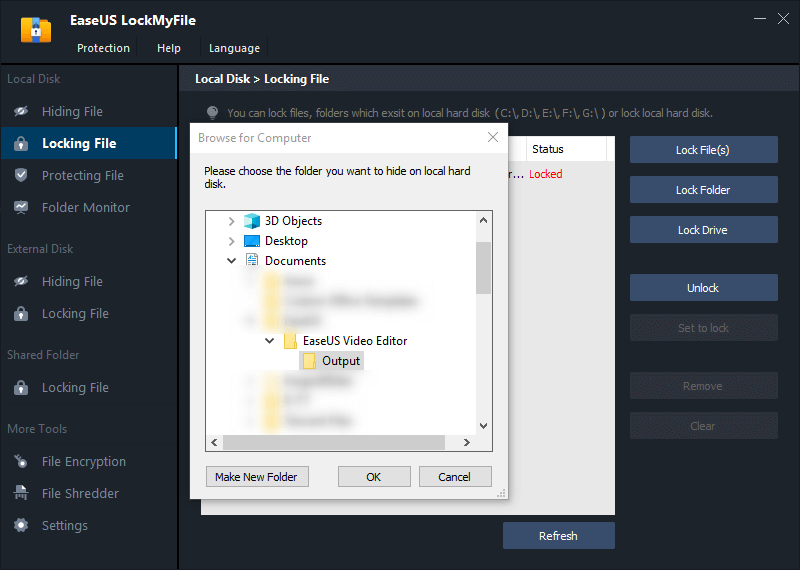
If you need to lock a folder, the operation is the same. Click Lock Folder, choose the target folder, and click OK to confirm.
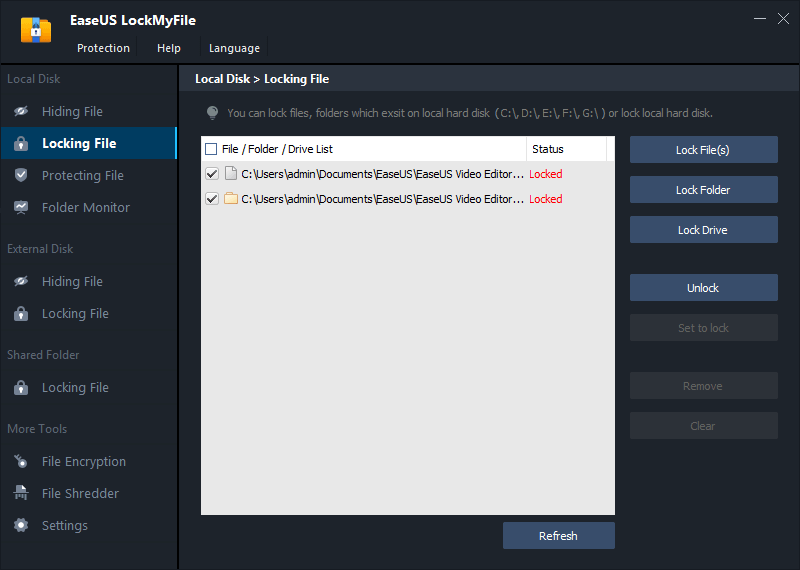
Step 4. You can check the status of your chosen files or folders now.
Related Articles - ALSO ON EaseUS SOFTWARE
-
How to Delete Protected Files in Windows 11/10/8/7
![Jean]() Jean/2025-04-15
Jean/2025-04-15
-
How Can You Password Protect Dropbox Folder on Windows & Mac
![Jean]() Jean/2025-04-15
Jean/2025-04-15
-
3 Ways to Prevent A File from Being Renamed or Deleted
![Jean]() Jean/2025-04-15
Jean/2025-04-15
-
How to Hide A Folder on A USB Drive | Unhide Files on USB Flash Drive
![Jean]() Jean/2025-04-15
Jean/2025-04-15